Set up a tier automation gift in your Shopify store to automatically add gifts to the cart and checkout when specific spending thresholds are reached. This guide will walk you through creating and configuring a tier-based promotional rule to enhance customer engagement and boost sales.
What You'll Need
-
Access to the Shopify admin dashboard
-
Advanced or Ultimate Plan subscription with AutoCart
-
For Checkout automation the Shopify Plus plan is required
Step 1: Initiate a New Rule
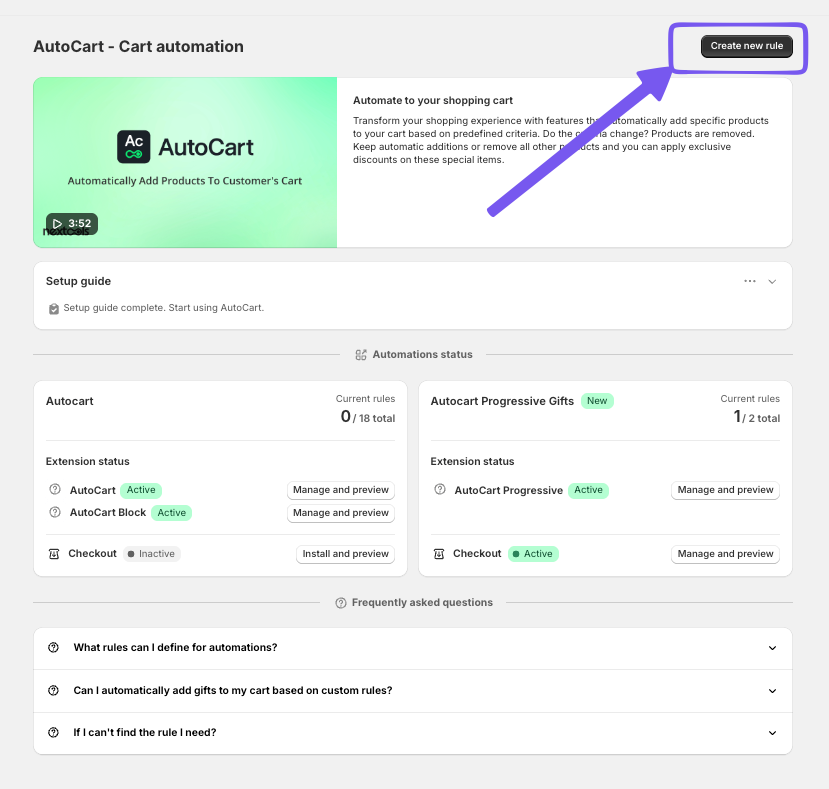
Click on the Create new rule button. This will start the setup for your tier automation gift campaign.
Step 2: Choose Progressive Gifts Automation
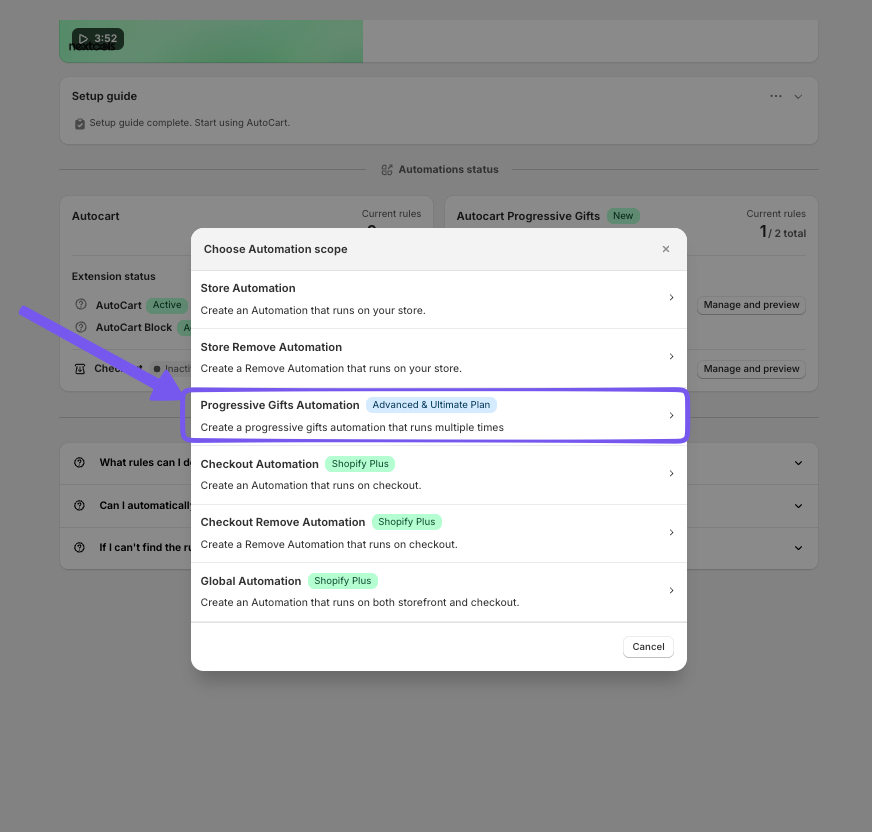
From the dropdown menu, select Progressive Gifts Automation to define the type of automation you want to implement.
Step 3: Define Your Automation Title
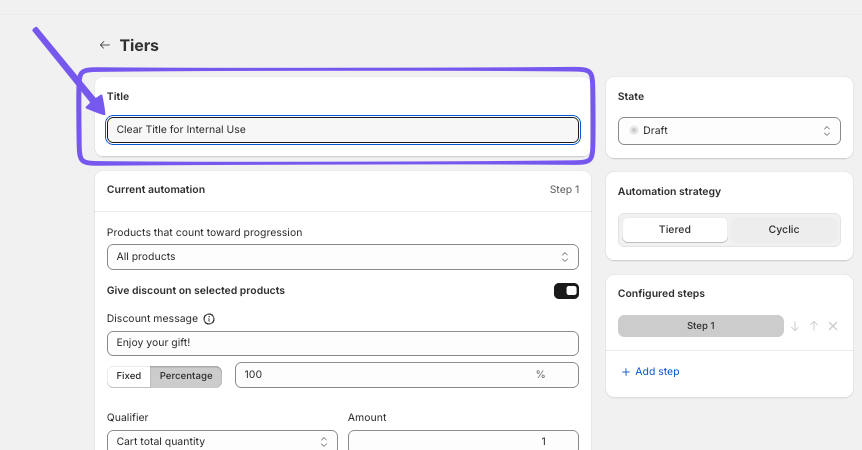
In the Title field, enter any title useful for you.
This internal name will help you organize and manage your promotional campaigns.
Step 4: Define Products eligible for the promotion
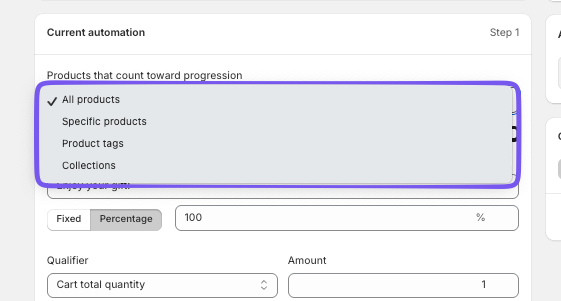
The first field allows you to select what products are eligible for the promotion and you can select by product ID, Collections or tags.
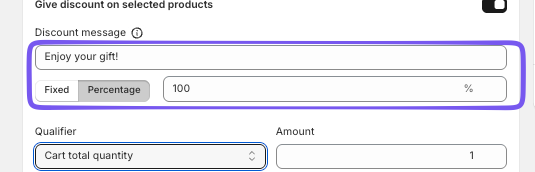
Step 5: Set the Discount Message for Tier 1 and the amout of the discount
Enter the message you want to show to your customers in the Discount message field to provide a friendly message that customers will see when they qualify for the first tier gift.
Also, Here you choose if apply a fixed or Percentage discount and define the amount simply in the next window.
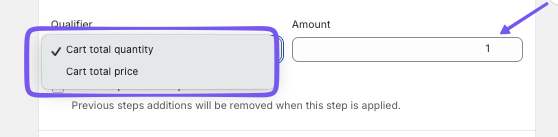
Step 6: Configure Qualifier for Tier 1
Change the Qualifier dropdown to Cart total price or the Cart total quantity depends on your need.
This specifies the spending threshold required to trigger the first gift and of course the amount of it.
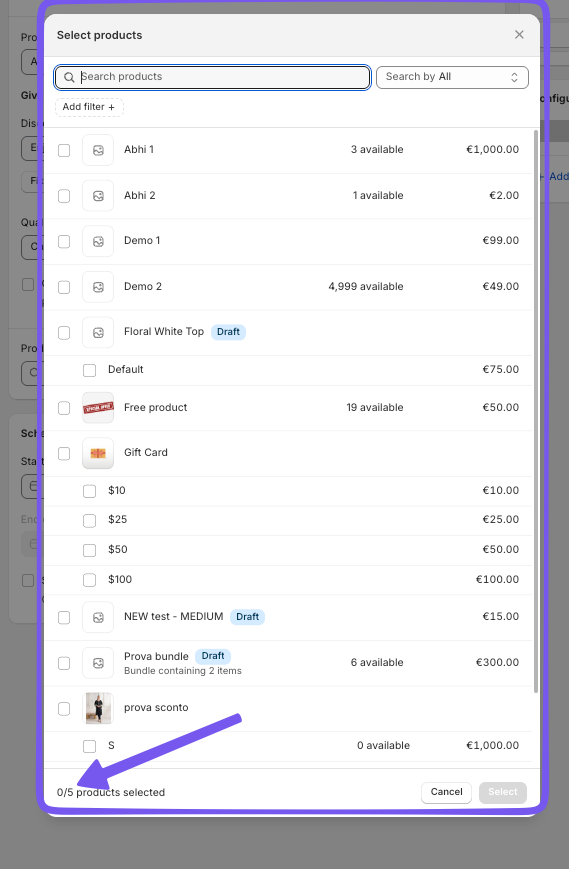
Step 7: Select the Tier 1 Gift Product
Click Browse next to Products, select the Product checkbox, and confirm by clicking Select. It will be the Gift added automatically to the cart.
You can select up to 5 products.
Step 8: Add a Second Tier or more
Click + Add step to define the second tier. You can create as many as you want and manage the order by the arrows next the Step.
Also, you can delate any Tier using the X.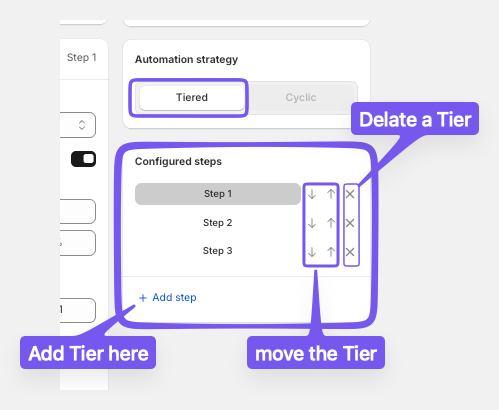
Step 9: Set the Tier 2 or more
To set up the next tier, you can simply repeat the previous steps. The process is the same, just be careful to make the tier conflicting together.
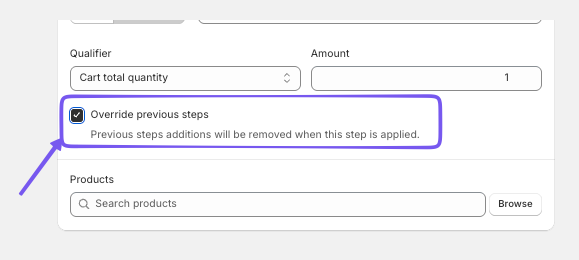
Step 10: Override Option
Enable the Override option to automatically remove lower-tier gifts when a new milestone is reached, ensuring customers keep only the reward for their current tier.
Step 11: Activate the Rule
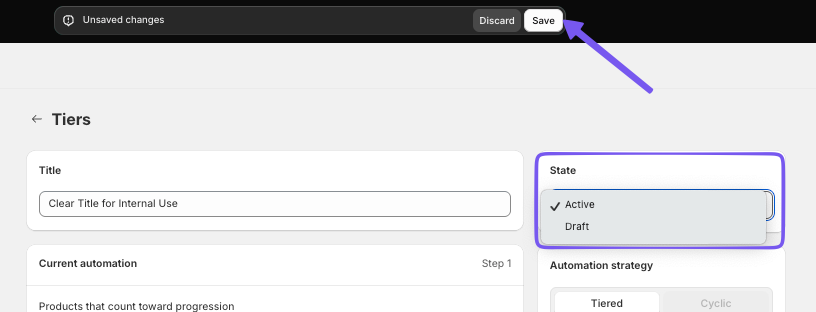
Change the State dropdown to Active to ensure the promotion is live. Save your changes by clicking Save in the top bar.
Step 12: Customize Your Theme to Enable Embed and App Block
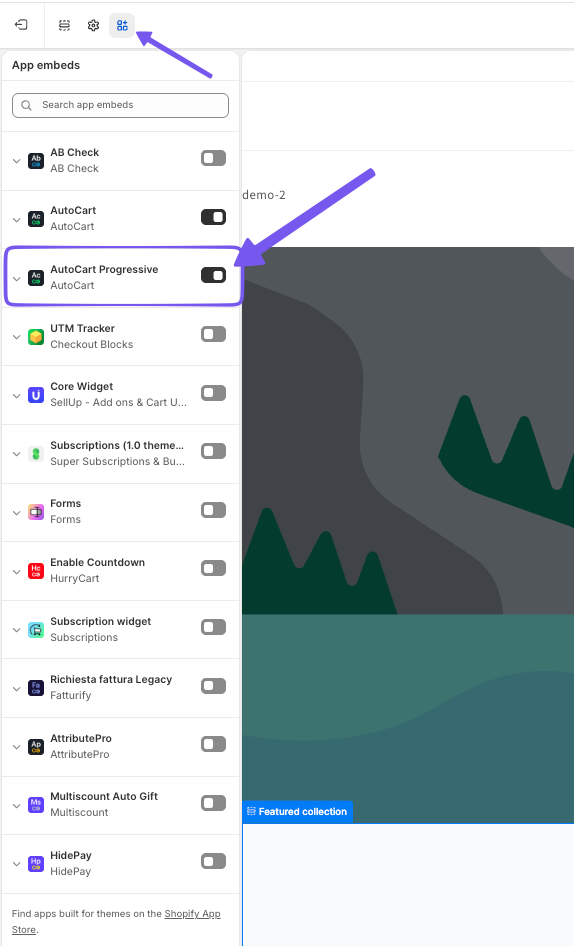
Navigate to Online Store > Themes, click Edit theme on your active theme, and enable AutoCart Progressive under App embeds. Save your changes.
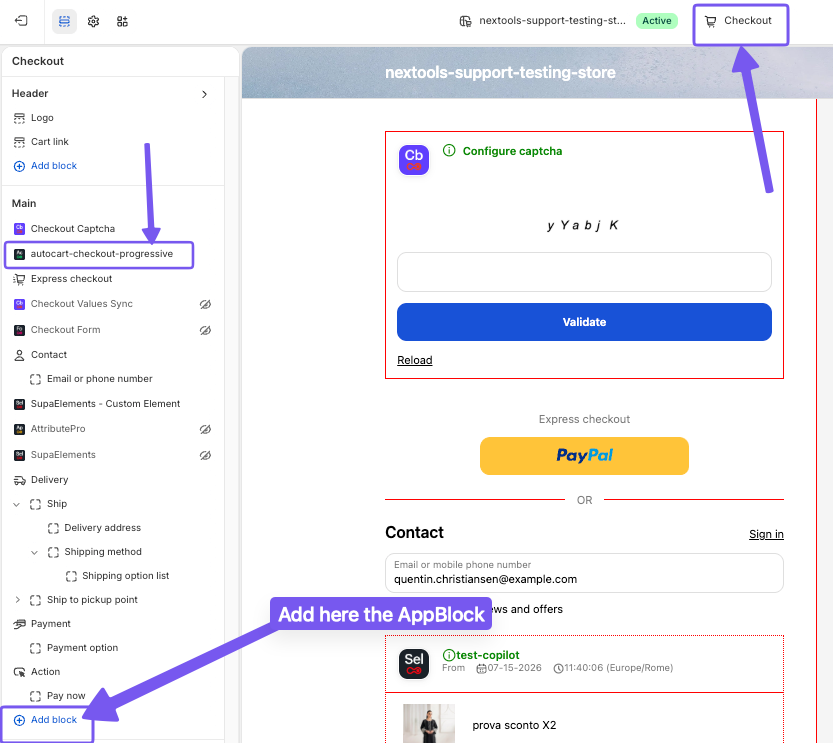
Then you move to the Checkout and add the App Block on the left menu. Add the Autocart Gift Progressive to enable the automation in the checkout.
It require to be on the Shopify Plus Account
Your setting is Ready to go. Now you can test it directly on your store.
If you have any questions or need assistance during setup, our team is here to help. You can contact the Nextools Support Team anytime via the in-app live chat or by email. We’ll be happy to assist you.
Tips and Best Practices
-
Use descriptive and engaging discount messages to motivate customers.
-
Regularly review and update your tier thresholds based on sales data.
-
Consider seasonal or promotional themes for your tier gifts.

Thank you for choosing and trusting the AutoCart application! 🚀
