Enable case-insensitive matching for text conditions in your validation process. This guide helps you configure text conditions to be case-insensitive, ensuring uniform validation regardless of text capitalization (uppercase or lowercase) in user inputs.
What You'll Need
-
Access to the validation settings in your platform
-
CartBlock installed and an active Plan
-
Estimated time: 5 minutes
Step 1: Create a New Validation
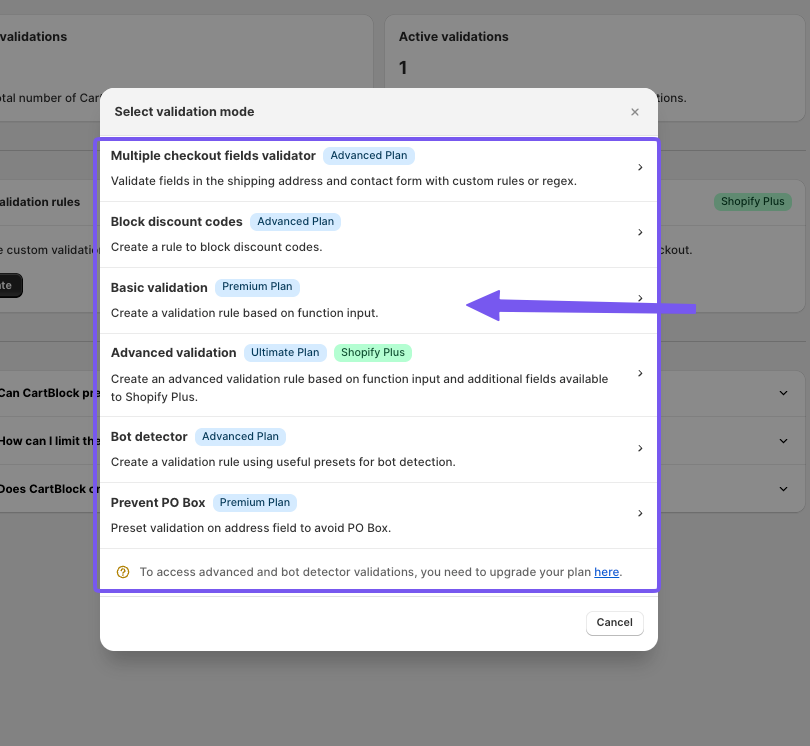
Click the Create button on your CartBlock dashboard. From the options, select Basic validation to open the configuration form. This initiates the process of setting up a new validation rule.
Note: This feature is available in all CartBlock plans starting from the Premium Plan.
Step 2: Configure Validation Details
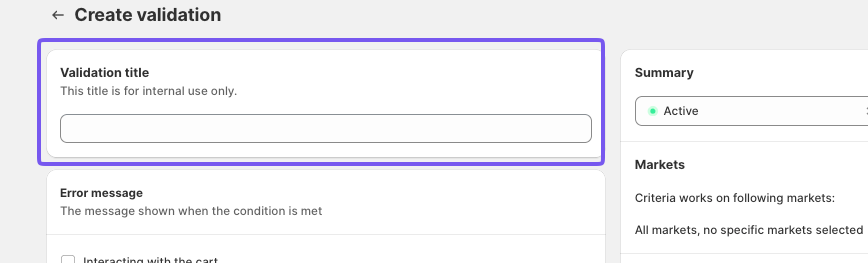
In the Create validation form, enter a title to help you immediately understand the scope of the rule (the title is for internal use only).
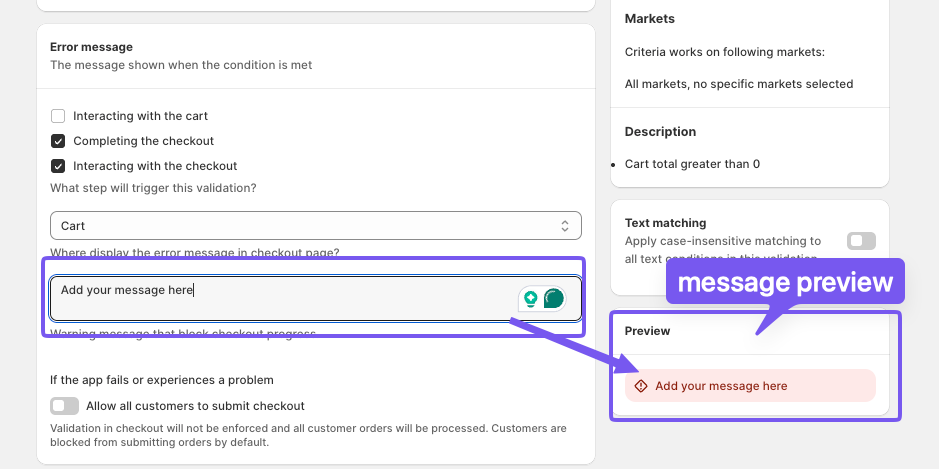
In the error section, select "Completing the checkout" and "Interacting with the checkout" as the steps where the validation will be triggered. Then, select where you want to show the message and write the text message you want to display to your customer.
Step 3: Set Text Condition
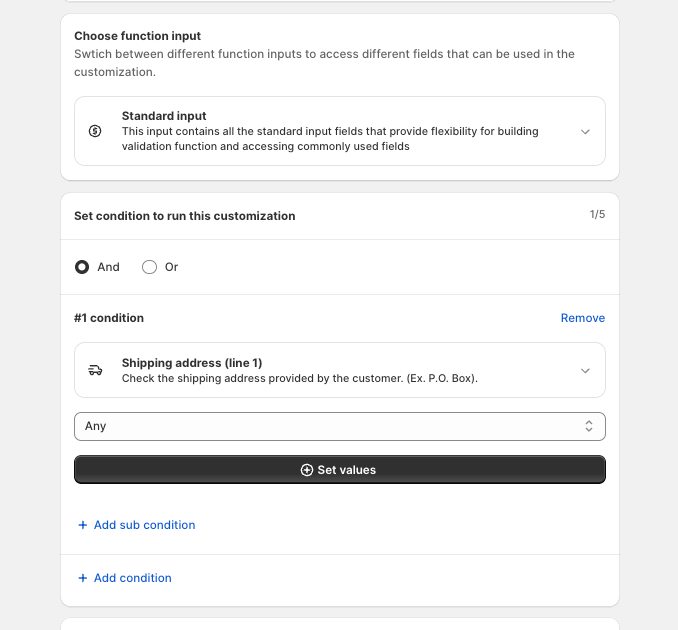
Scroll to the conditions section and select the condition that best fits your validation from the dropdown menu. For this feature, a condition that requires a text input is needed (for example: Shipping address line 1). Click the + Set values button to define specific text conditions for the address field.
Step 4: Add Text Value
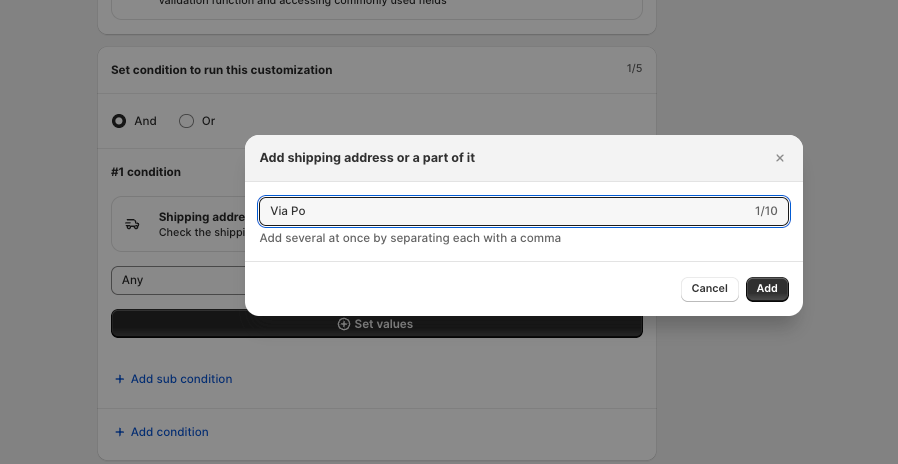
In the modal that appears, enter the text value (for example: Via Po with capital letters). Click Add to include this value in your validation condition.
Step 5: Enable Case-Insensitive Text Matching
In the validation settings panel on the right, locate the Text matching section. Toggle the switch to Active (ON).
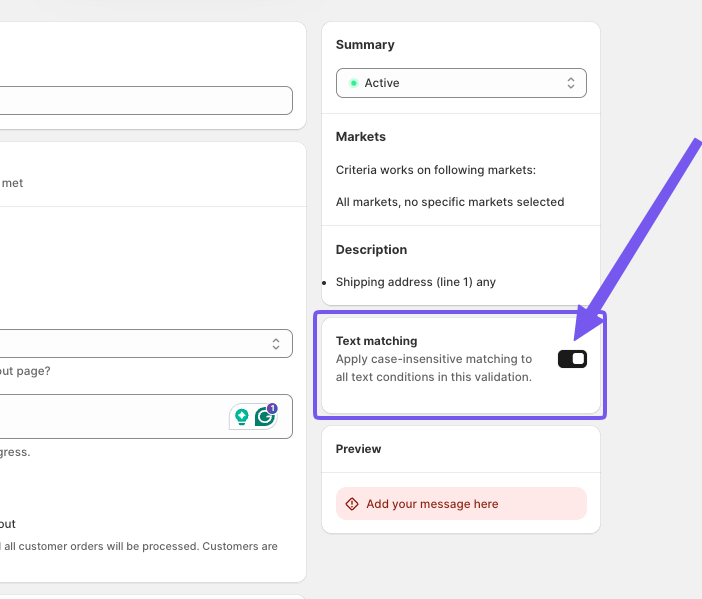
This will automatically apply case-insensitive matching to all text conditions in this validation, ensuring that variations like via po, VIA PO, or Via Po are all recognized uniformly.
Step 6: Save Validation
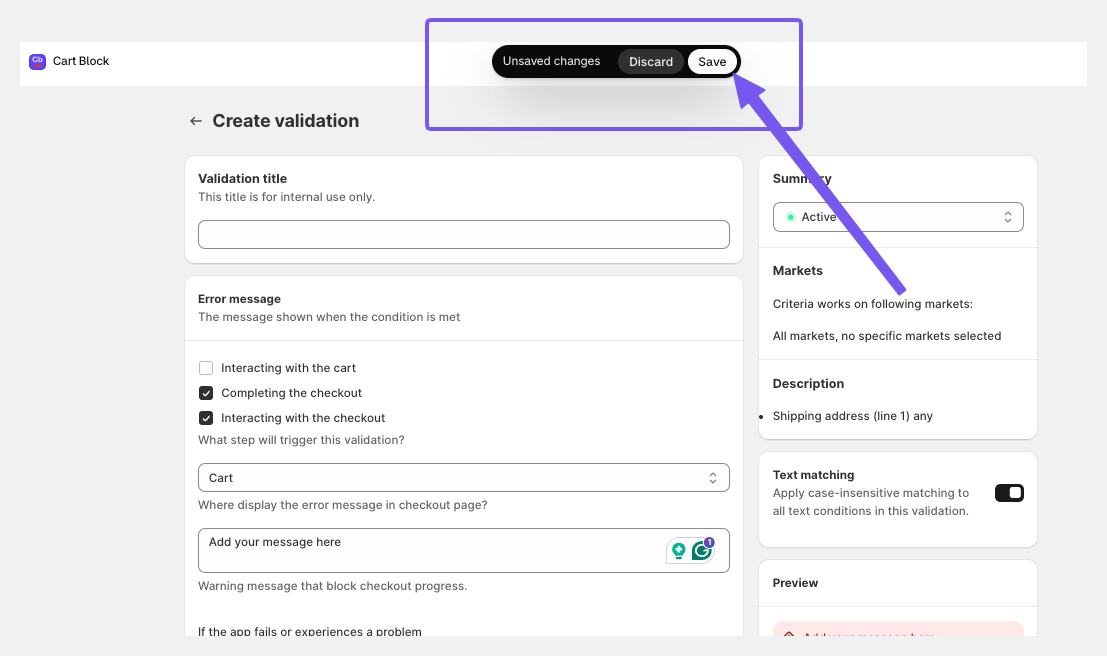
Scroll back to the top of the page and click the Save button. This action activates your newly configured validation rule on the platform.
Tips and Best Practices
-
Use descriptive titles: Name your validations clearly to easily identify their purpose later.
-
Check text values: Double-check text conditions for unintended extra spaces or typos.
-
Test different cases: Test your validations across various scenarios and capitalization styles to ensure they work as intended.
