Easily manage how payment methods appear during checkout based on discounts. This guide explains how to hide, sort, or rename payment methods when specific discount conditions are met, offering tailored checkout experiences for your customers.
What You'll Need
-
Advanced Plan or superior
-
Predefined discounts already active or to create
-
Estimated time: 10-15 minutes
Step 1: Open Payment Customizations
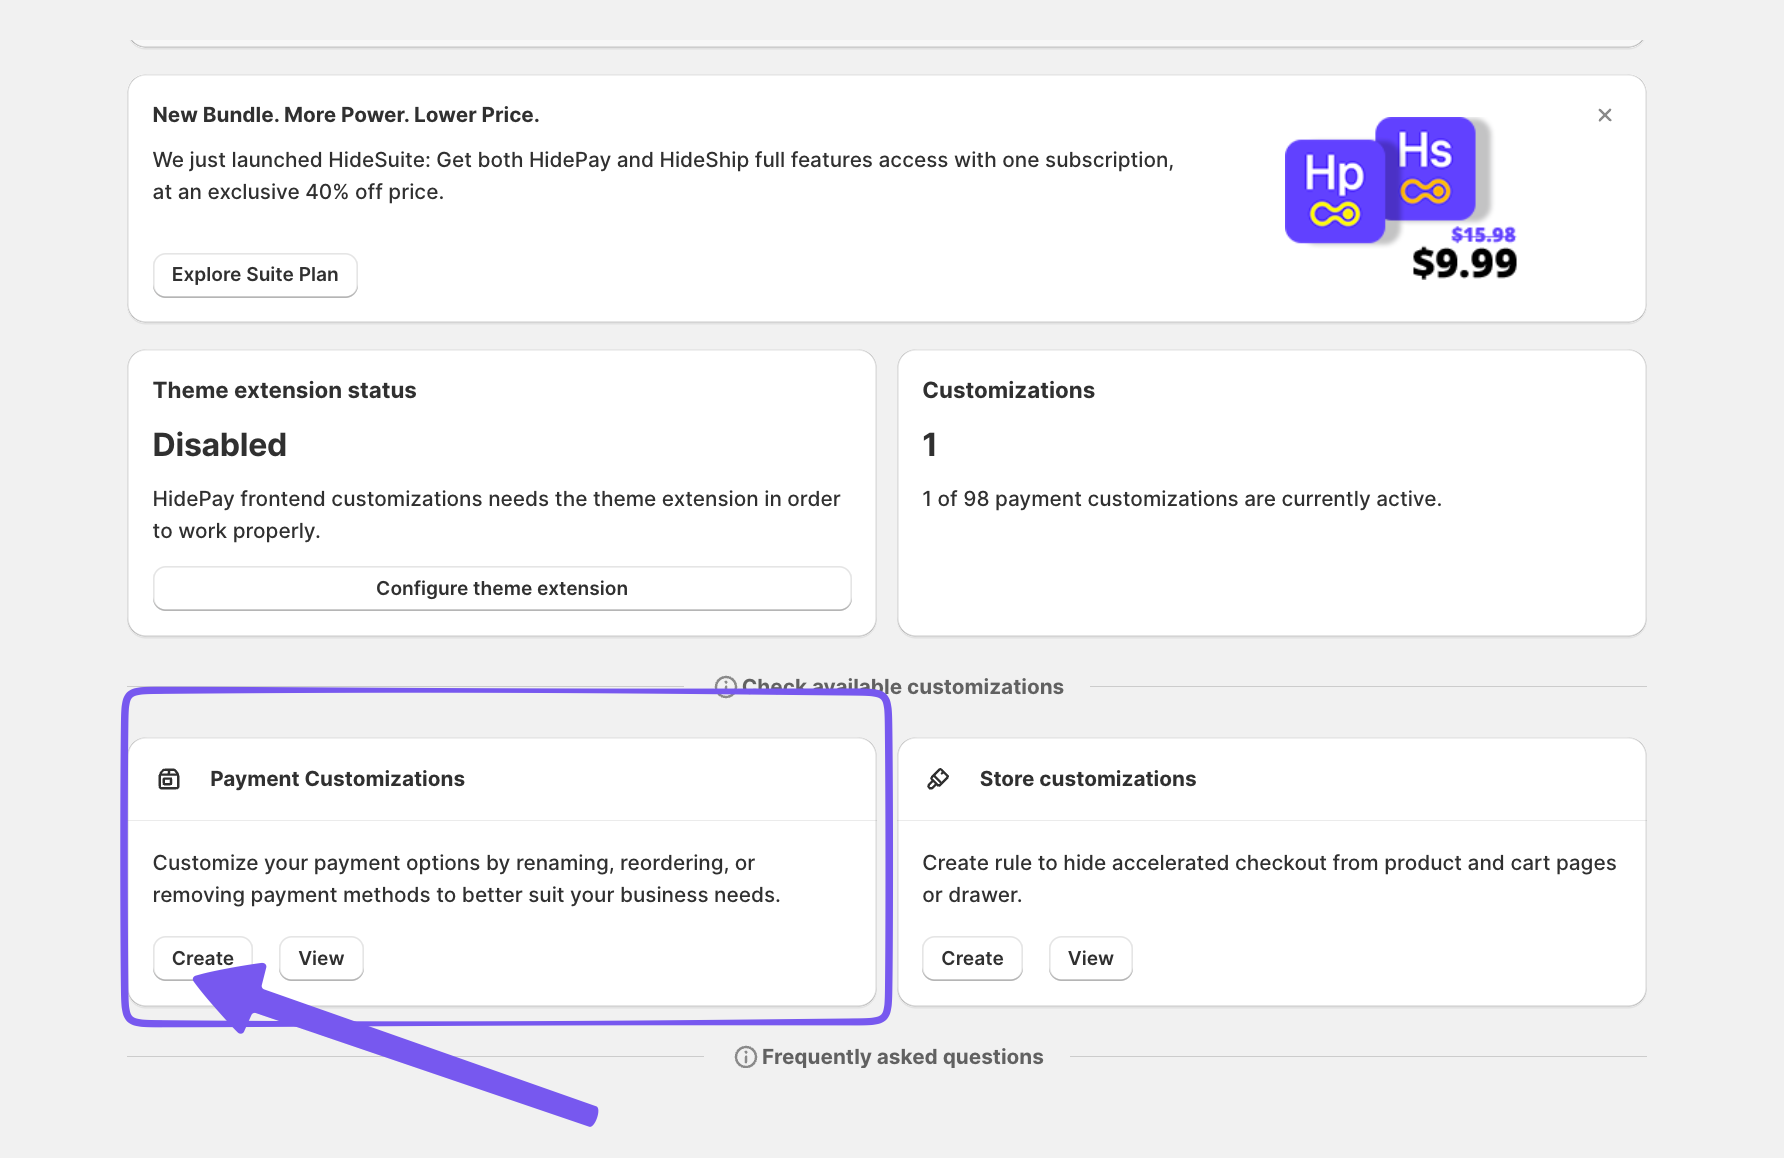
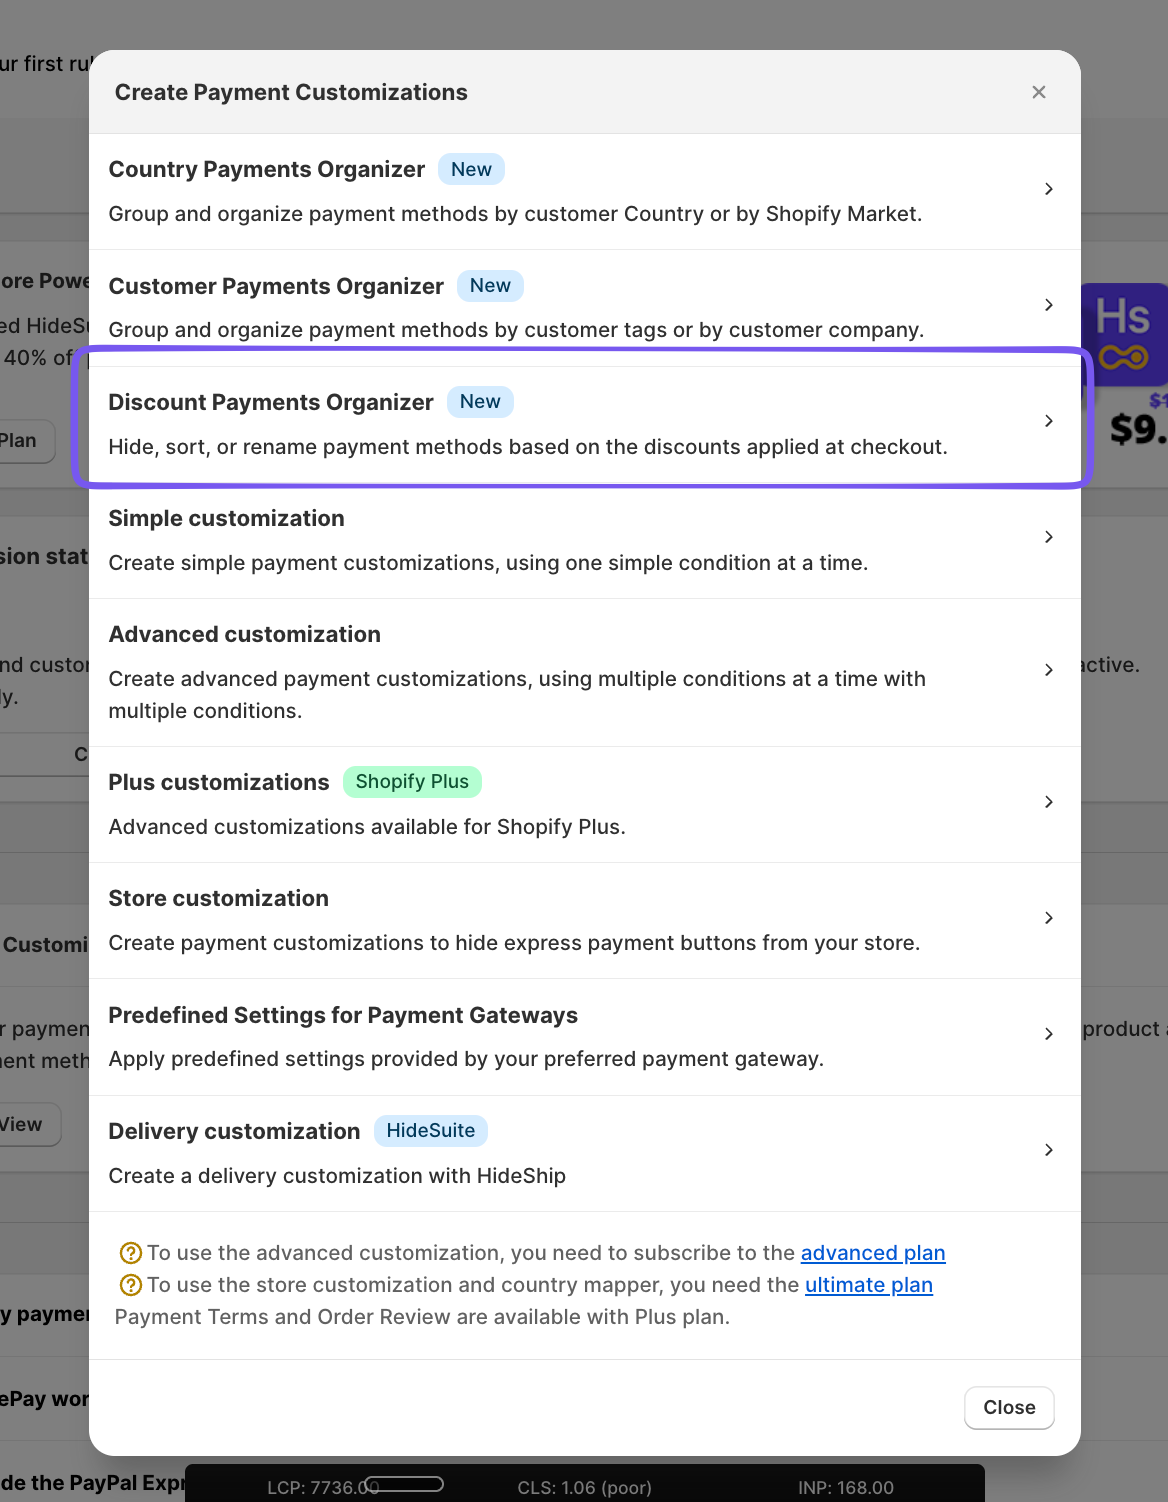
Click on Create button under Payment Customizations. Choose Discount Payments Organizer from the dropdown to proceed.
Step 2: Set Up Customization Title
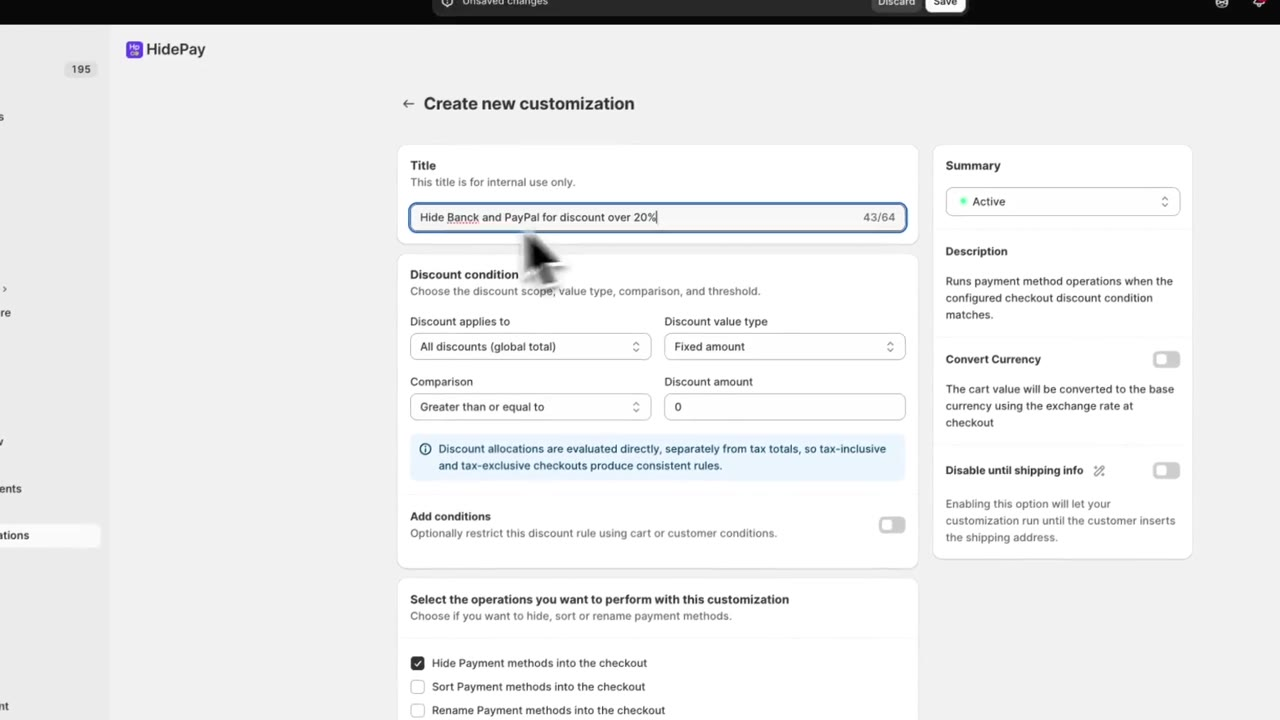
In the customization setup, enter a descriptive title, it is for internal use only. This helps to quickly identify the rule later.
Step 3: Define Discount Conditions
In the Discount condition section, we are going to define the characteristic of the discount we want to target for trigger the rule.
Note: It is not possible to target specific Code Discount.
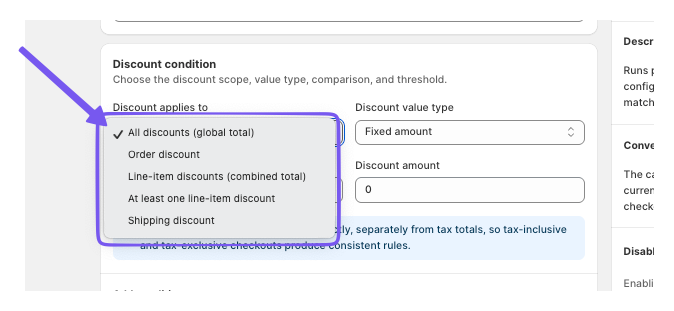
The rule will only target the discounts types available in the Discount applies to section
Discount applies to:
Here, you are going to choose what type of discount you are going to target: order discount, product discount, or other type of discount.
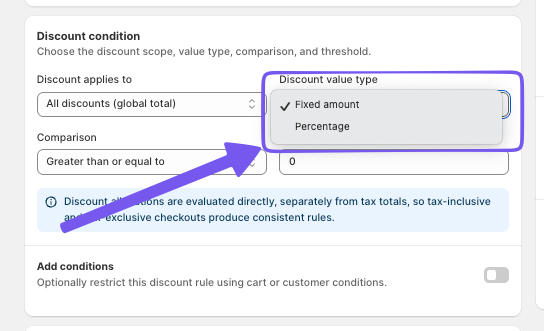
Discount Value type:
This section will let you choose if target percentage or fixed amount discount
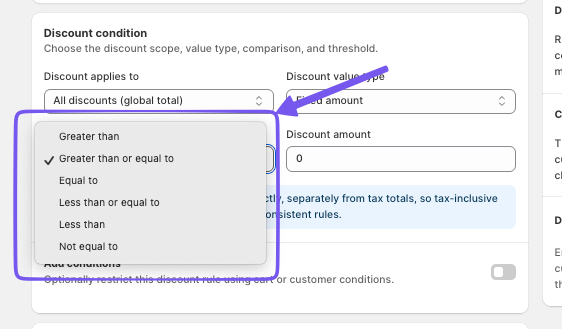
Comparison:
Now you can choose if target a range of discount or a specific amount/percentage
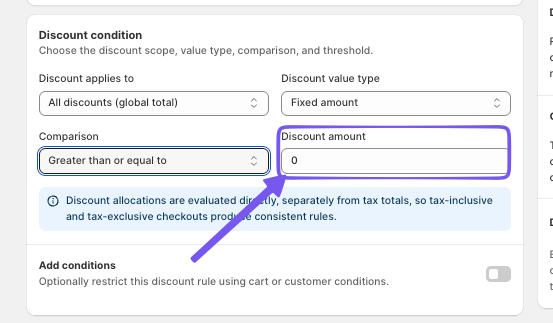
Discount amount:
And finally you set the exact amount entering a value
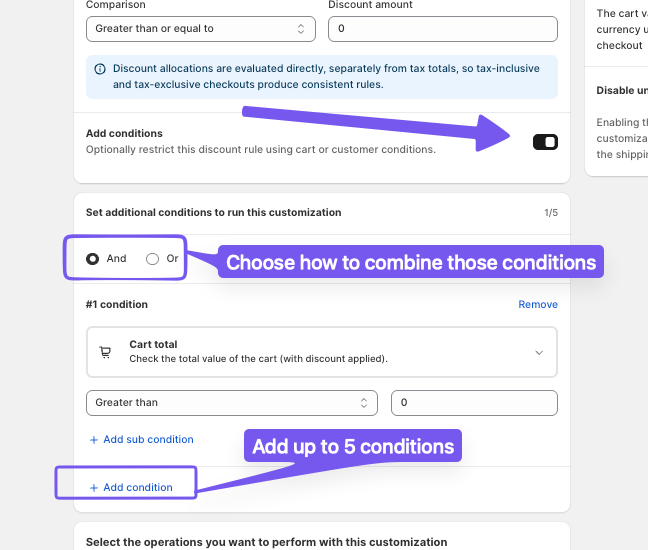
Step 4: Enable Additional Conditions (Optional)
To unlock advanced customization options, toggle the Add conditions switch. This allows you to combine up to 5 conditions simultaneously based on product selections, customer tags, or cart totals.
Use the AND/OR selector at the top to decide the rule behavior:
-
AND: All specified conditions must be met.
-
OR: Meeting at least one condition is sufficient.
Note: Setting additional conditions is completely optional. You can simply apply the rule to target all discounted carts.
Step 6: Configure Payment Method Operations
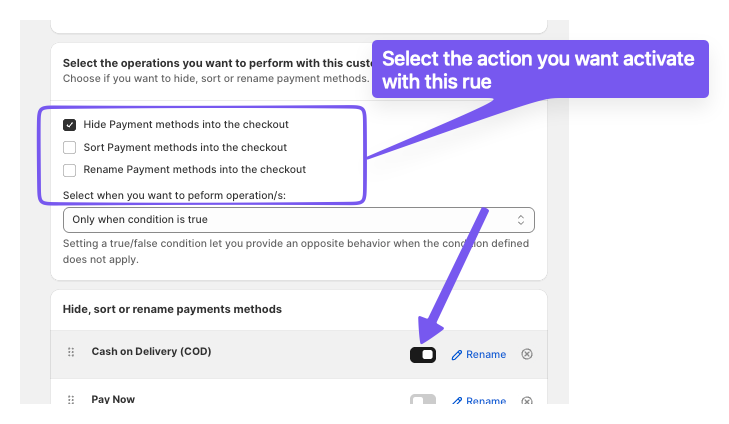
Check the Hide Payment Methods box to manage payment visibility at checkout. Toggle the switches for any payment gateways you wish to hide.
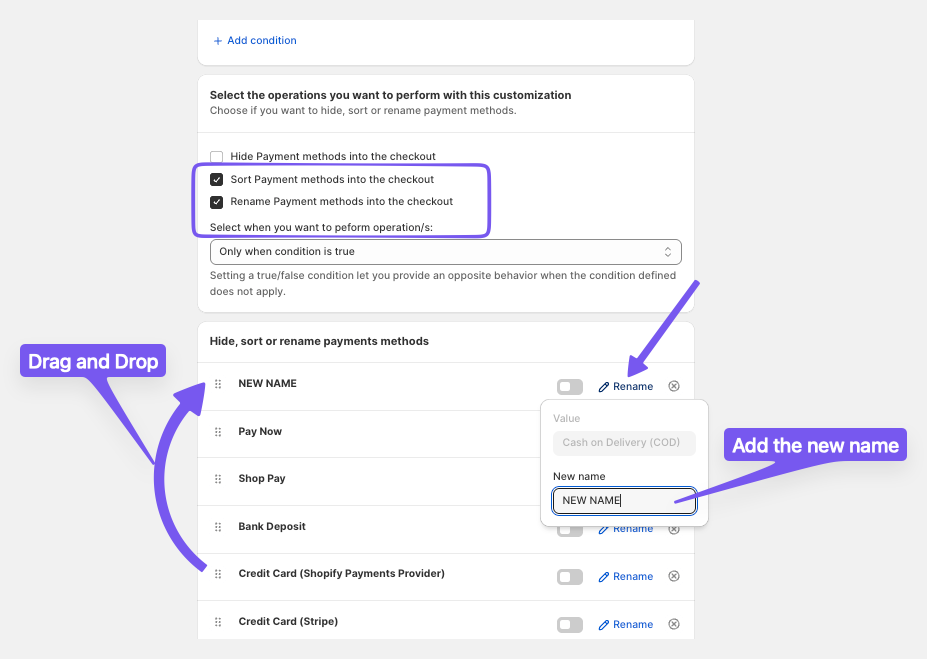
To Rename or Sort payment methods, simply enable the corresponding checkbox, then type your new label or drag and drop the gateways into your preferred order.
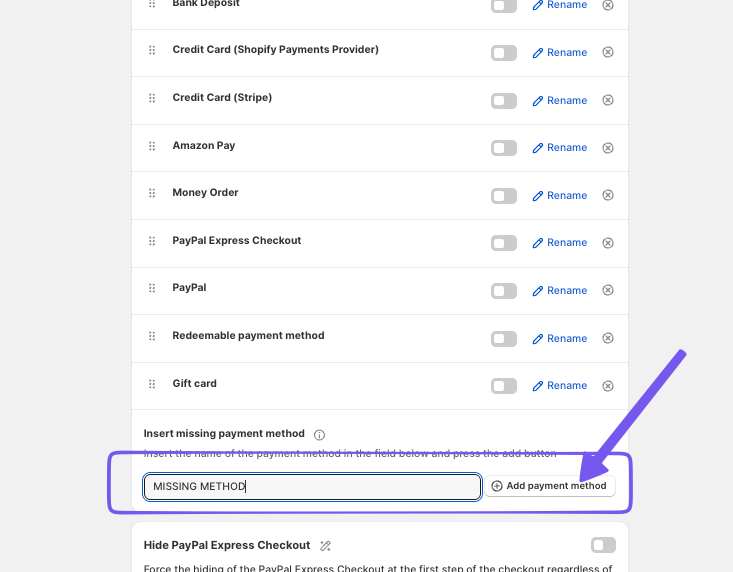
Step 7: Add Missing Payment Methods
If a payment method isn't listed, type its name in the Insert missing payment method box and click Add payment method. Click Save in the top header to apply the changes.
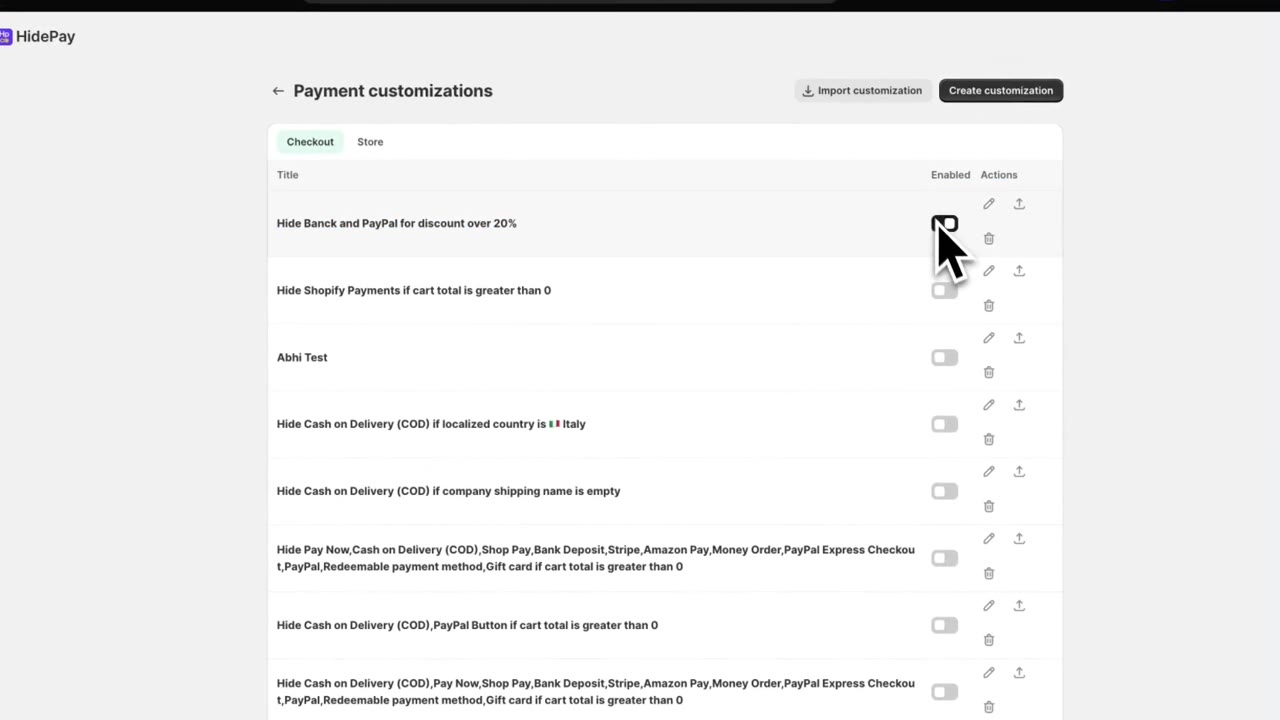
Step 8: Activate the Customization Rule
Save and the rule will immediately active! To verify it you can simply Return to the main dashboard and check if the status switch for your rule is Active. This ensures the customization is enabled and operational.
Step 9: Test the Customization in Storefront
Now you can simply reach your store and test the rule on your store to verify everything is running correctly.
If you have any questions or need assistance during setup, our team is here to help. You can contact the Nextools Support Team anytime via the in-app live chat or by email. We’ll be happy to assist you.
Tips and Best Practices
-
Always use descriptive titles for easy management of multiple rules.
-
If you are using multiple discounts in your store, make sure to check whether they are stackable.
-
Regularly review discount codes and their impact on payment methods to ensure a seamless checkout experience.
We’re always here to help you get the most out of HidePay! 🚀
