We're thrilled to introduce a powerful new feature: customer tag and company payment rate organization.
This feature empowers you to organize payment methods based on two key criteria:
- Customer Tags: assign unique tags to customers based on their characteristics (e.g., "VIP member").
- Company Names: tailor payment methods specifically for registered companies with accounts in your store.
STEP 1
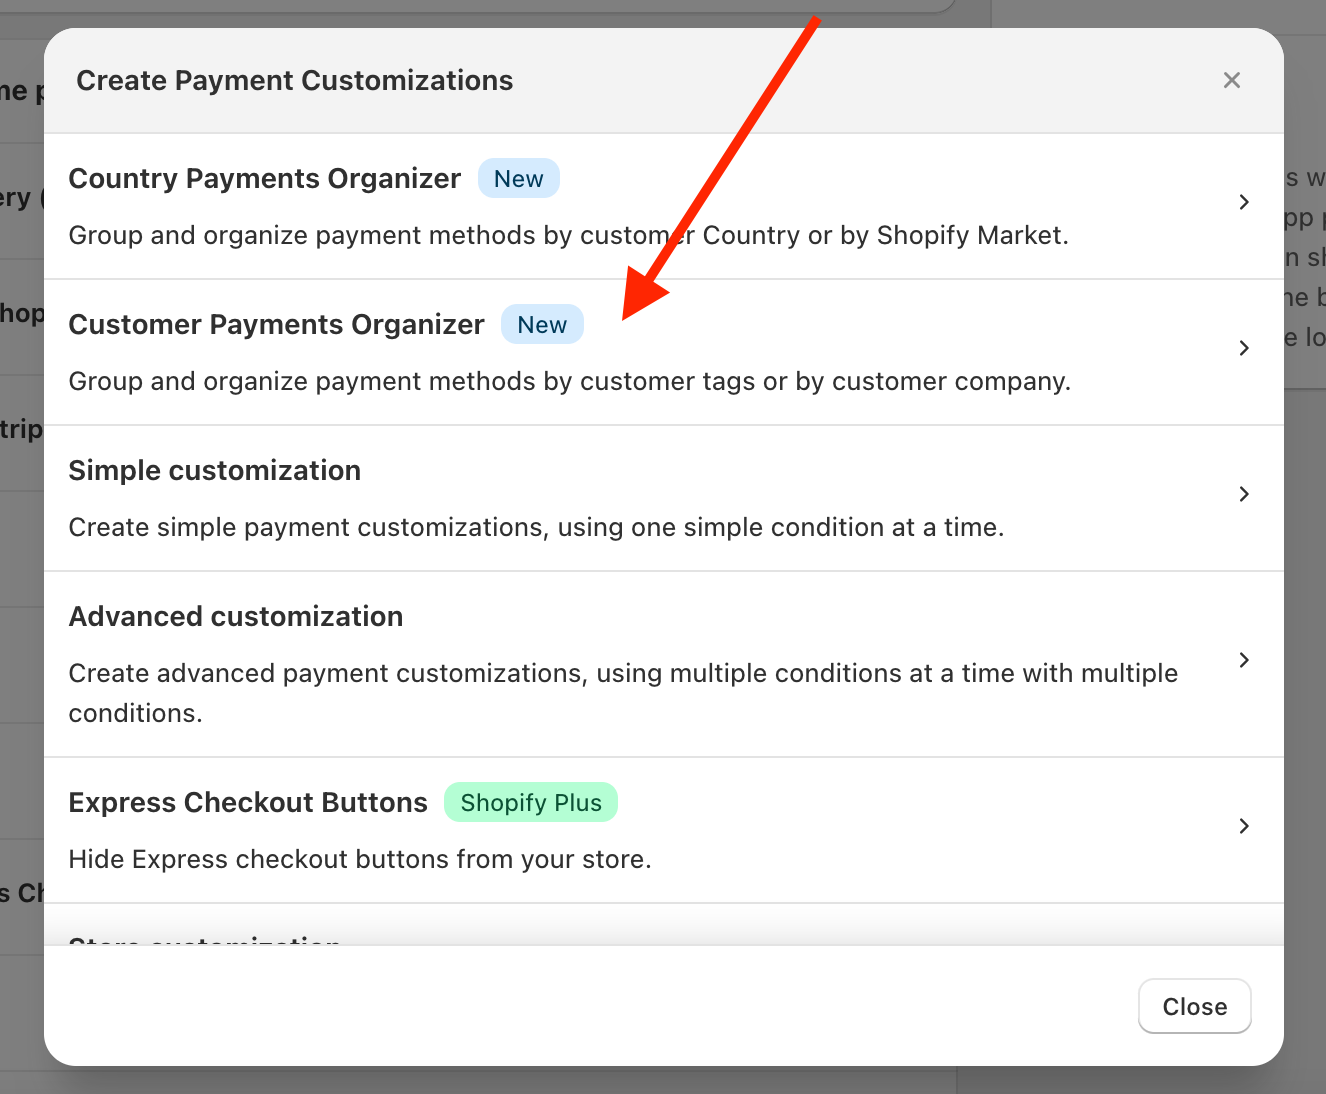
Go to App and select Create Customization.

STEP 2
Choose Customer Payment Organizer.
STEP 3
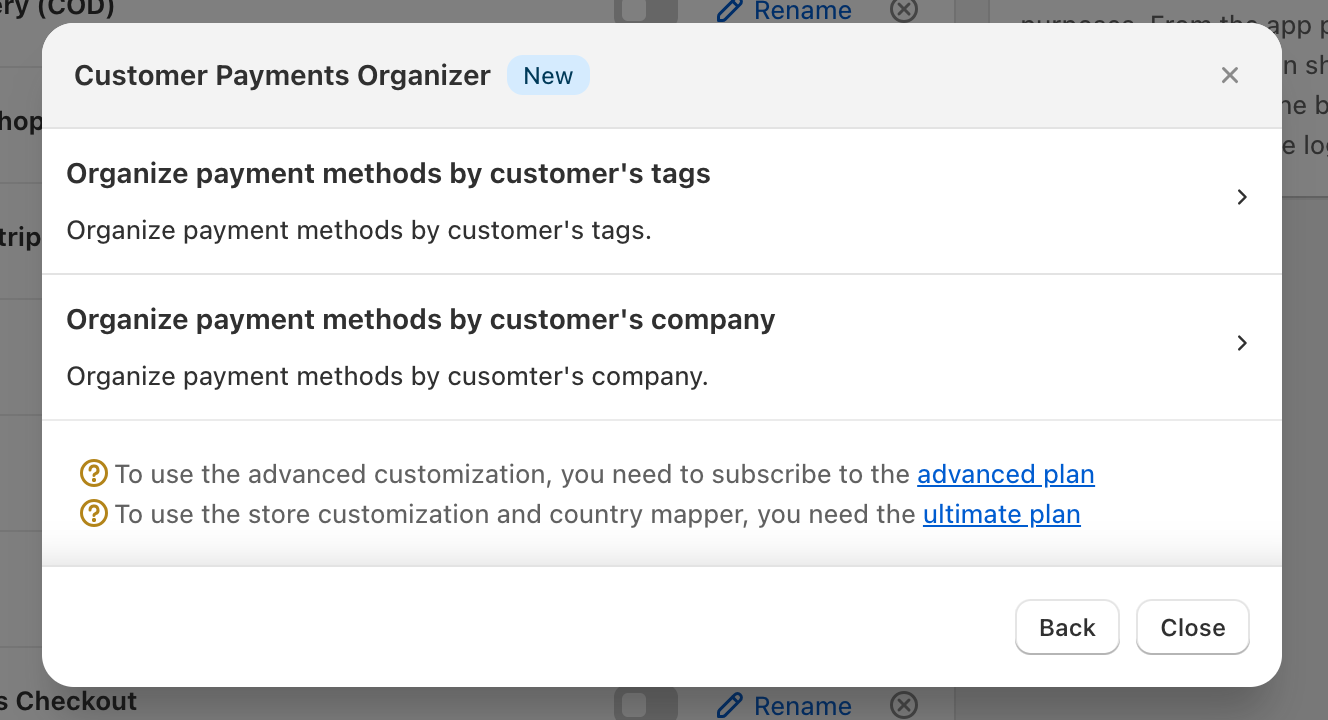
Choose the option you prefer:
Customer's tags or Customer's company
STEP 4
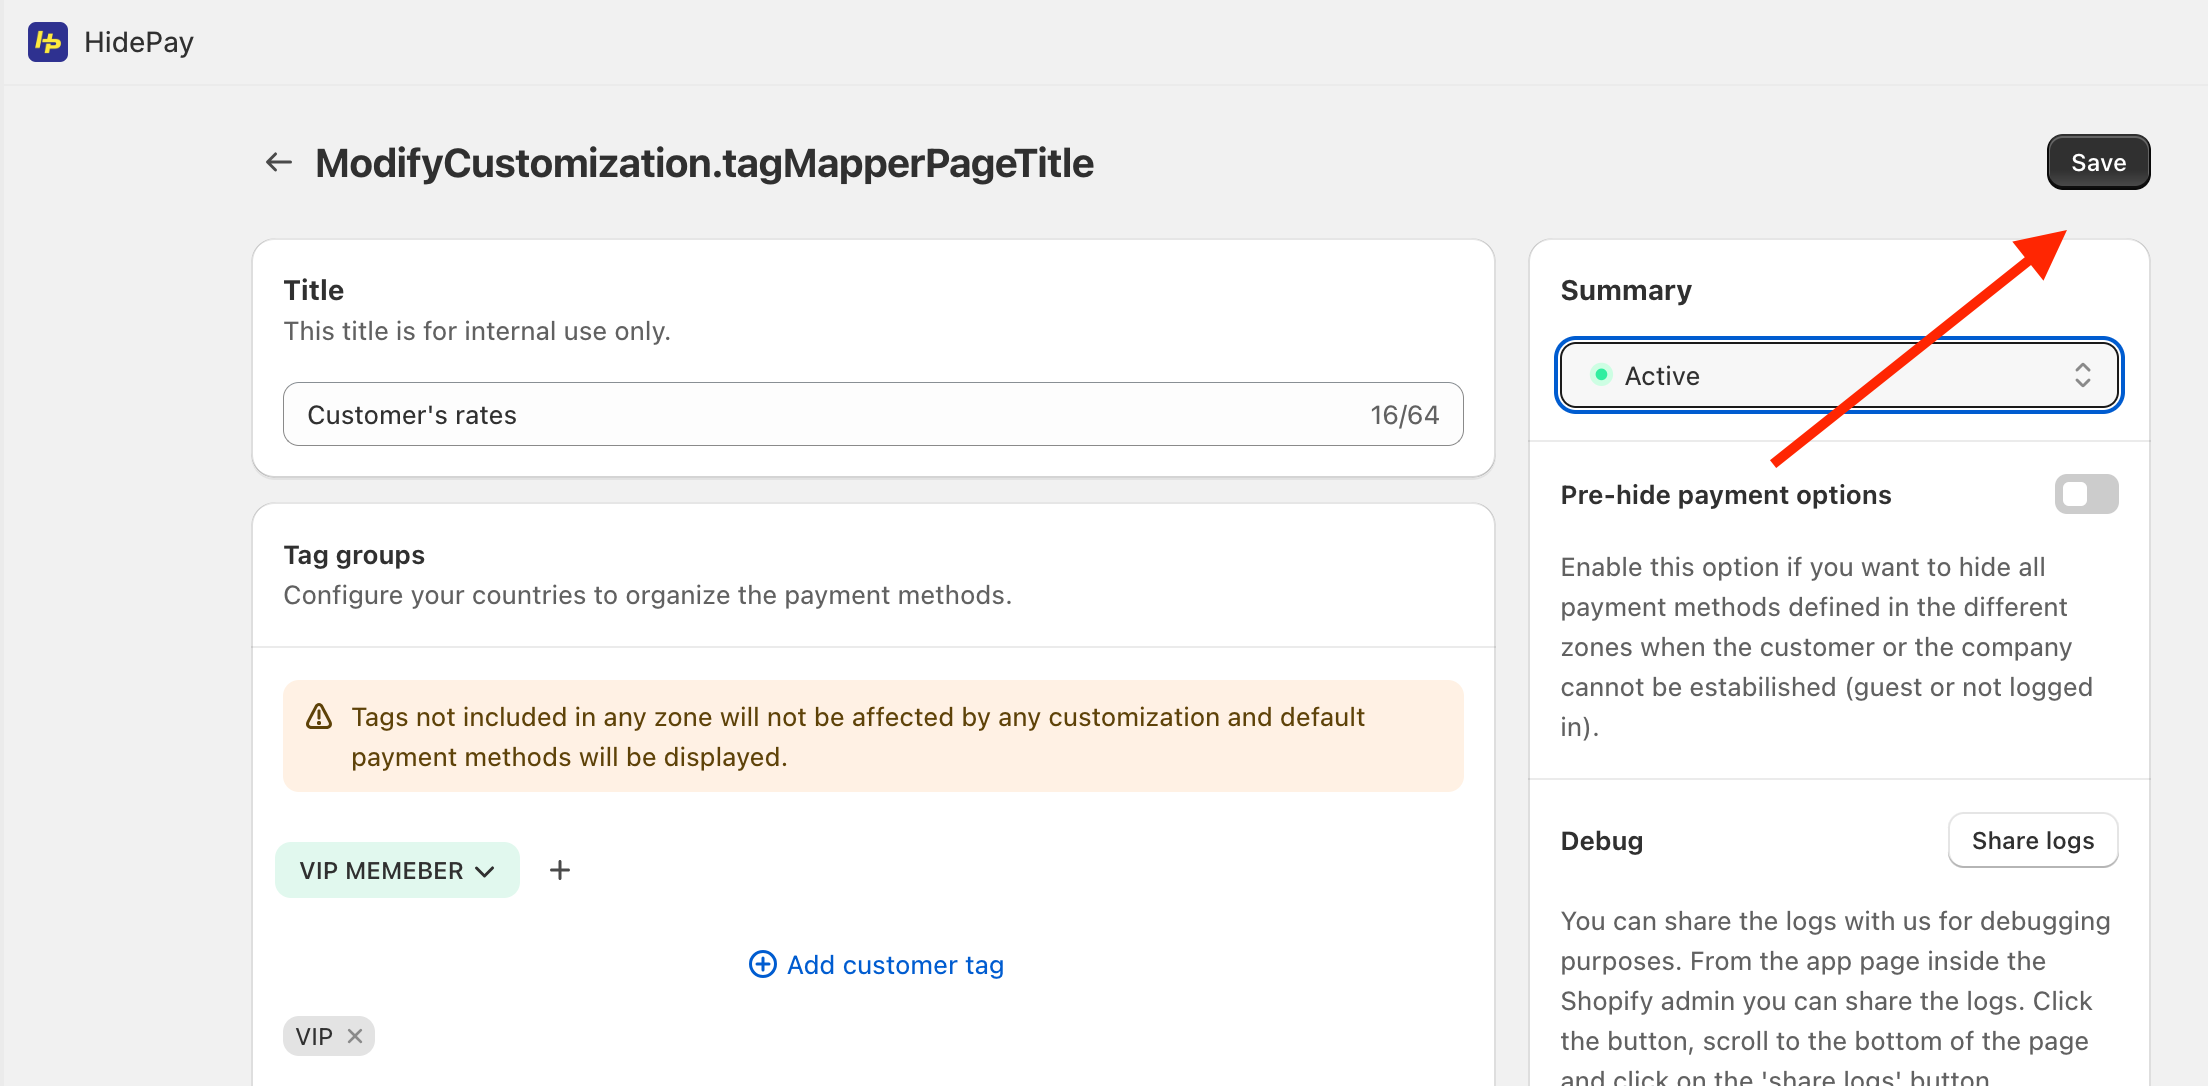
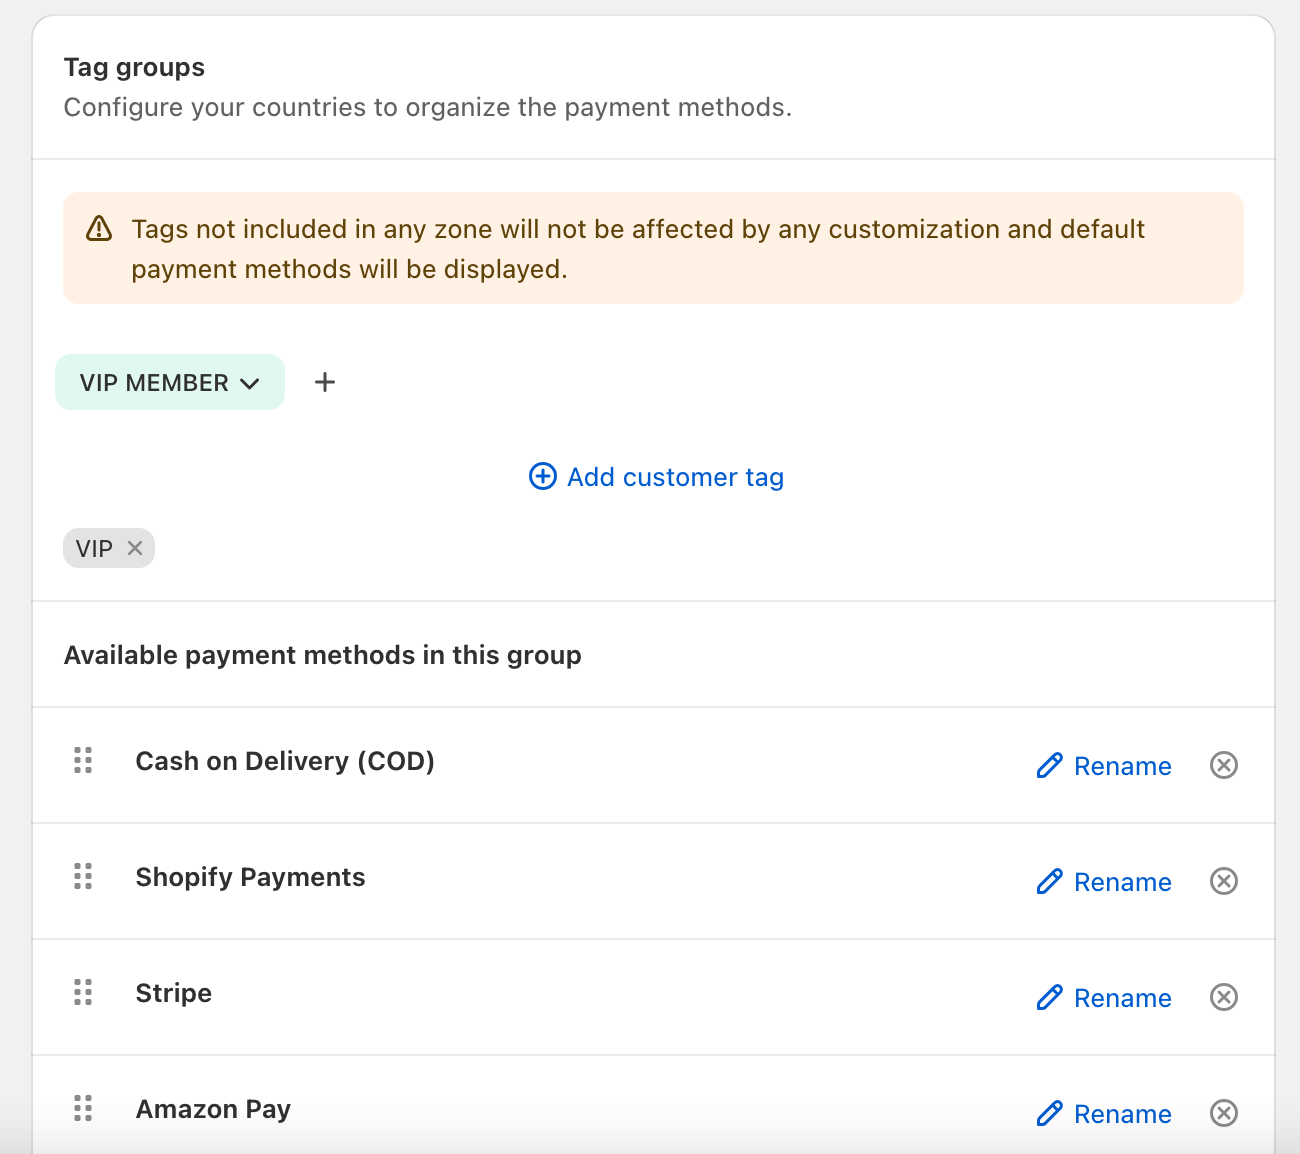
If you chose customer's tags you will see this.
First fill in the title then choose the tag groups.
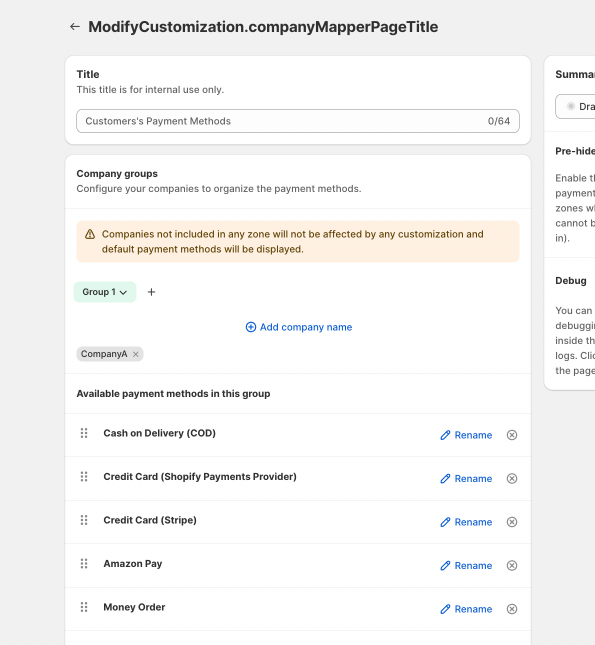
If you chose customer's company you will see this.
Again, first fill in the title then choose the company groups.
STEP 5
Now you need to choose which method to SHOW for the selected TAG/Company.
Delate the other methods you don't want to show.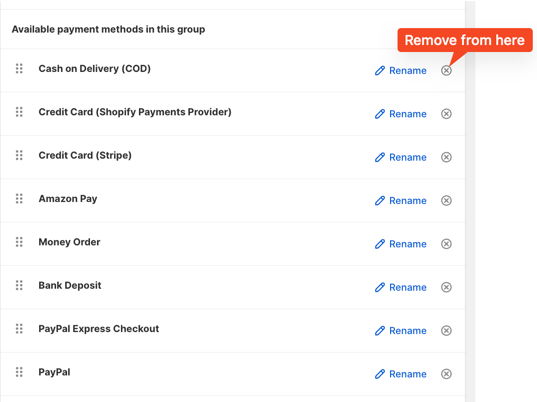
If you don't find your method you can easily add it here on the bottom of the rule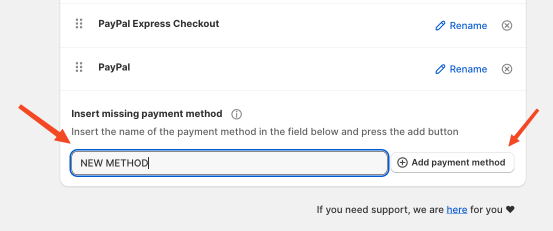
STEP 6
After you're done save the customization.