🎯 What are Payment Terms?
Payment Terms allow you to:
- Delay payment (e.g., pay after fulfilment)
- Set deposits
- Trigger payments based on events (like order fulfilment)
⚙️ Step-by-step setup
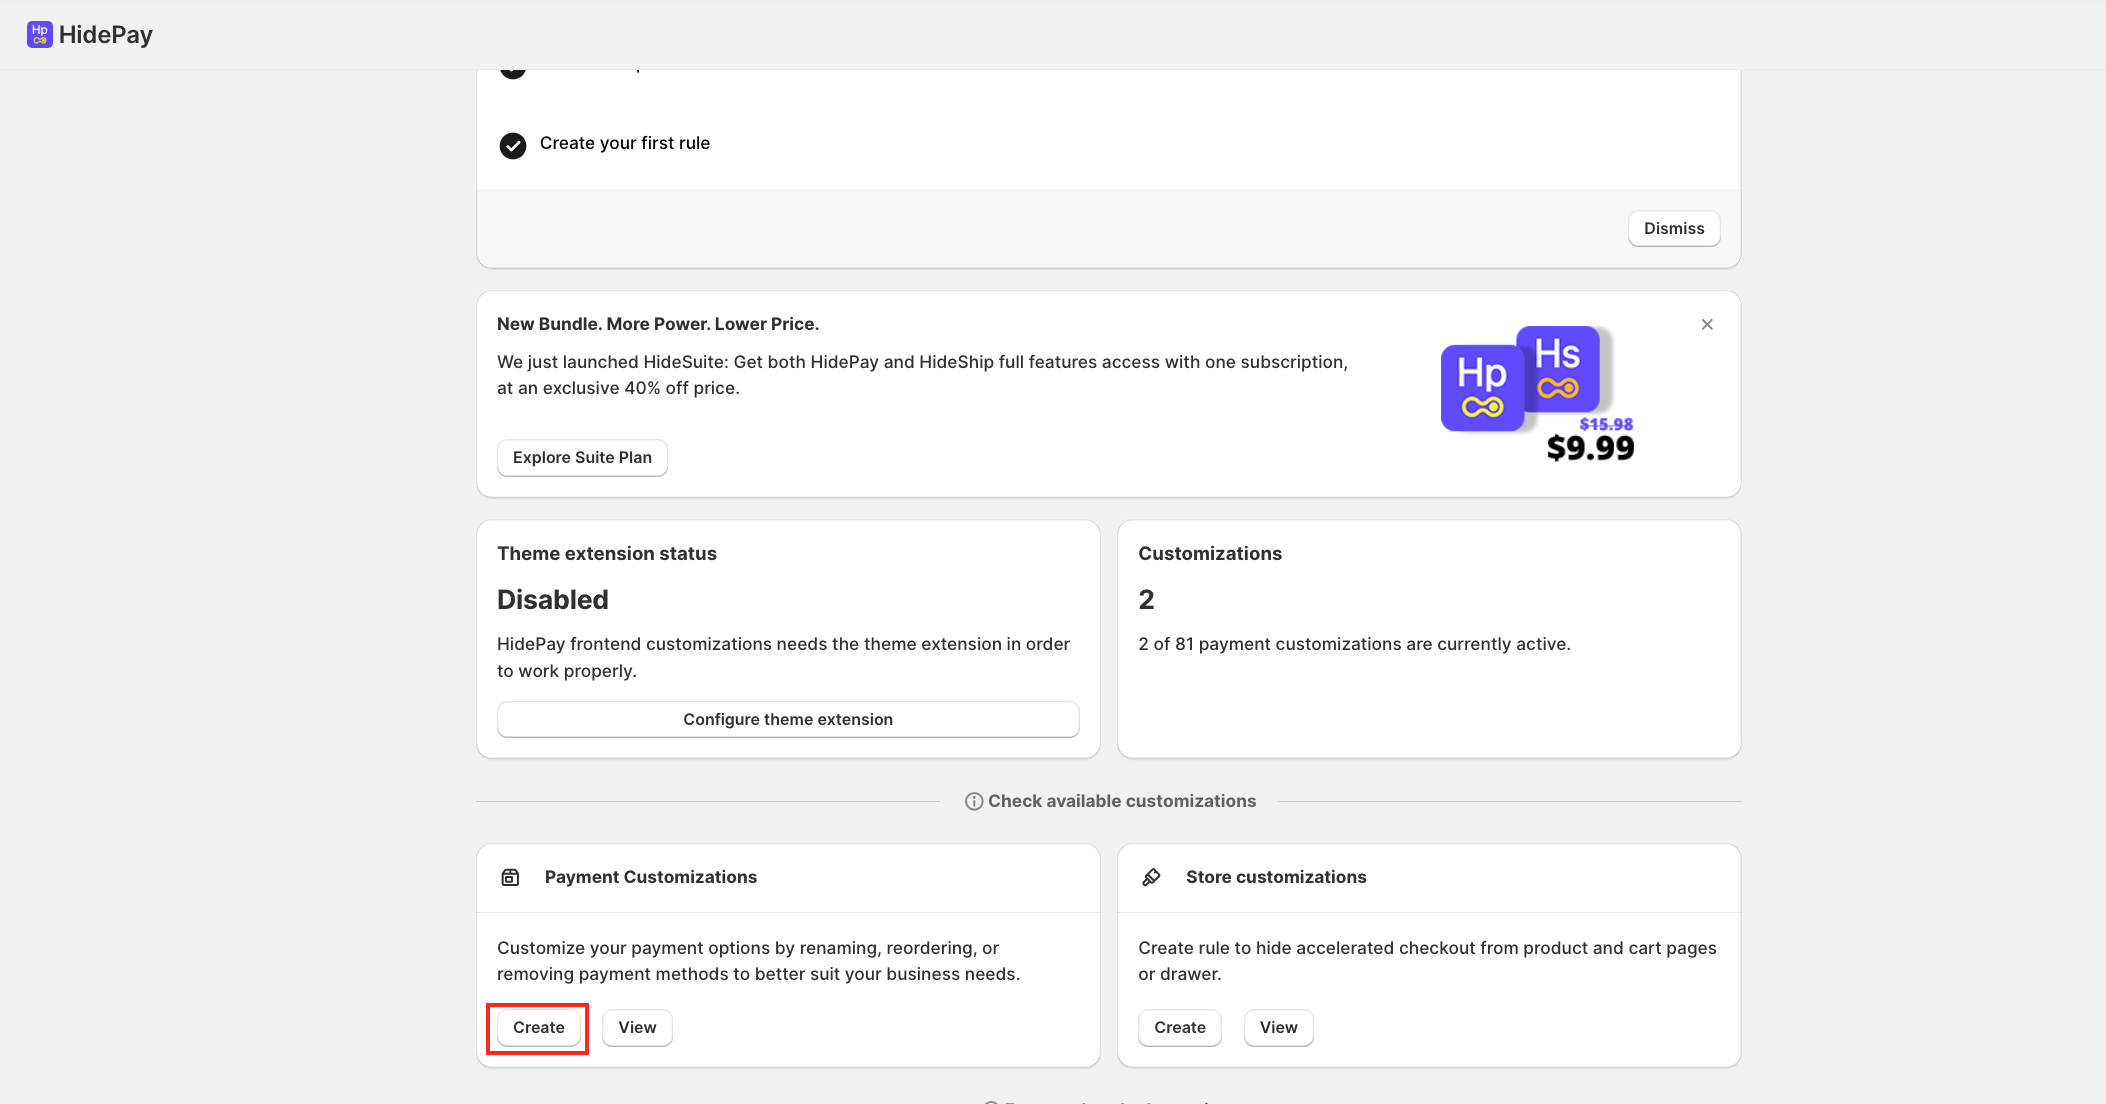
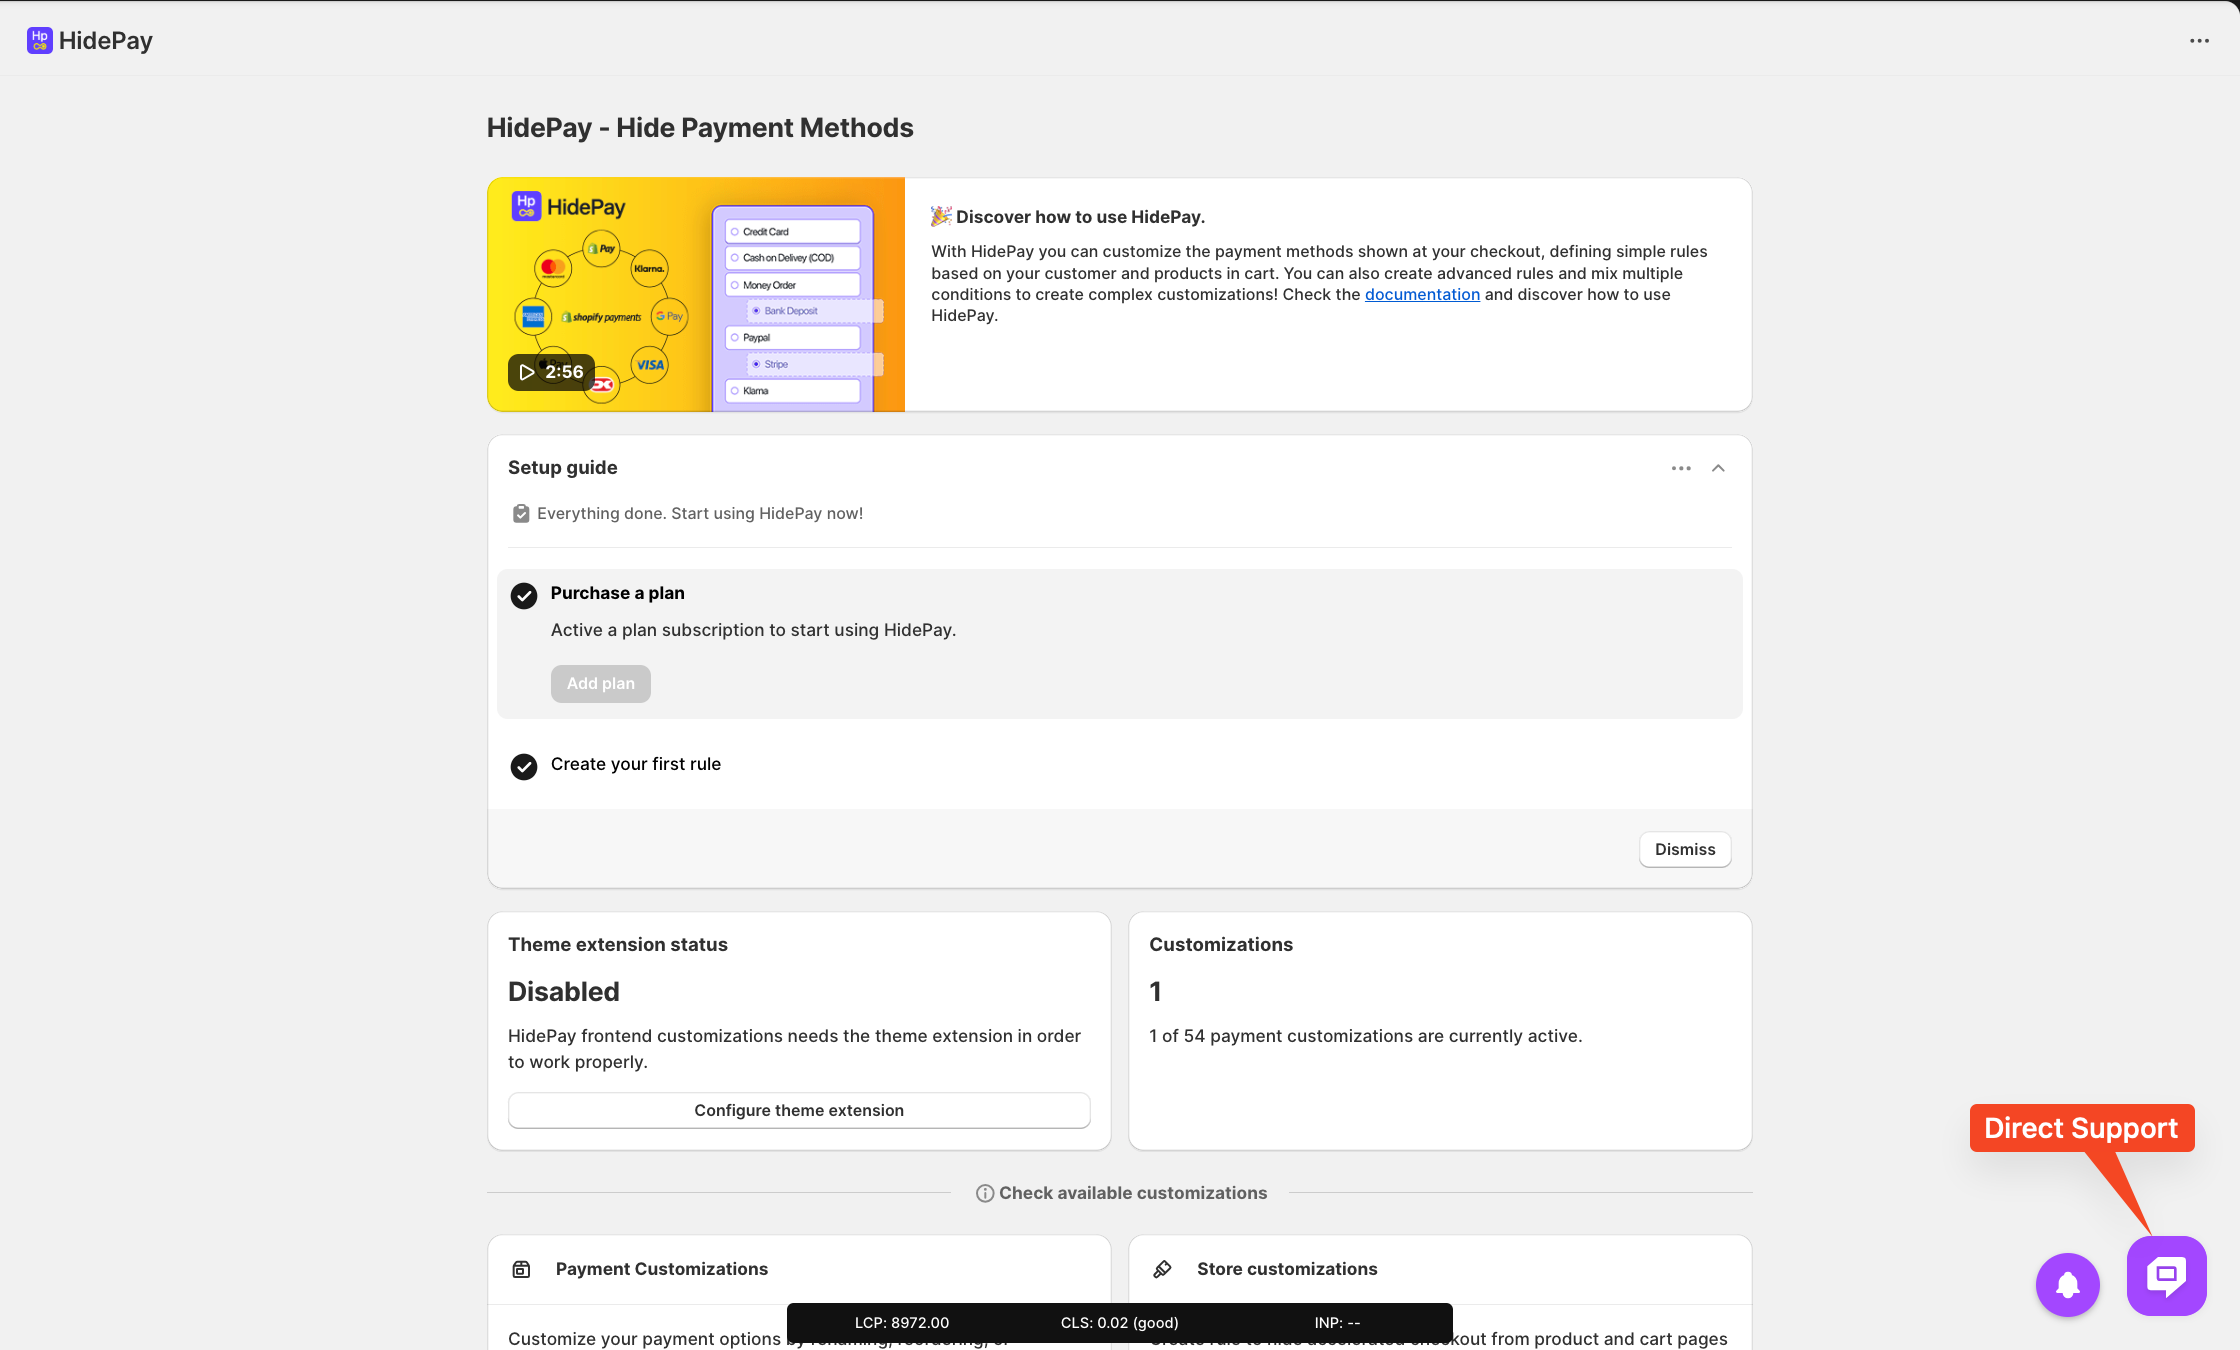
Let's click on the create button under the Payment customisation.
➡️ Click on the Create button under the Payment Customisation section.
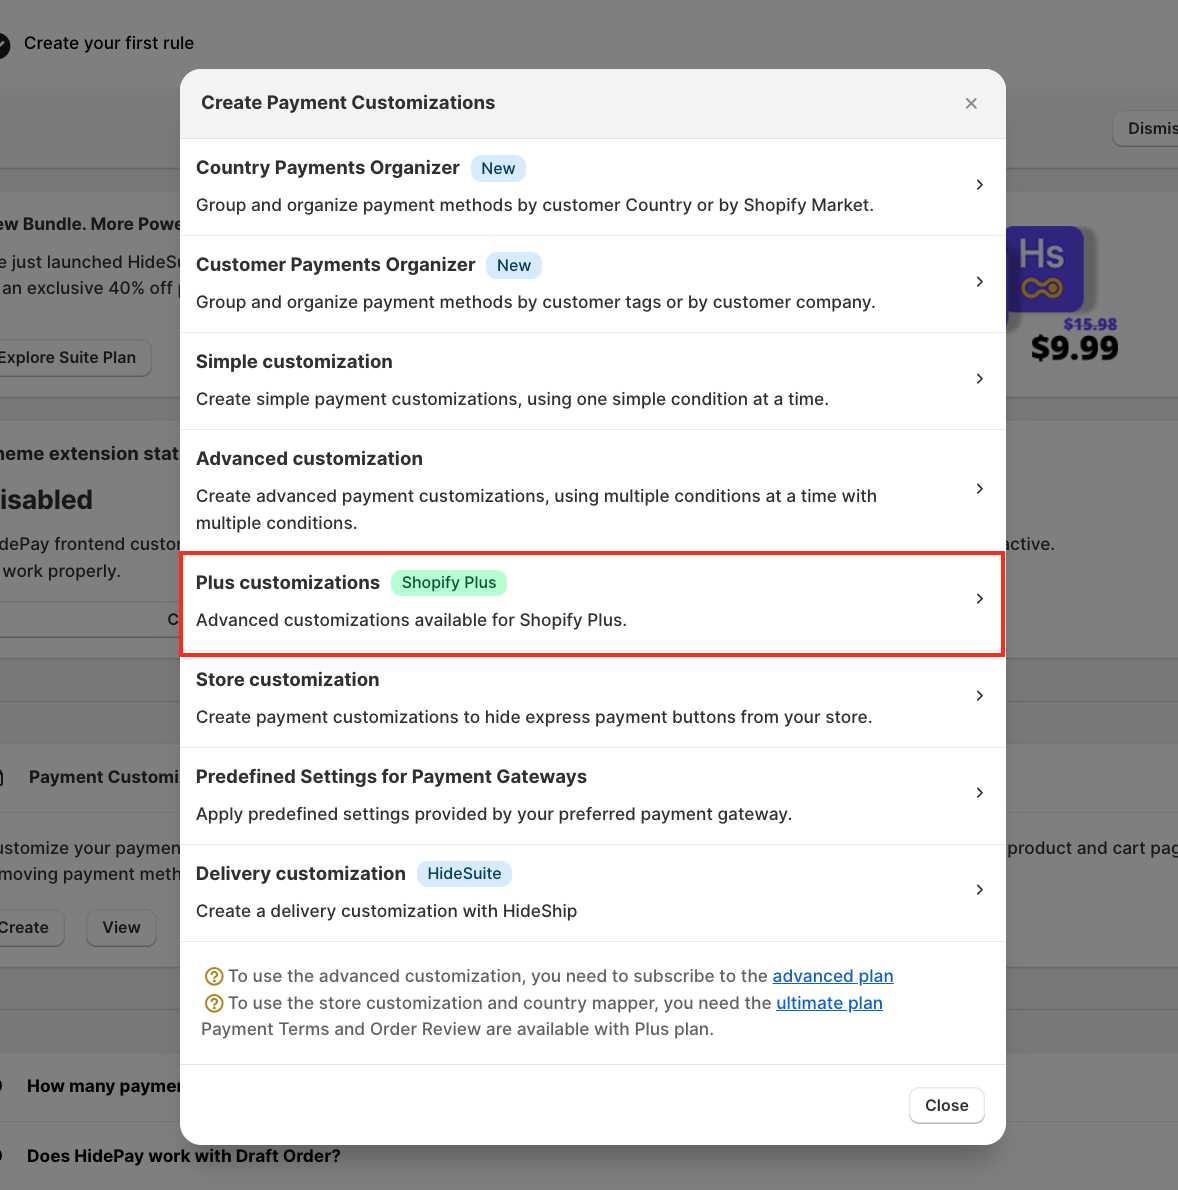
A pop-up will appear. Select Plus Customization (available for Shopify Plus merchants).
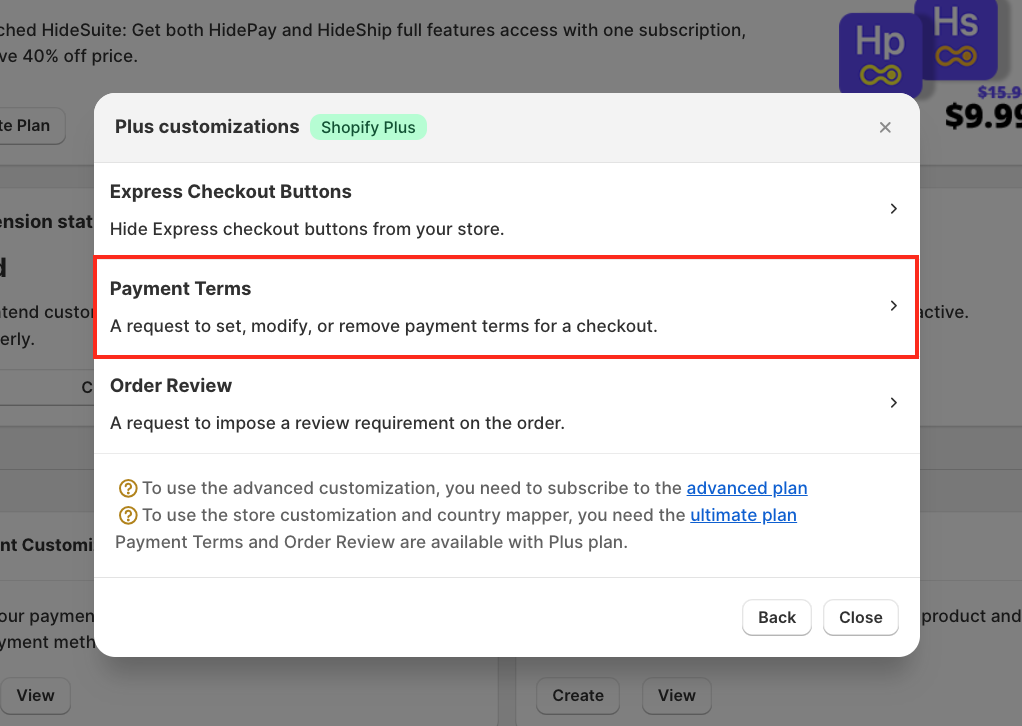
After selecting Plus Customisation, choose the Payment Terms option.
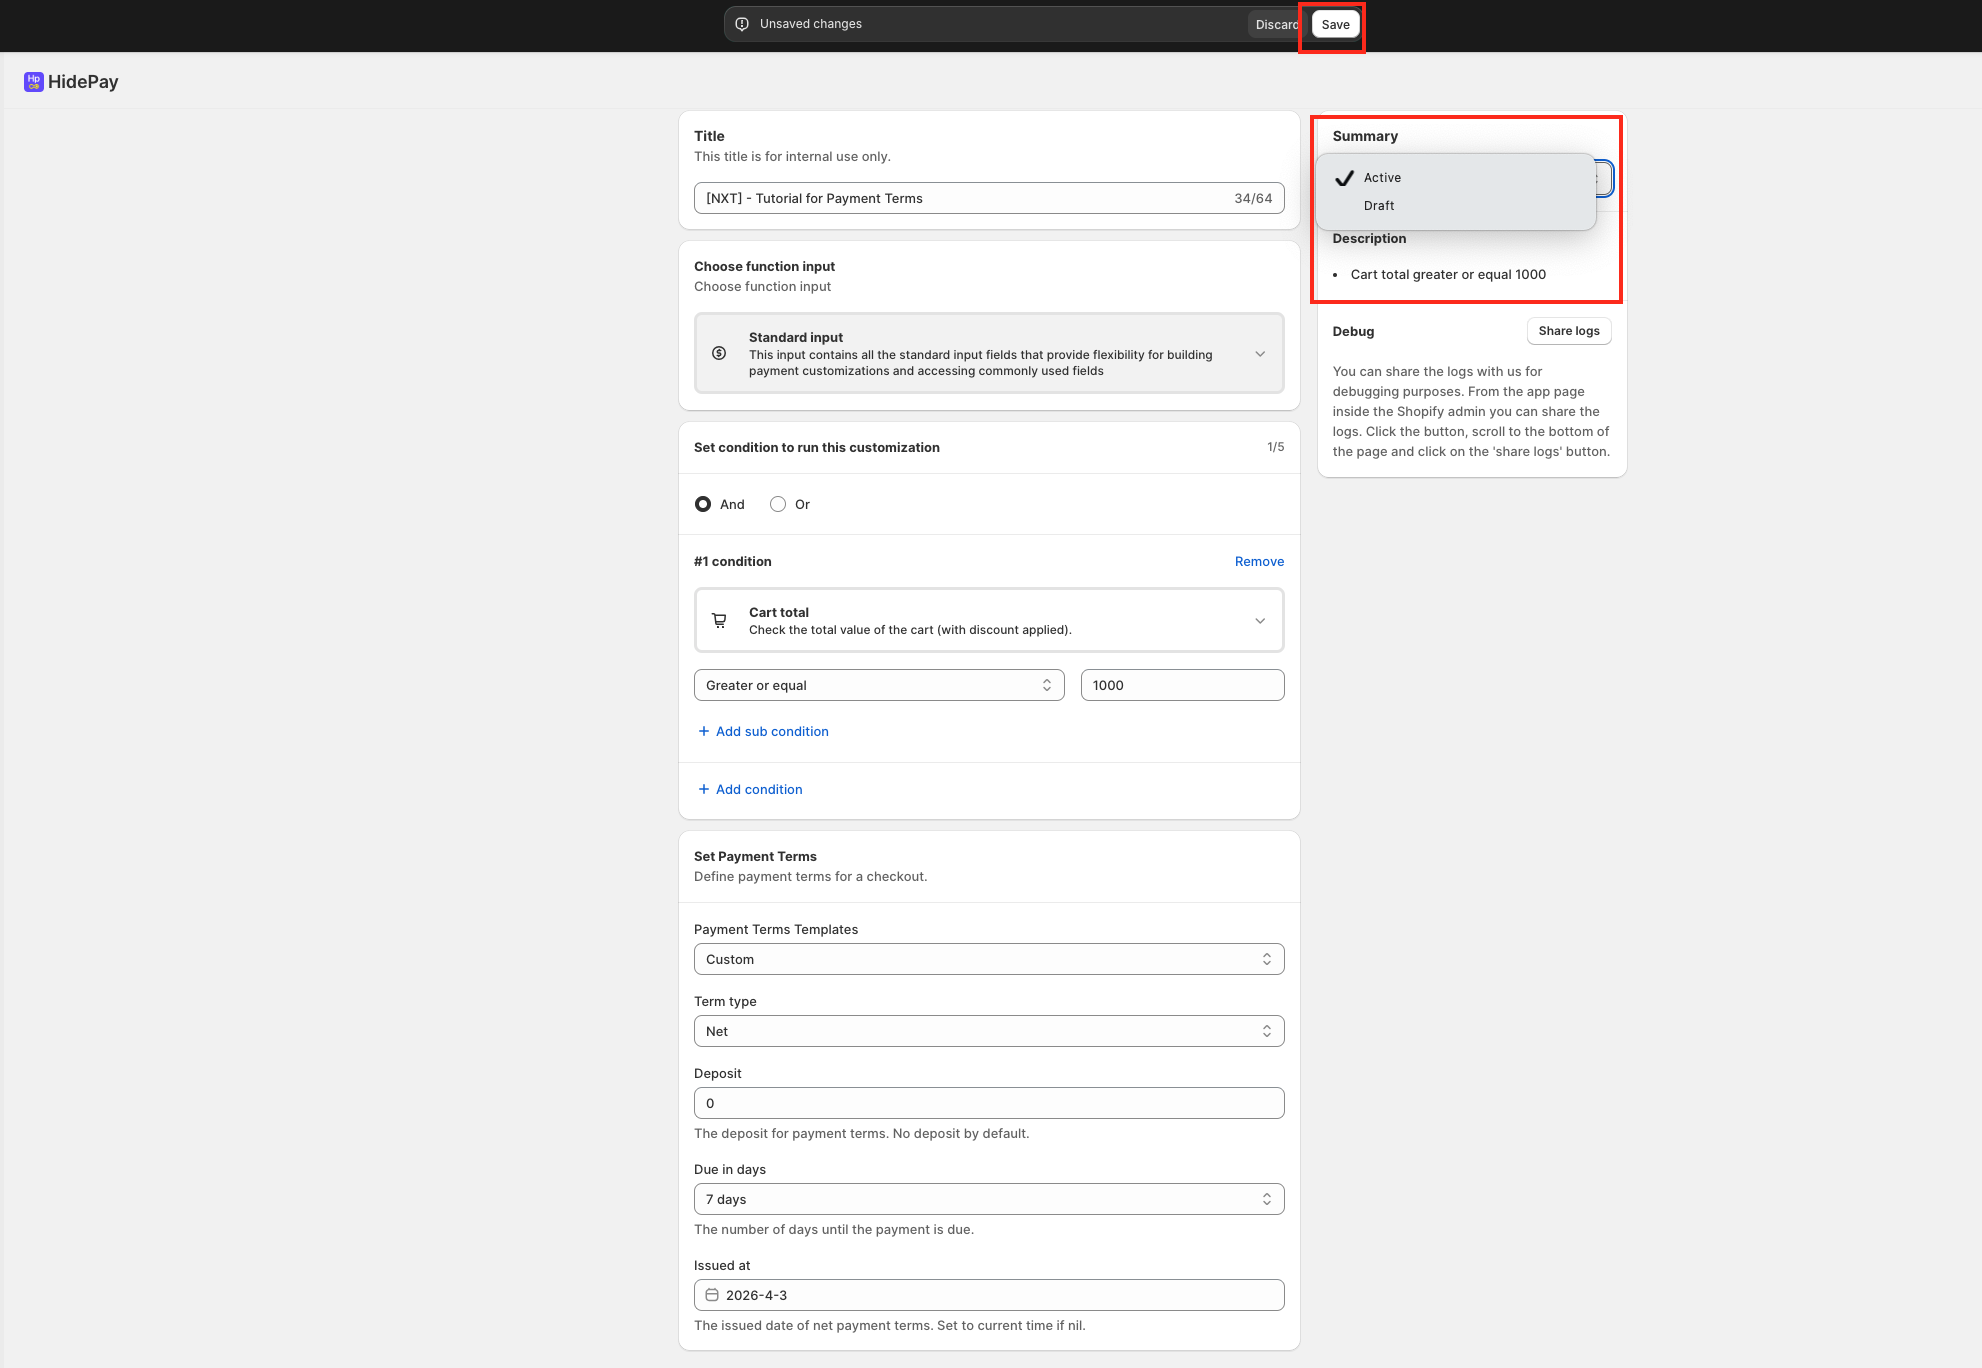
Start by adding a title for the customisation. This is for internal reference only.
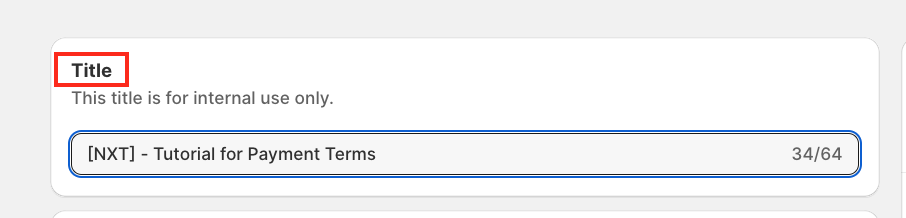
Note: The title is for internal use only and does not affect your live store.
Next, define the conditions for when these payment terms should be applied.
For this example, we will apply the rule when the cart total is greater than or equal to €1,000.
You can configure different conditions based on your requirements. You may add up to 5 conditions within a single customisation rule for greater flexibility.
✅ Example condition (from screenshot)
Cart total → Greater than or equal → €1,000

Now, let’s configure the Payment Terms step by step.
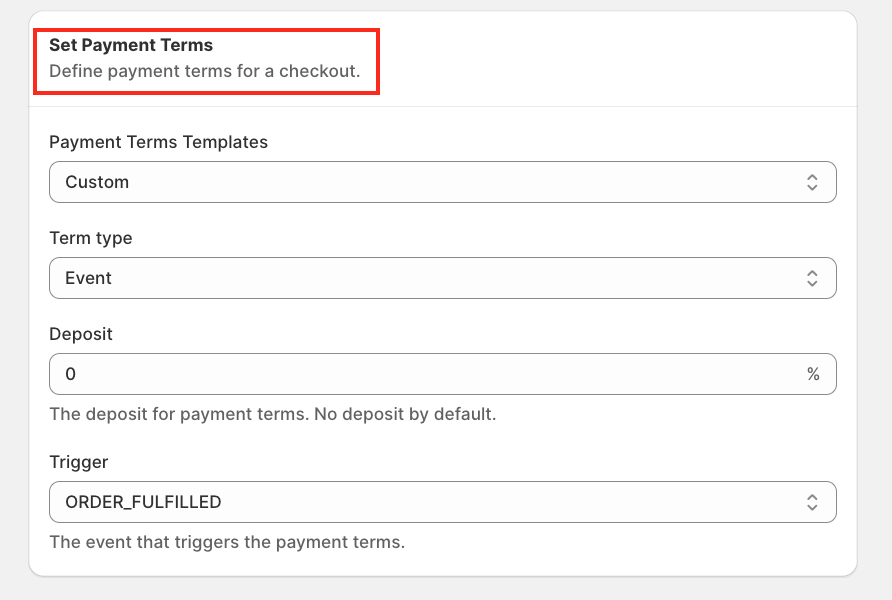
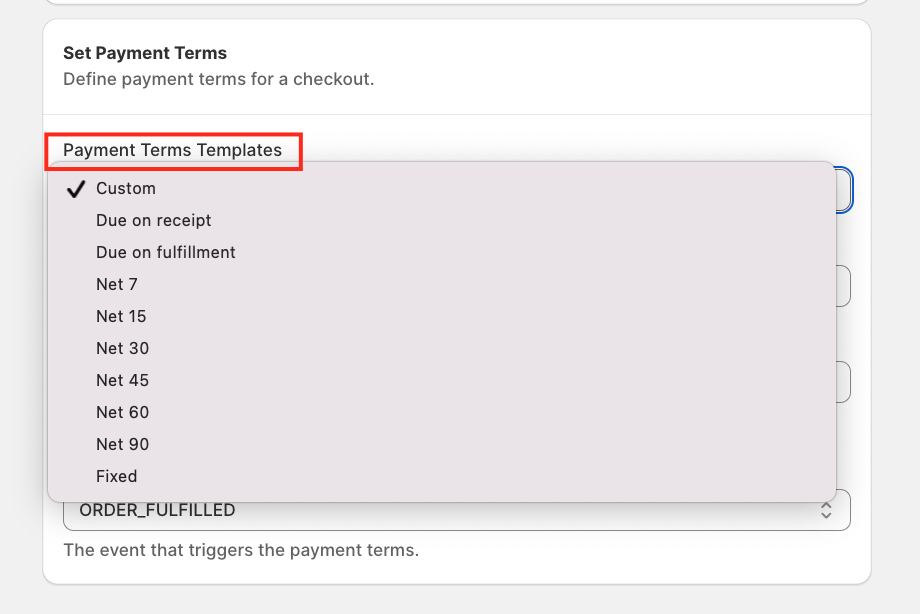
First, select a Payment Terms Template. In this example, we choose Custom.
Next, select the Term Type. For this tutorial, we chose Net.
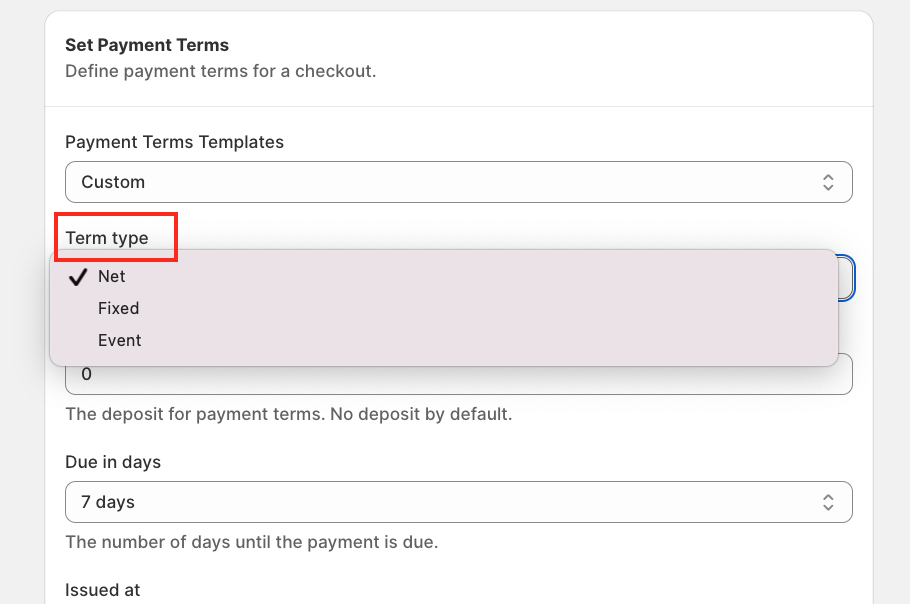
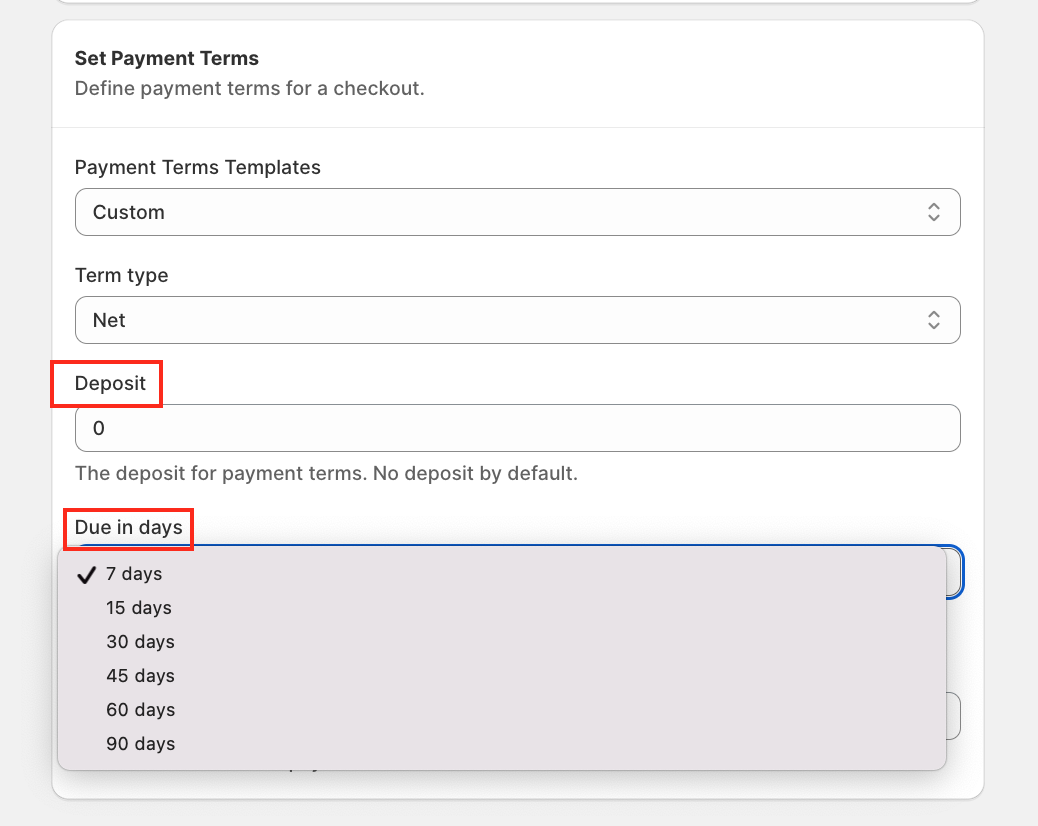
After selecting Net, a Deposit field will appear. Enter the deposit amount based on your business requirements.
Next, define when the remaining payment is due. Multiple options are available.
In this example, we set the deposit to 0% and the payment due in 7 days.
Alternatively, the issued date is the date when the payment term starts.
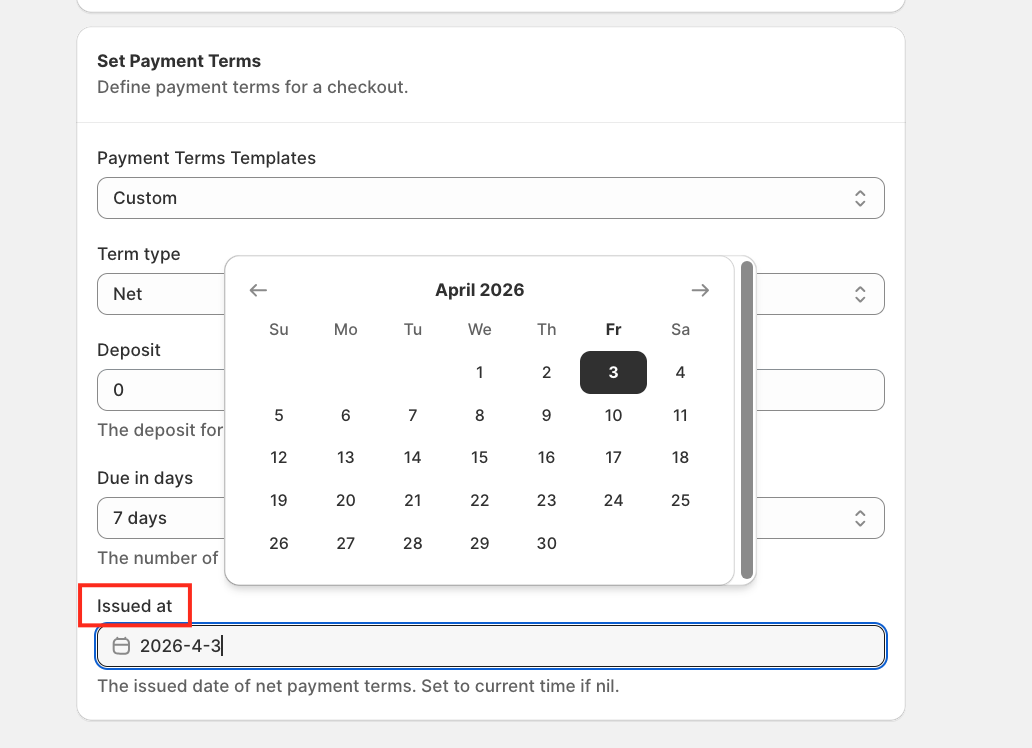
Finally, save the customisation before testing it on your store.
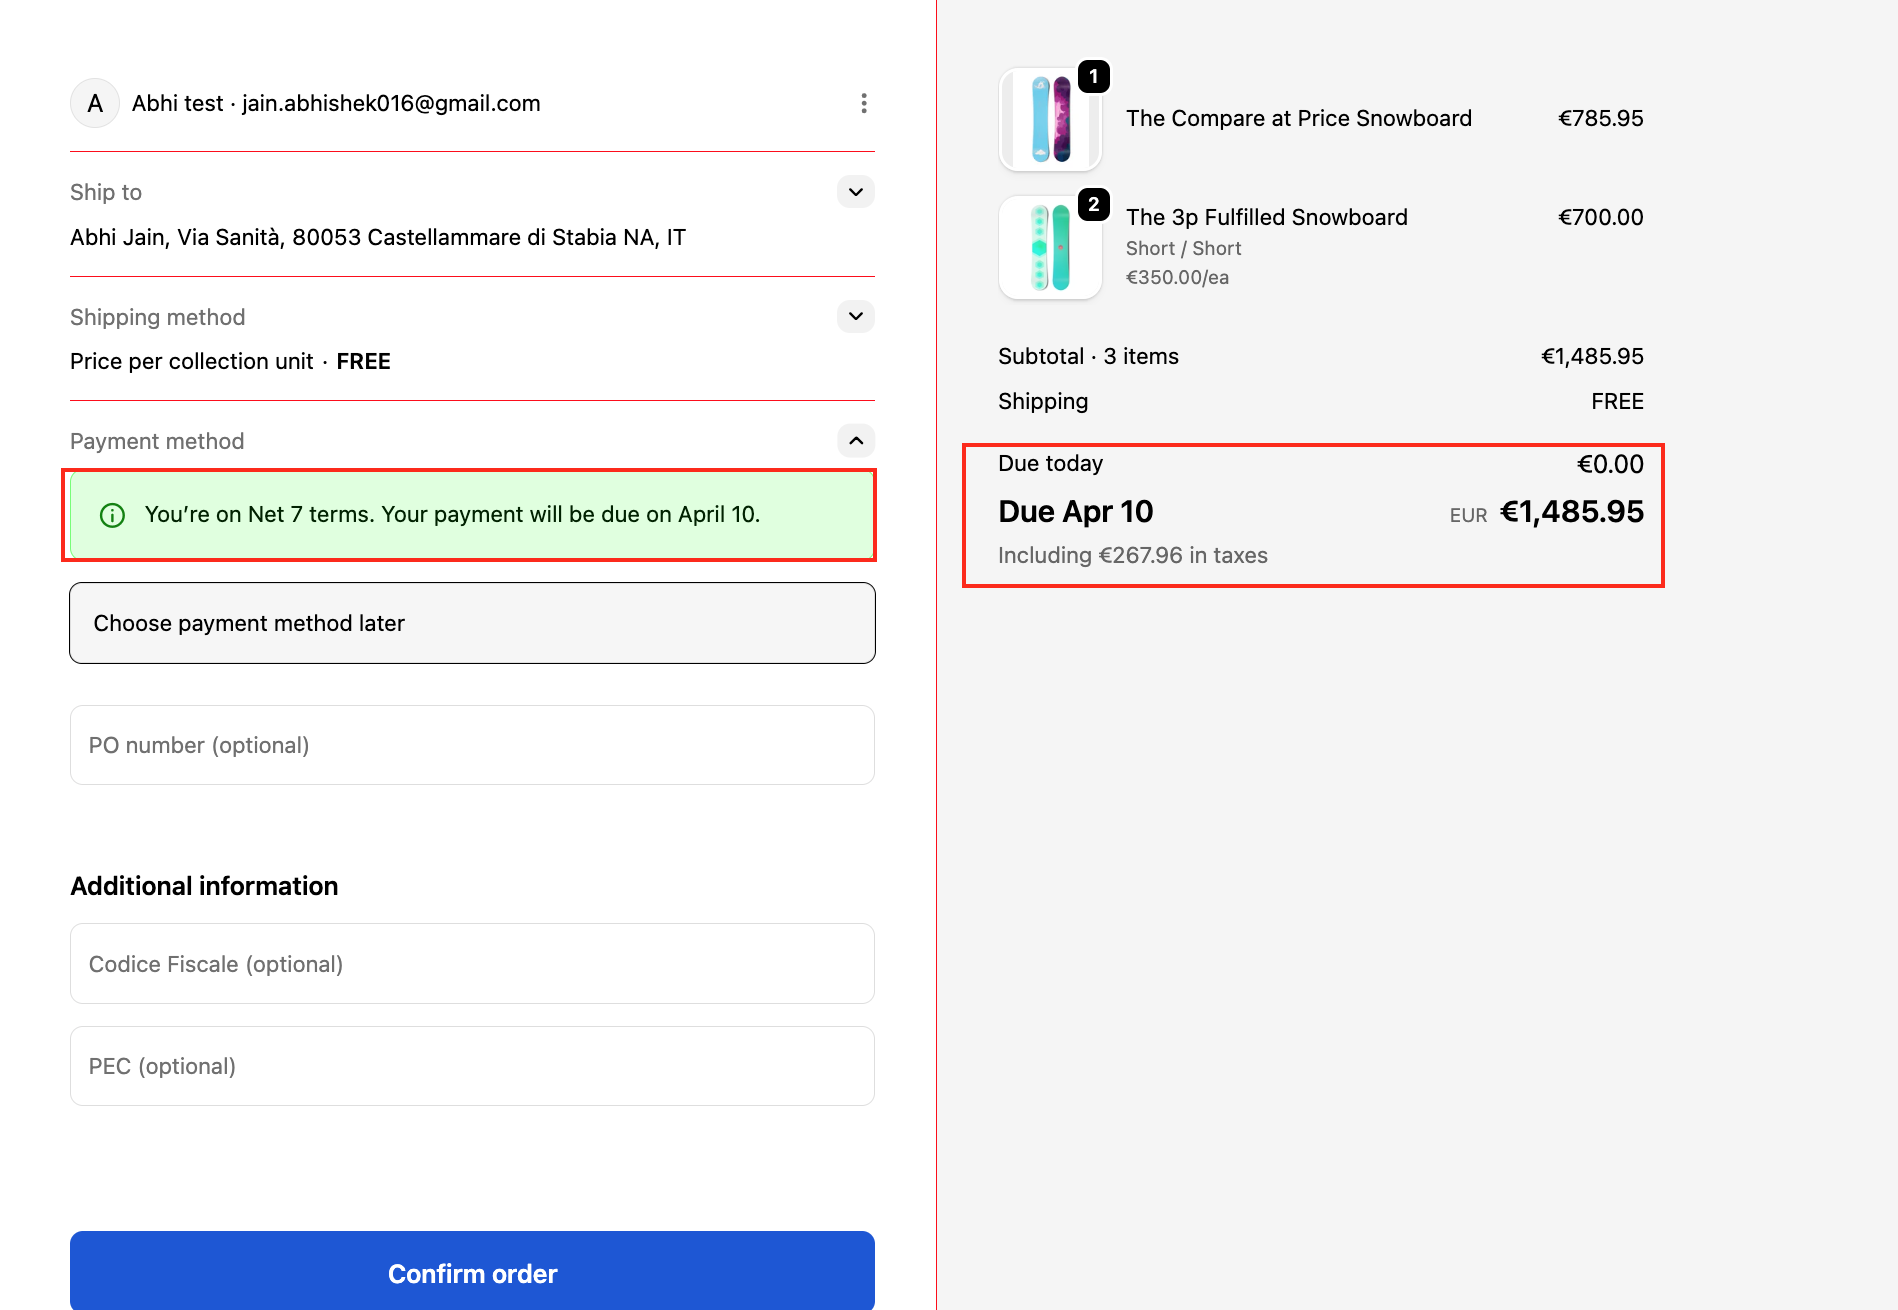
Now, test the rule on the storefront to verify that the payment terms are applied correctly.
We’re always here to help you get the most out of HidePay! 🚀