When you install Hook2Flow, the goal is simple: turn real Shopify events into powerful, automated actions. Instead of relying only on the limited triggers available in Shopify Flow, Hook2Flow allows you to react to what actually happens in your store the moment it happens.
How to set up Hook2Flow Permissions
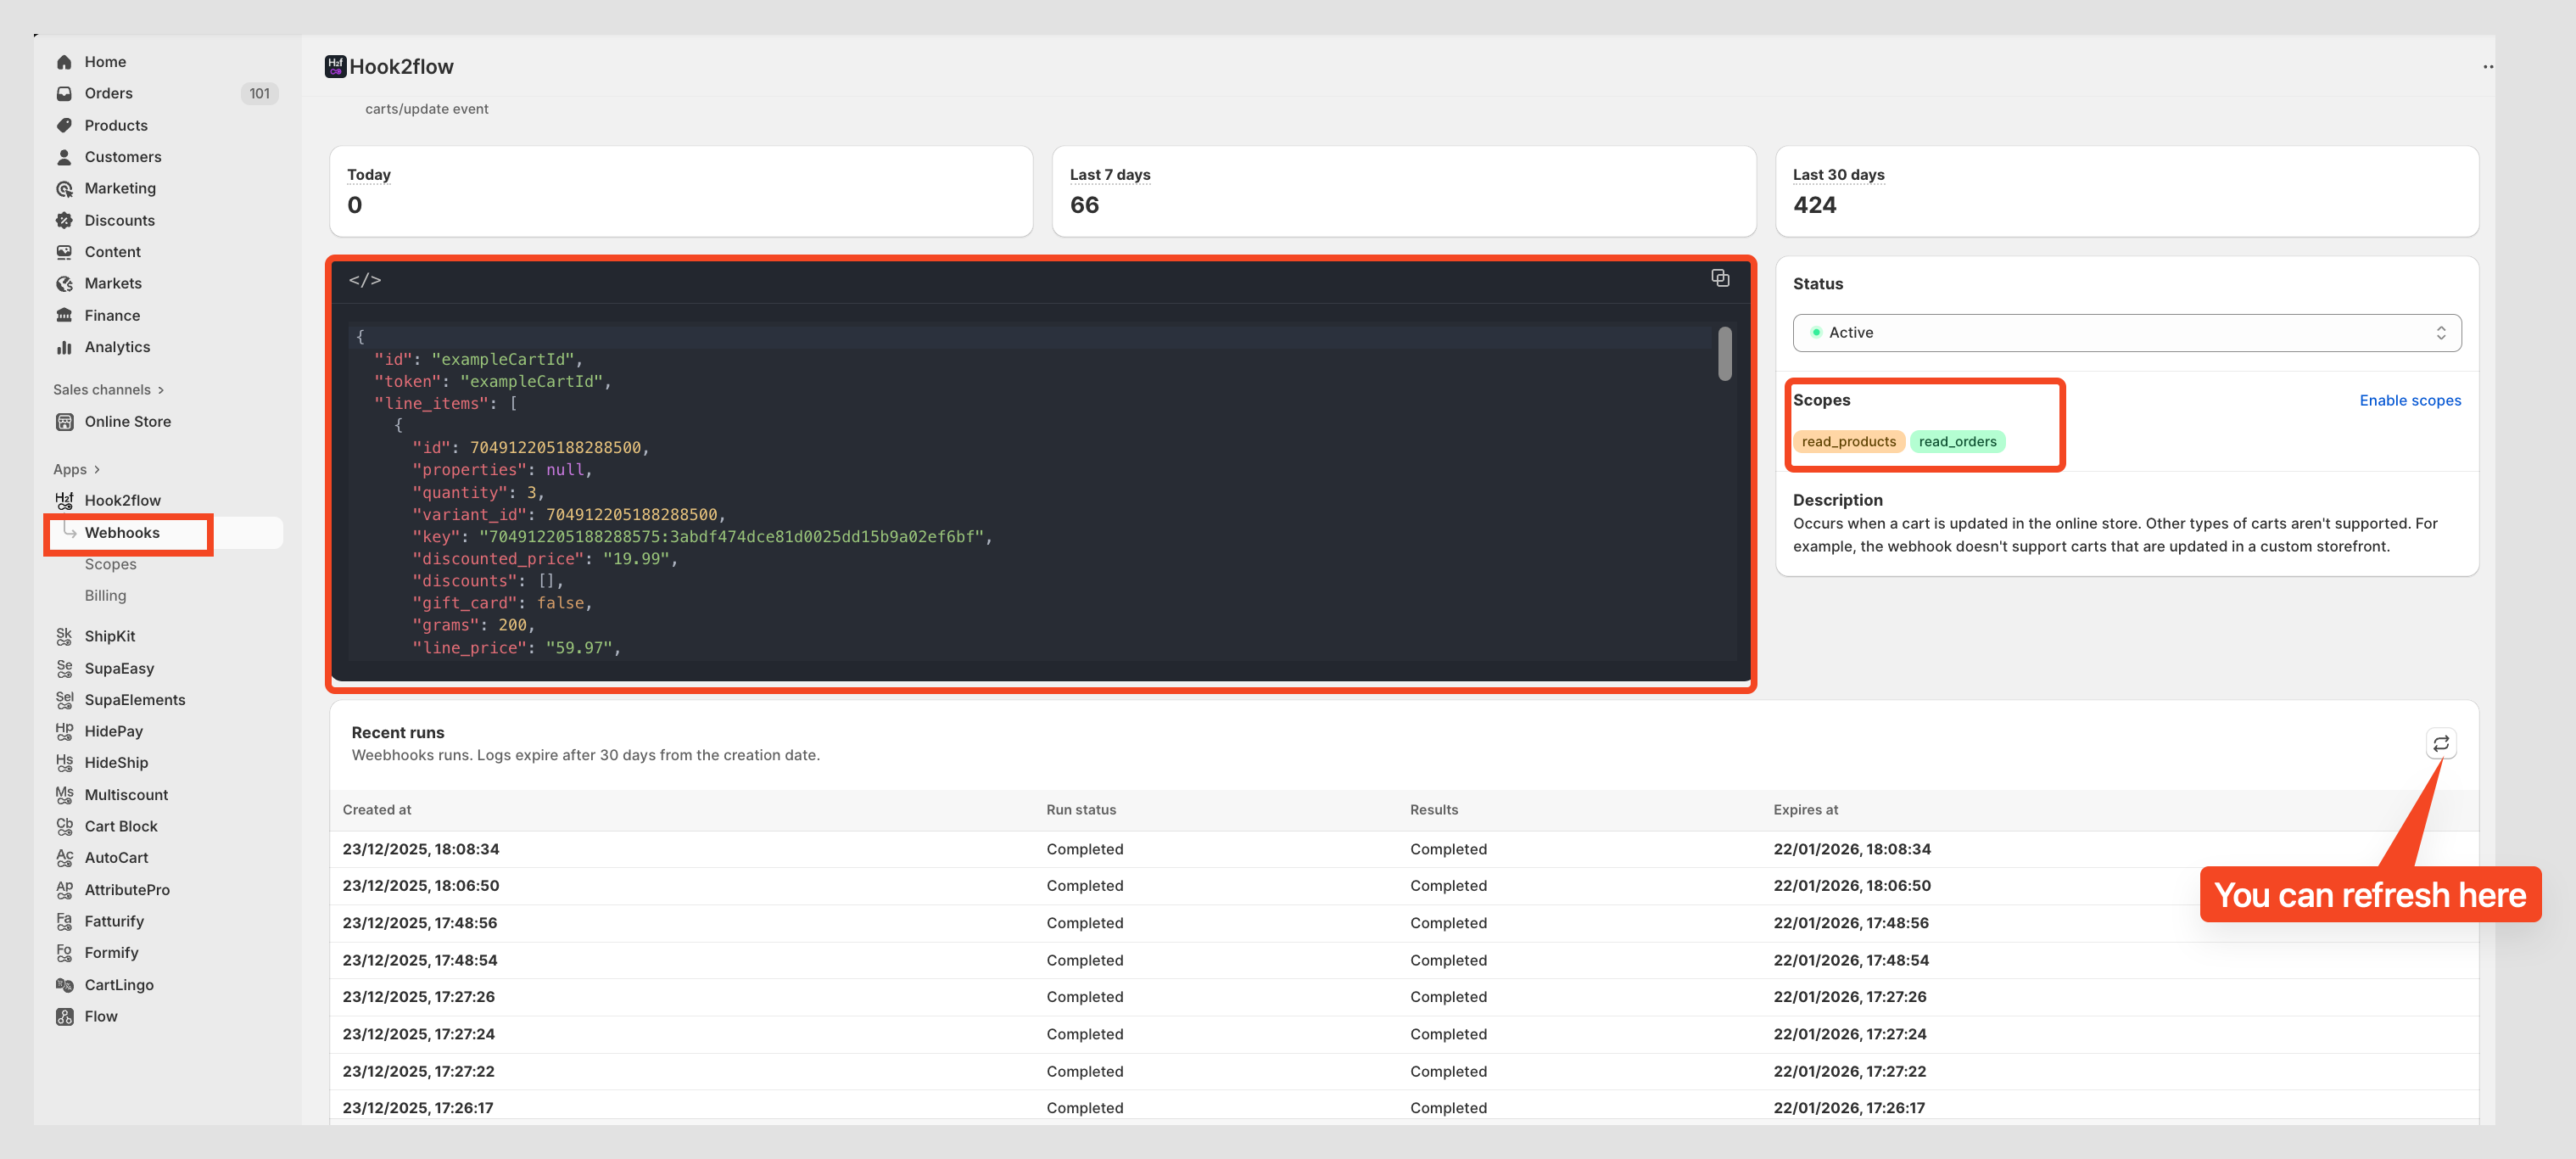
The first thing Hook2Flow needs is permission to listen to the events you care about.
Inside the app, you’ll find the Scopes section. This is where you decide which parts of your store Hook2Flow can read. Each scope corresponds to a type of event orders, products, discounts, themes, and more.
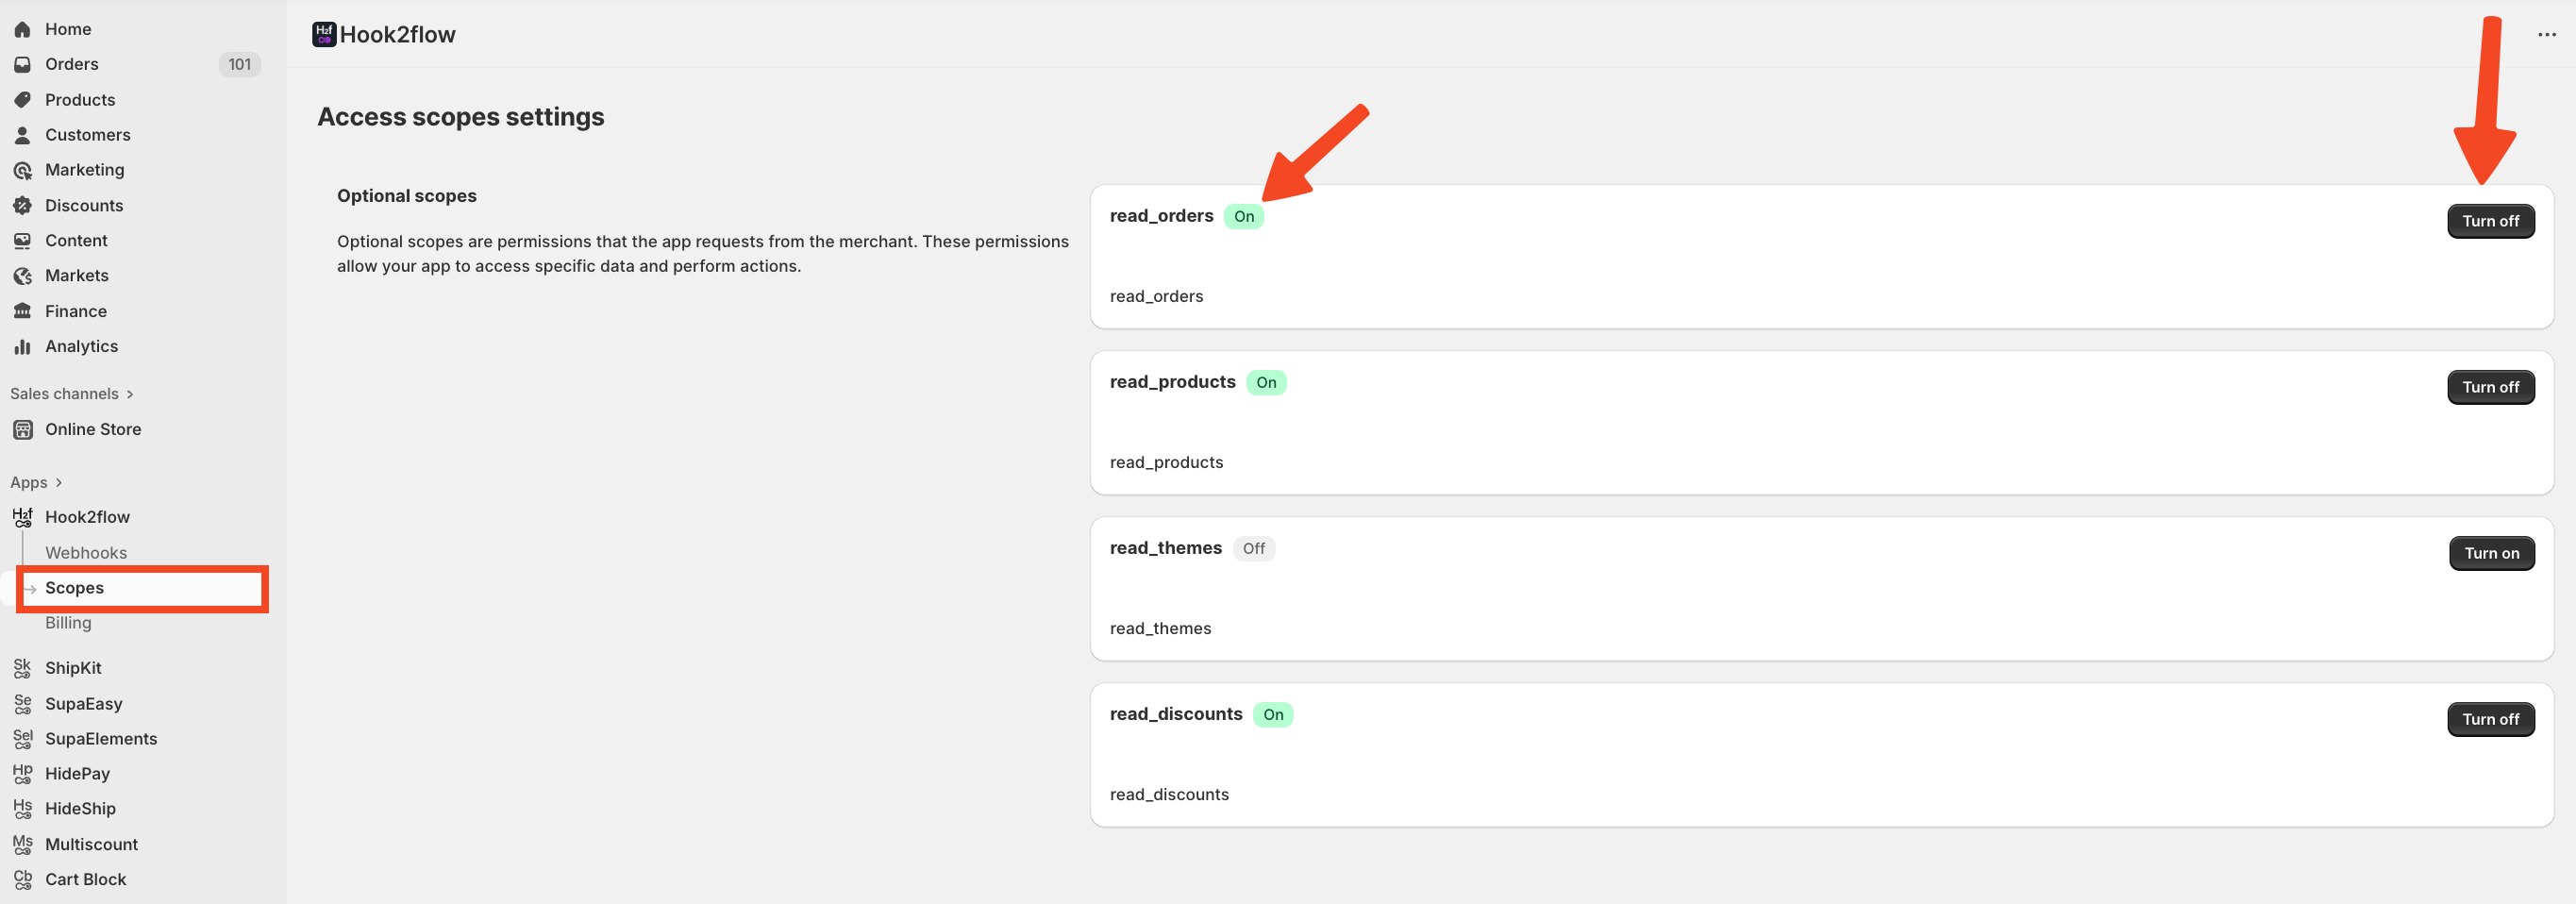
You don’t need to enable everything, it’s better to start small. This first automation is based on orders, enable the order-related scope. You can always expand later as your workflows grow and turn on further scopes.

This approach keeps your setup clean, secure, and intentional.
To simplify the experience, the required scopes are already included within each webhook, making the setup faster, clearer, and much more intuitive.
Choosing the Event That Starts your Flow
Once scopes are in place, the next step is choosing what event should trigger your rule.
In Hook2Flow, this means selecting a webhook topic. Topics are defined by Shopify and represent specific actions, such as: An order being created and cart updated.
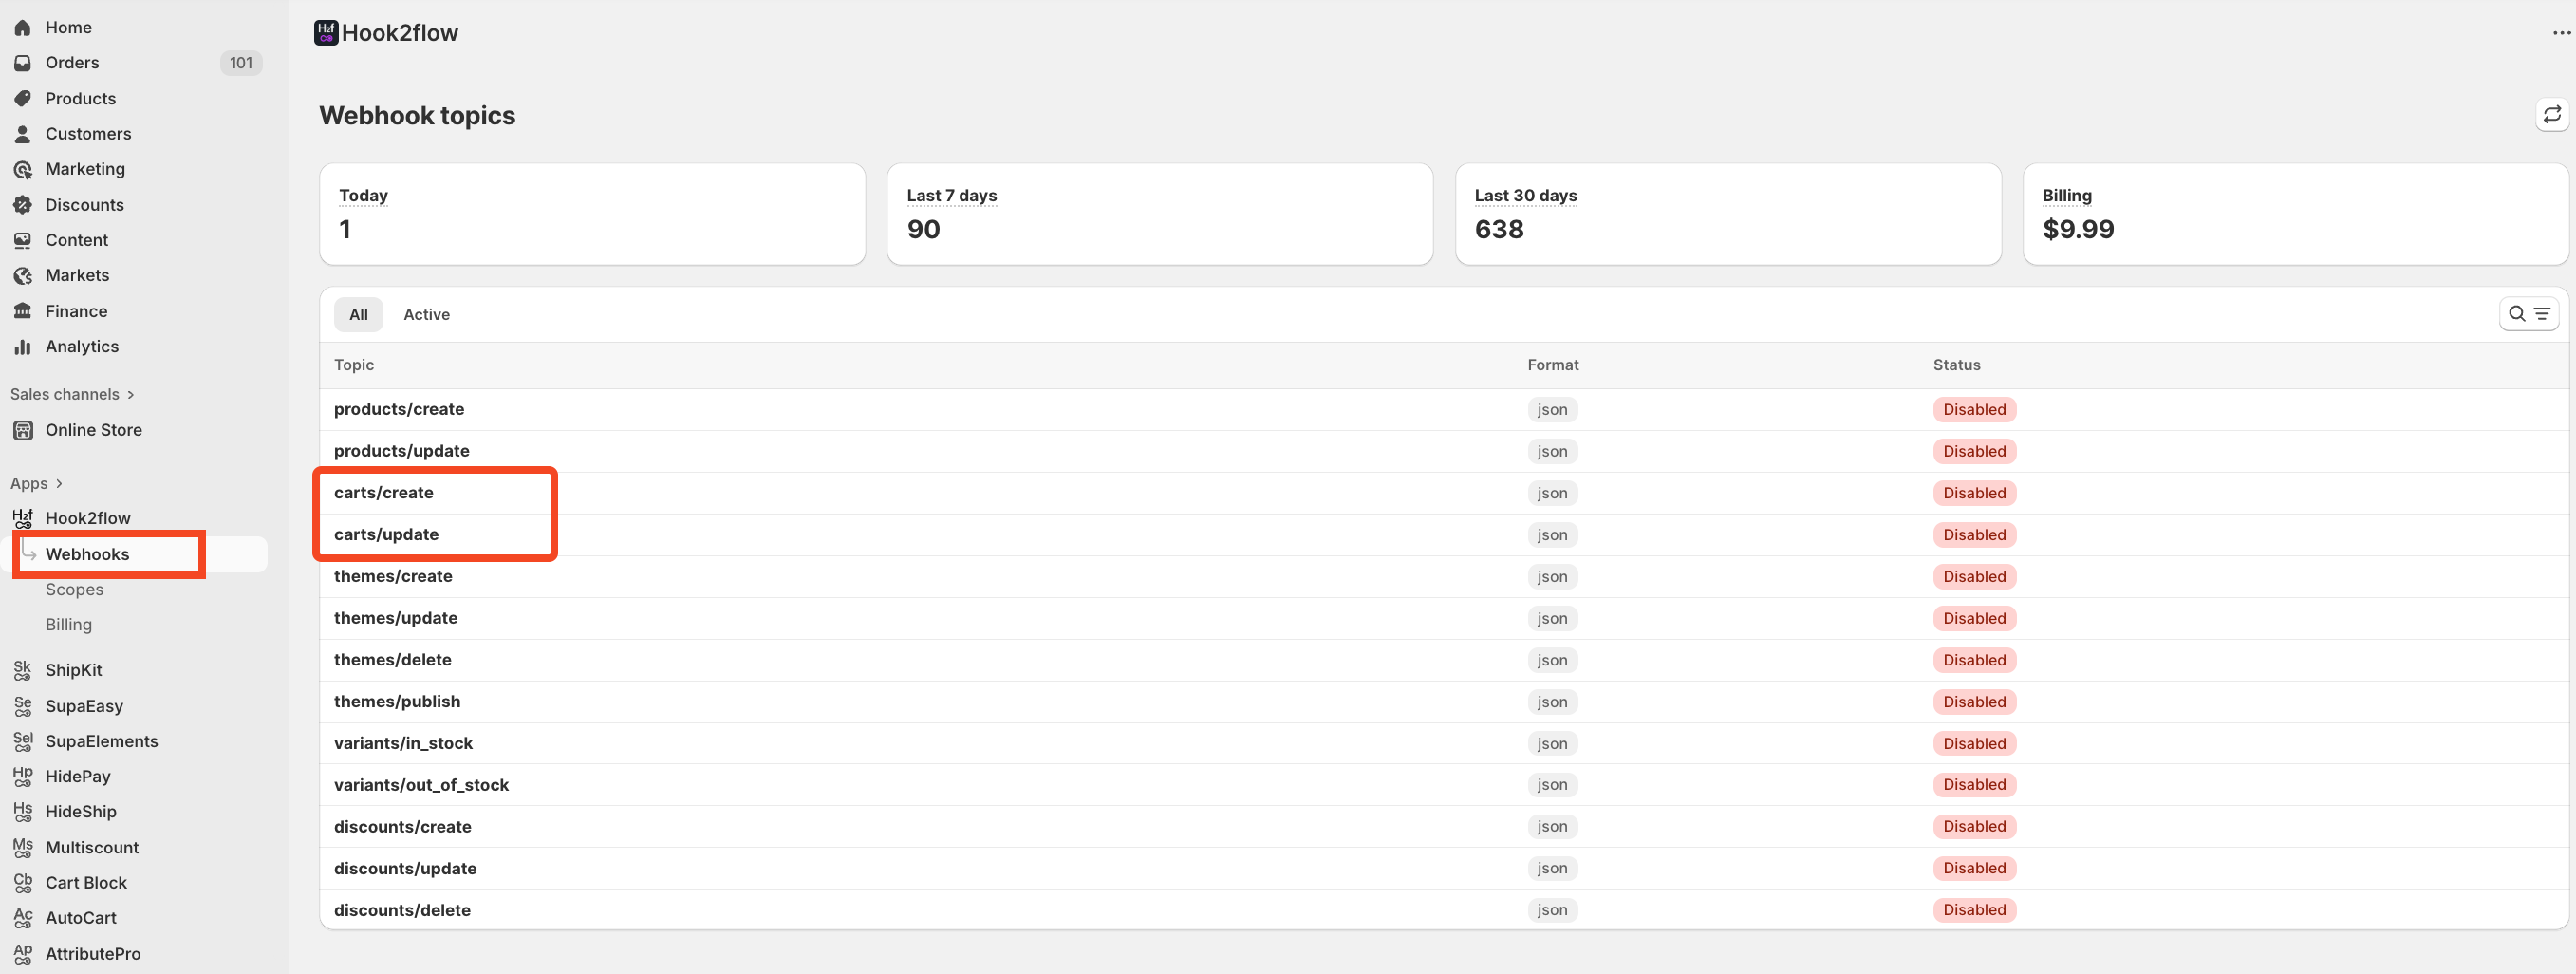
When you select a topic, Hook2Flow begins tracking that exact event. From that moment on, every time the event occurs, Shopify will send a payload and Hook2Flow will capture it.
This payload is the foundation of your automation trigger.
Working with Payload Data in Shopify Flow
Hook2Flow guarantees the payload and provides examples so you know what data is available. You don’t need to touch the payload directly or understand its raw coding structure.
Inside Shopify Flow, this data becomes fields you can use in conditions and logic. You can check values, compare amounts, verify statuses, and decide which action should run, all this without writing code.
How to create a Shopify Flow with Hook2Flow
With Hook2Flow tracking webhooks in the background, you can now move to Shopify Flow to create your workflow rule.
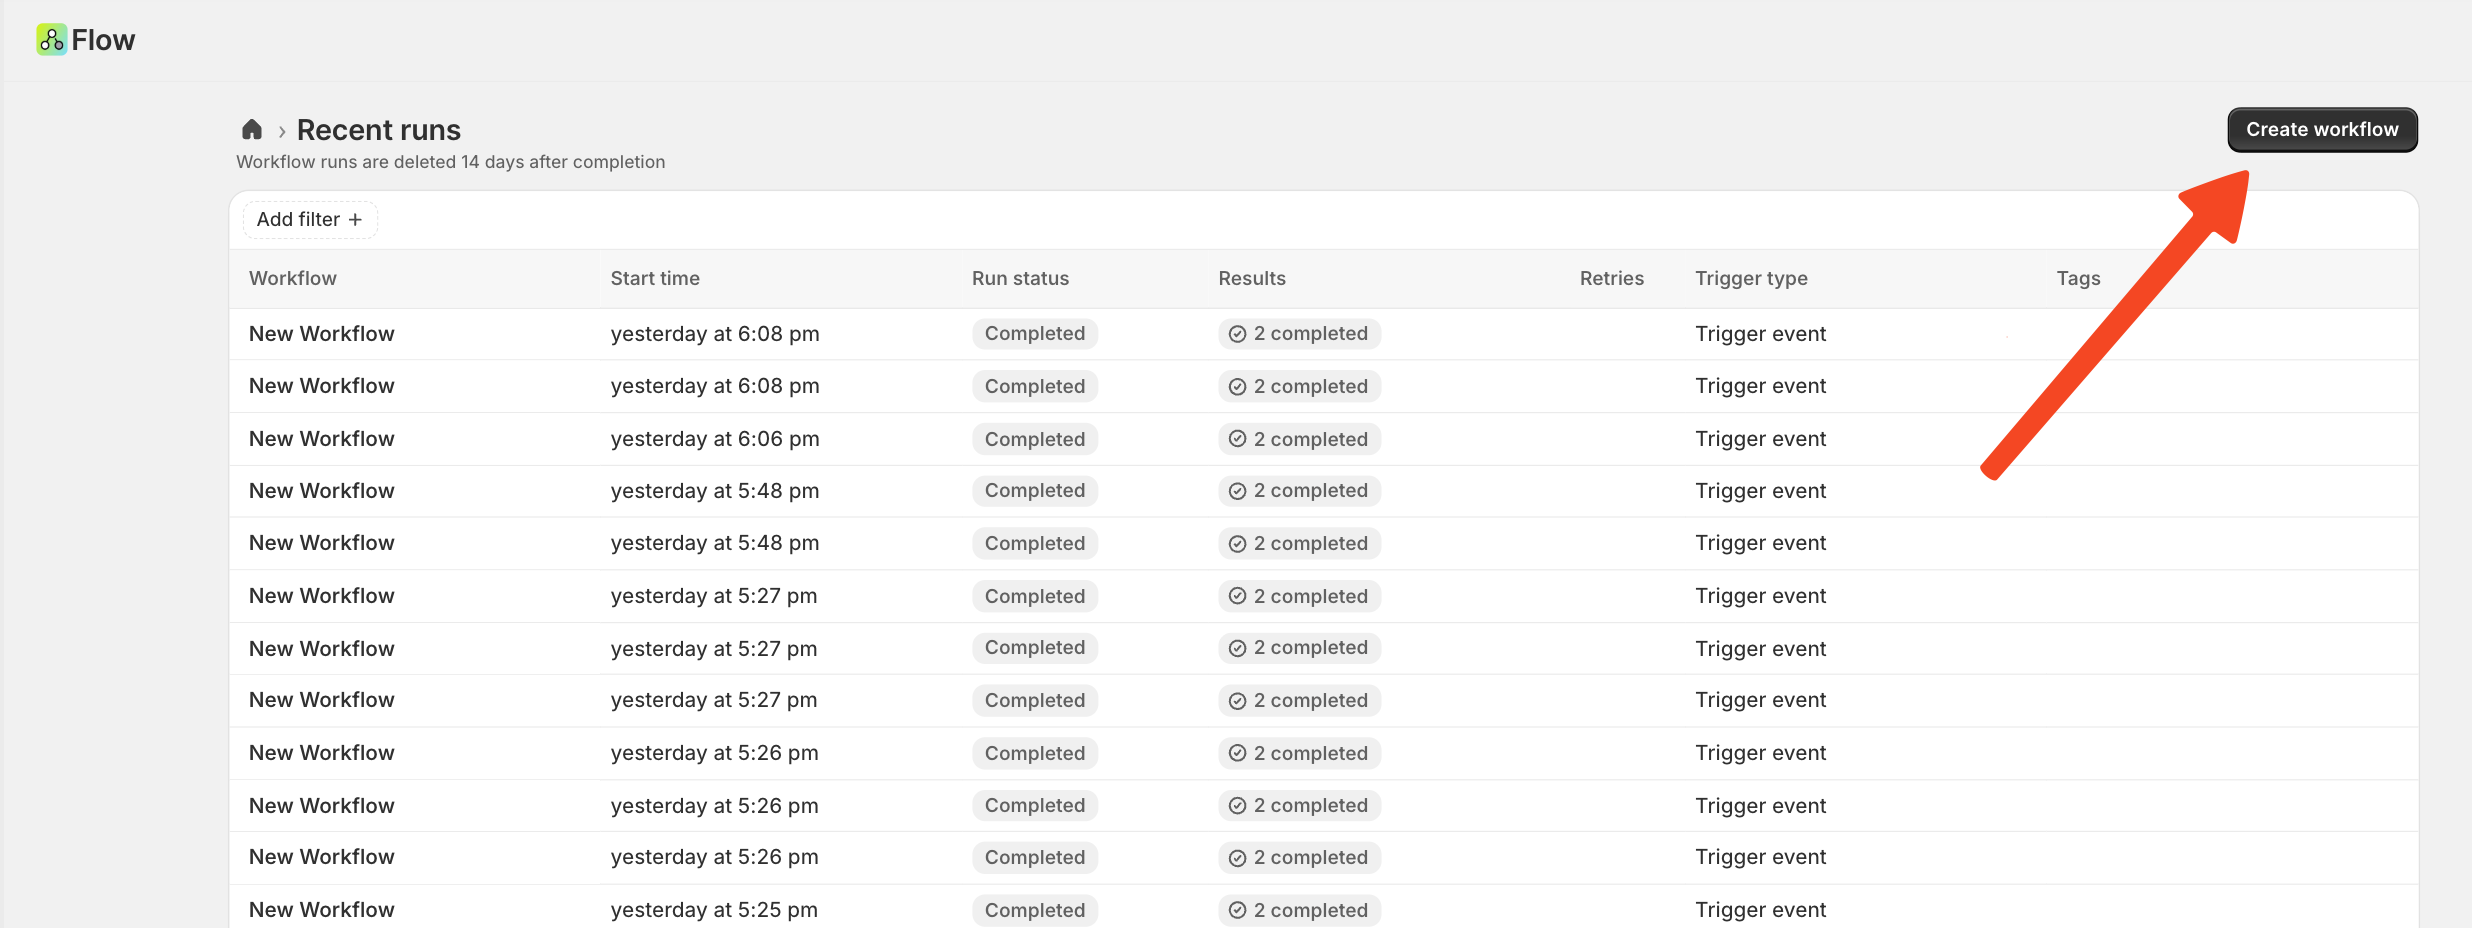
Then select a Hook2Flow trigger related to the webhook topic you chose earlier. From there, you can add conditions if needed, and finally define the actions you want the rule to perform.
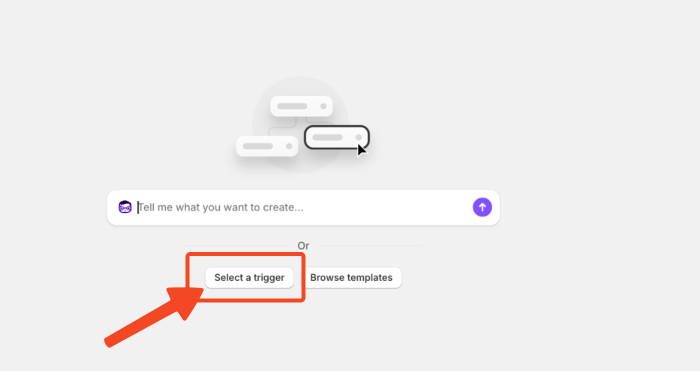
Once you choose Select a Trigger, a new window will appear and you will be able to select Hook2flow as your webhook manager.
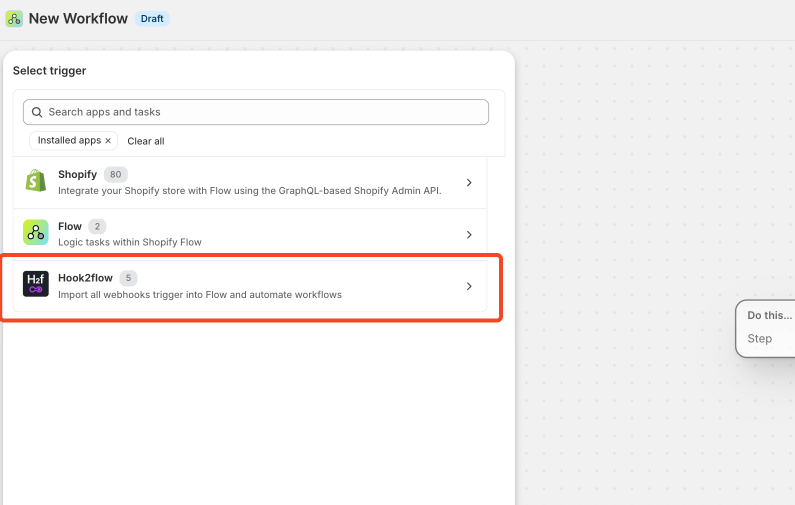
Now you can choose which events you want to track and the Cart Events according to the webhook we have previously activated on Hook2Flow.
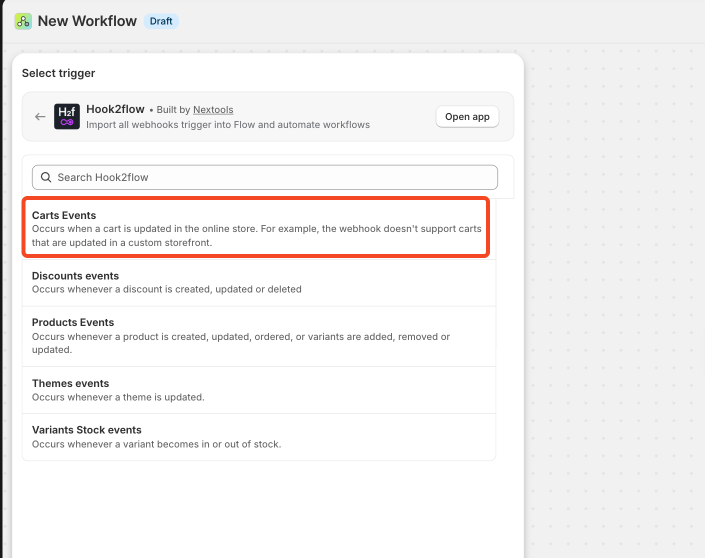
From Now on all events connected to the Cart will be available and can be used as a trigger for your flow.

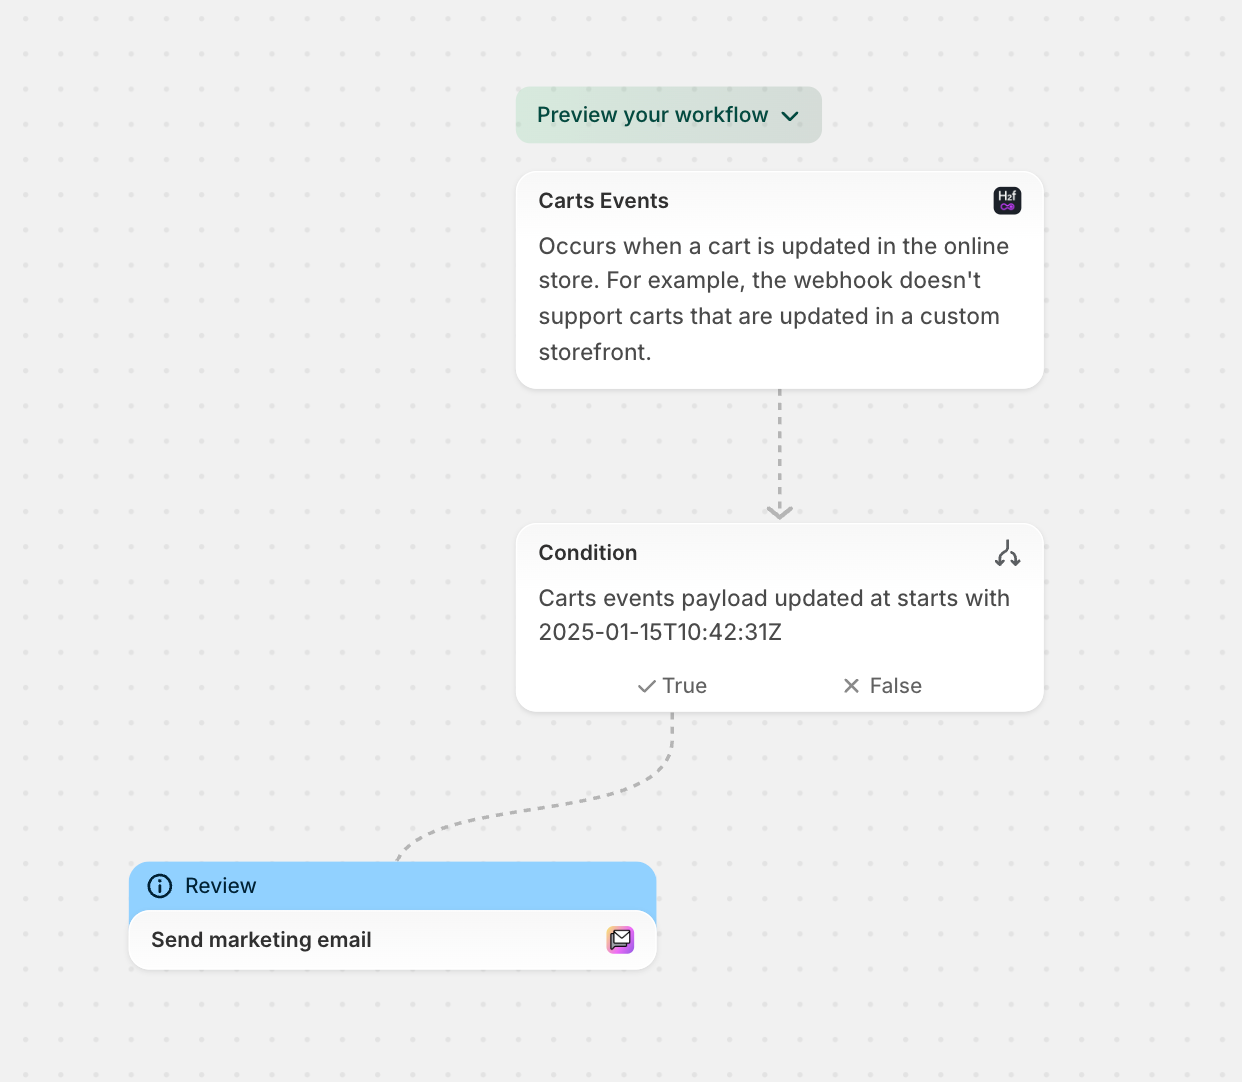
You can now complete your workflow by selecting the condition that better suit your need and the consequential action you want to trigger.
The action will be triggered only if the selected conditions are met.

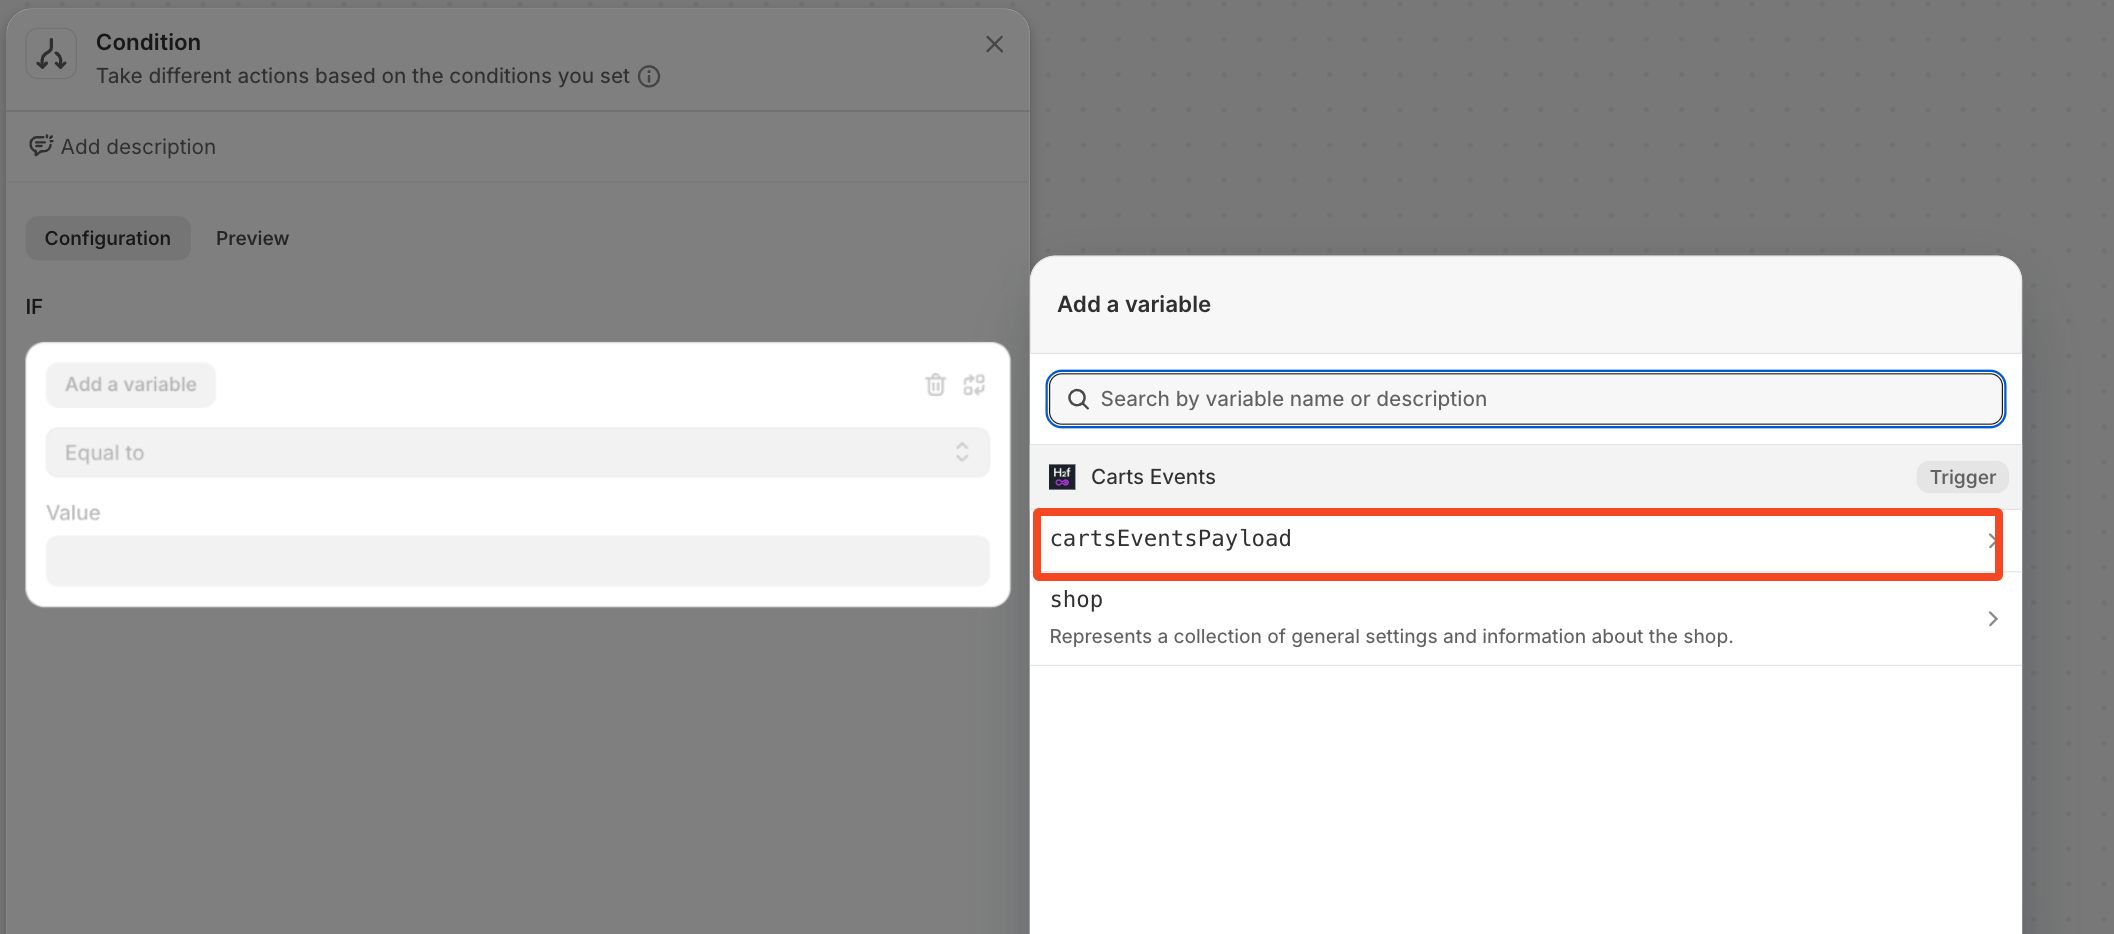
Then Add a variable and select cartEventsPayload
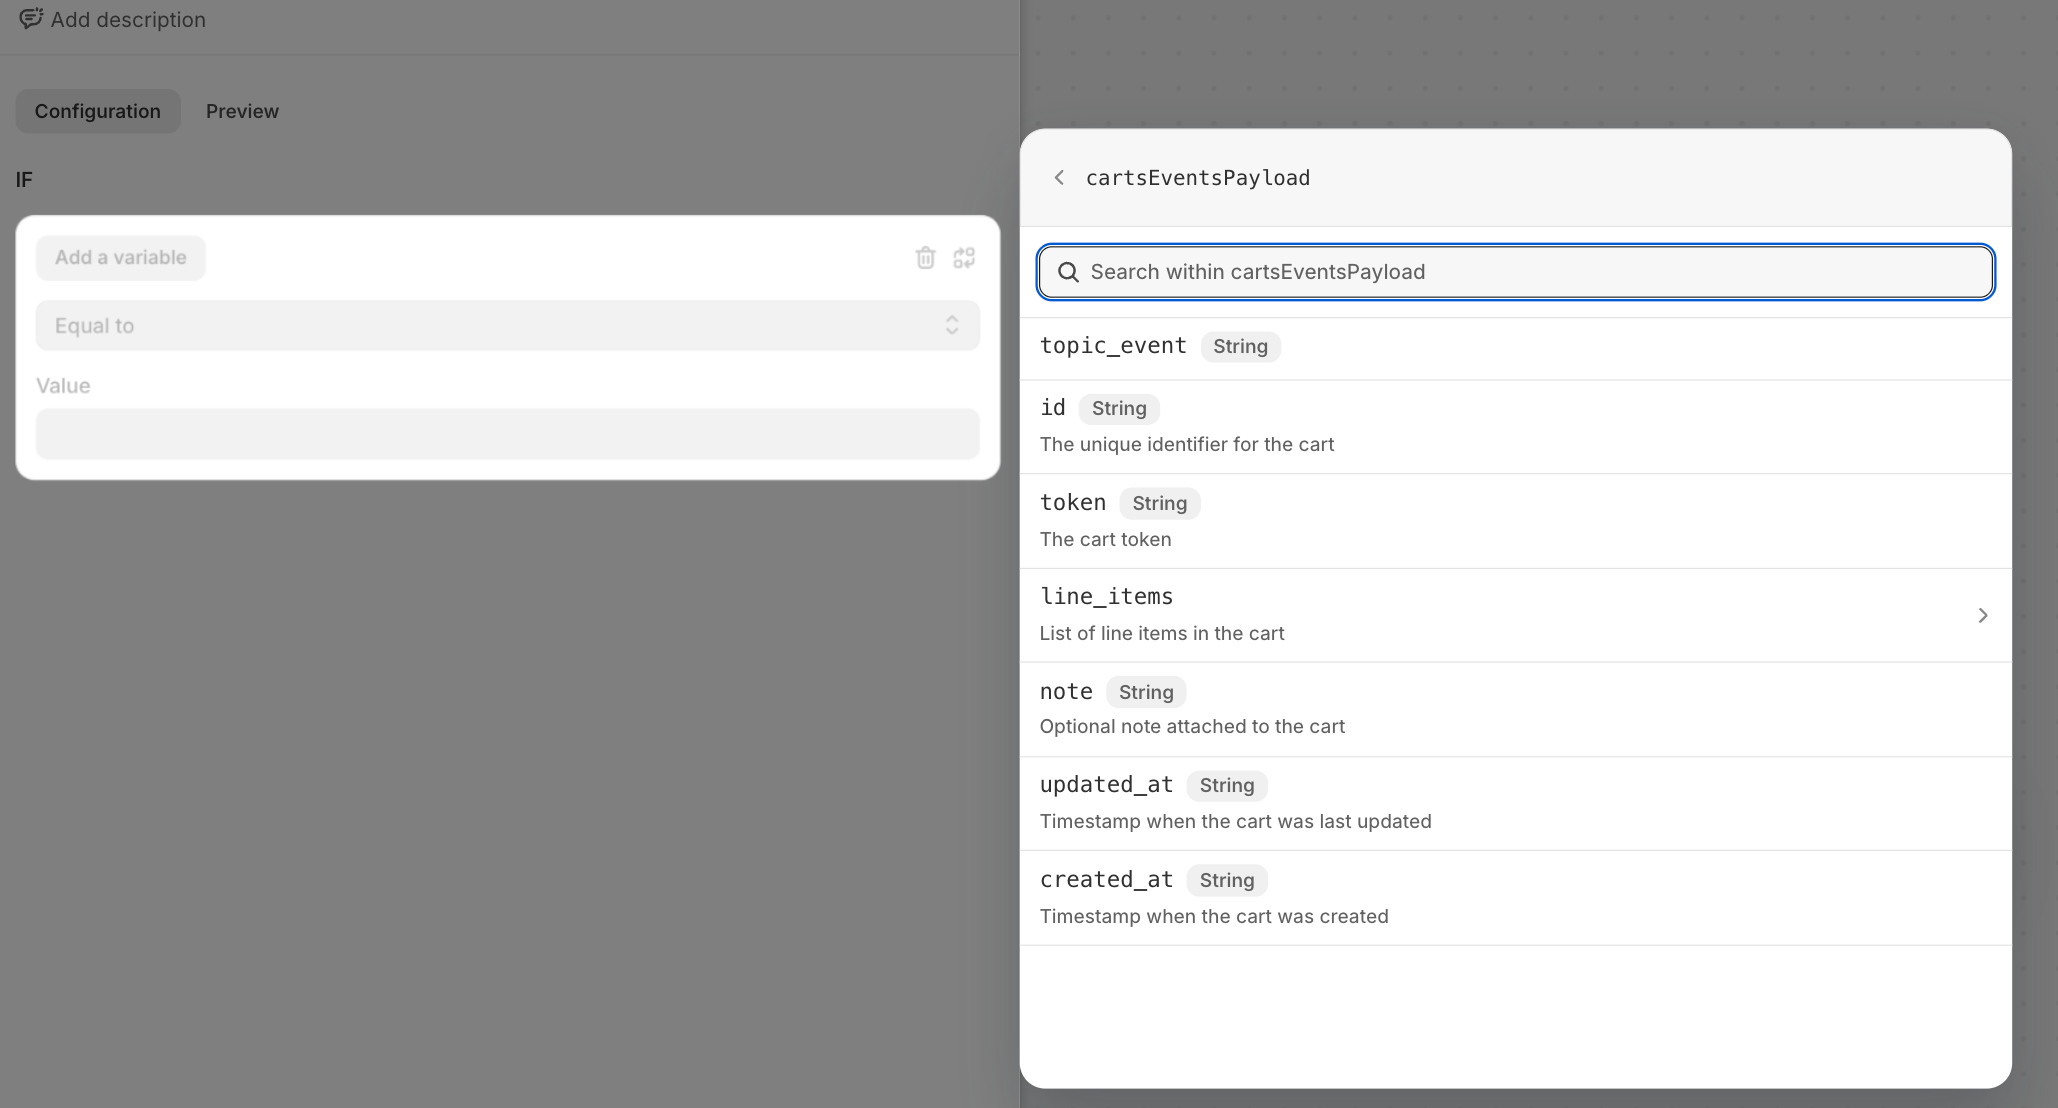
You can now select the Event you want to monitor within what is available in the payload.
Then you have to define the condition to validate.
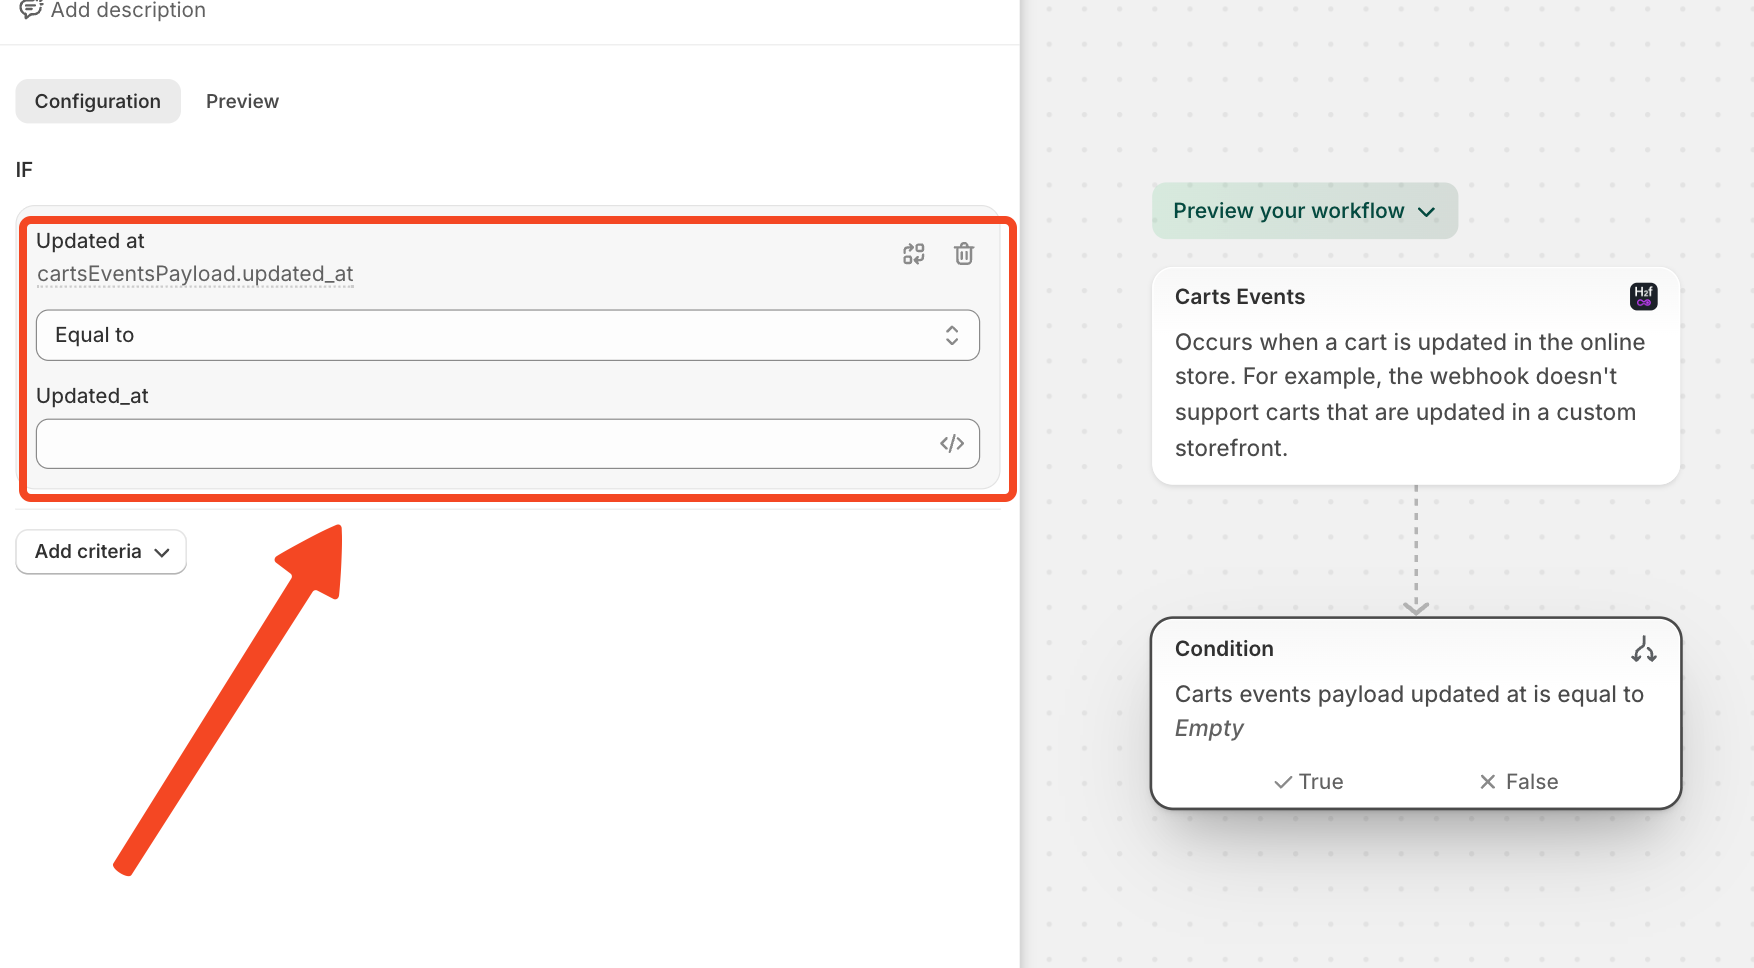
After setting the trigger and the condition to be verified, you need to set the action you want to be performed, depending on whether the condition is met or not.
In this example, we chose to send a marketing email whenever the shopping cart is updated, featuring a special offer.