The Automatic Gift with Purchase feature in Multiscount allows you to automatically add a free (or discounted) gift to the cart when customers meet specific conditions. This is one of the most effective promotional strategies to increase AOV and conversions, and it works seamlessly on the storefront once properly configured.
Before You Start
To use the Gift with Purchase automation, make sure that:
-
The Multiscount Advanced Plan is active on your store
-
The product you want to use as a gift is available and published
-
You have access to your Shopify Theme Editor
Let's see what steps you need to take to create an Automatic Gift with Purchase.
Step 1 – Activate the Automation in Your Theme (Required)
To allow Multiscount to automatically add the gift to the cart, you must enable the corresponding app embed in your theme.
Go to Online Store → Themes, click Customize on your active theme, and open the App embeds section.
Here, enable “Multiscount Auto Gift” and make sure to save the changes.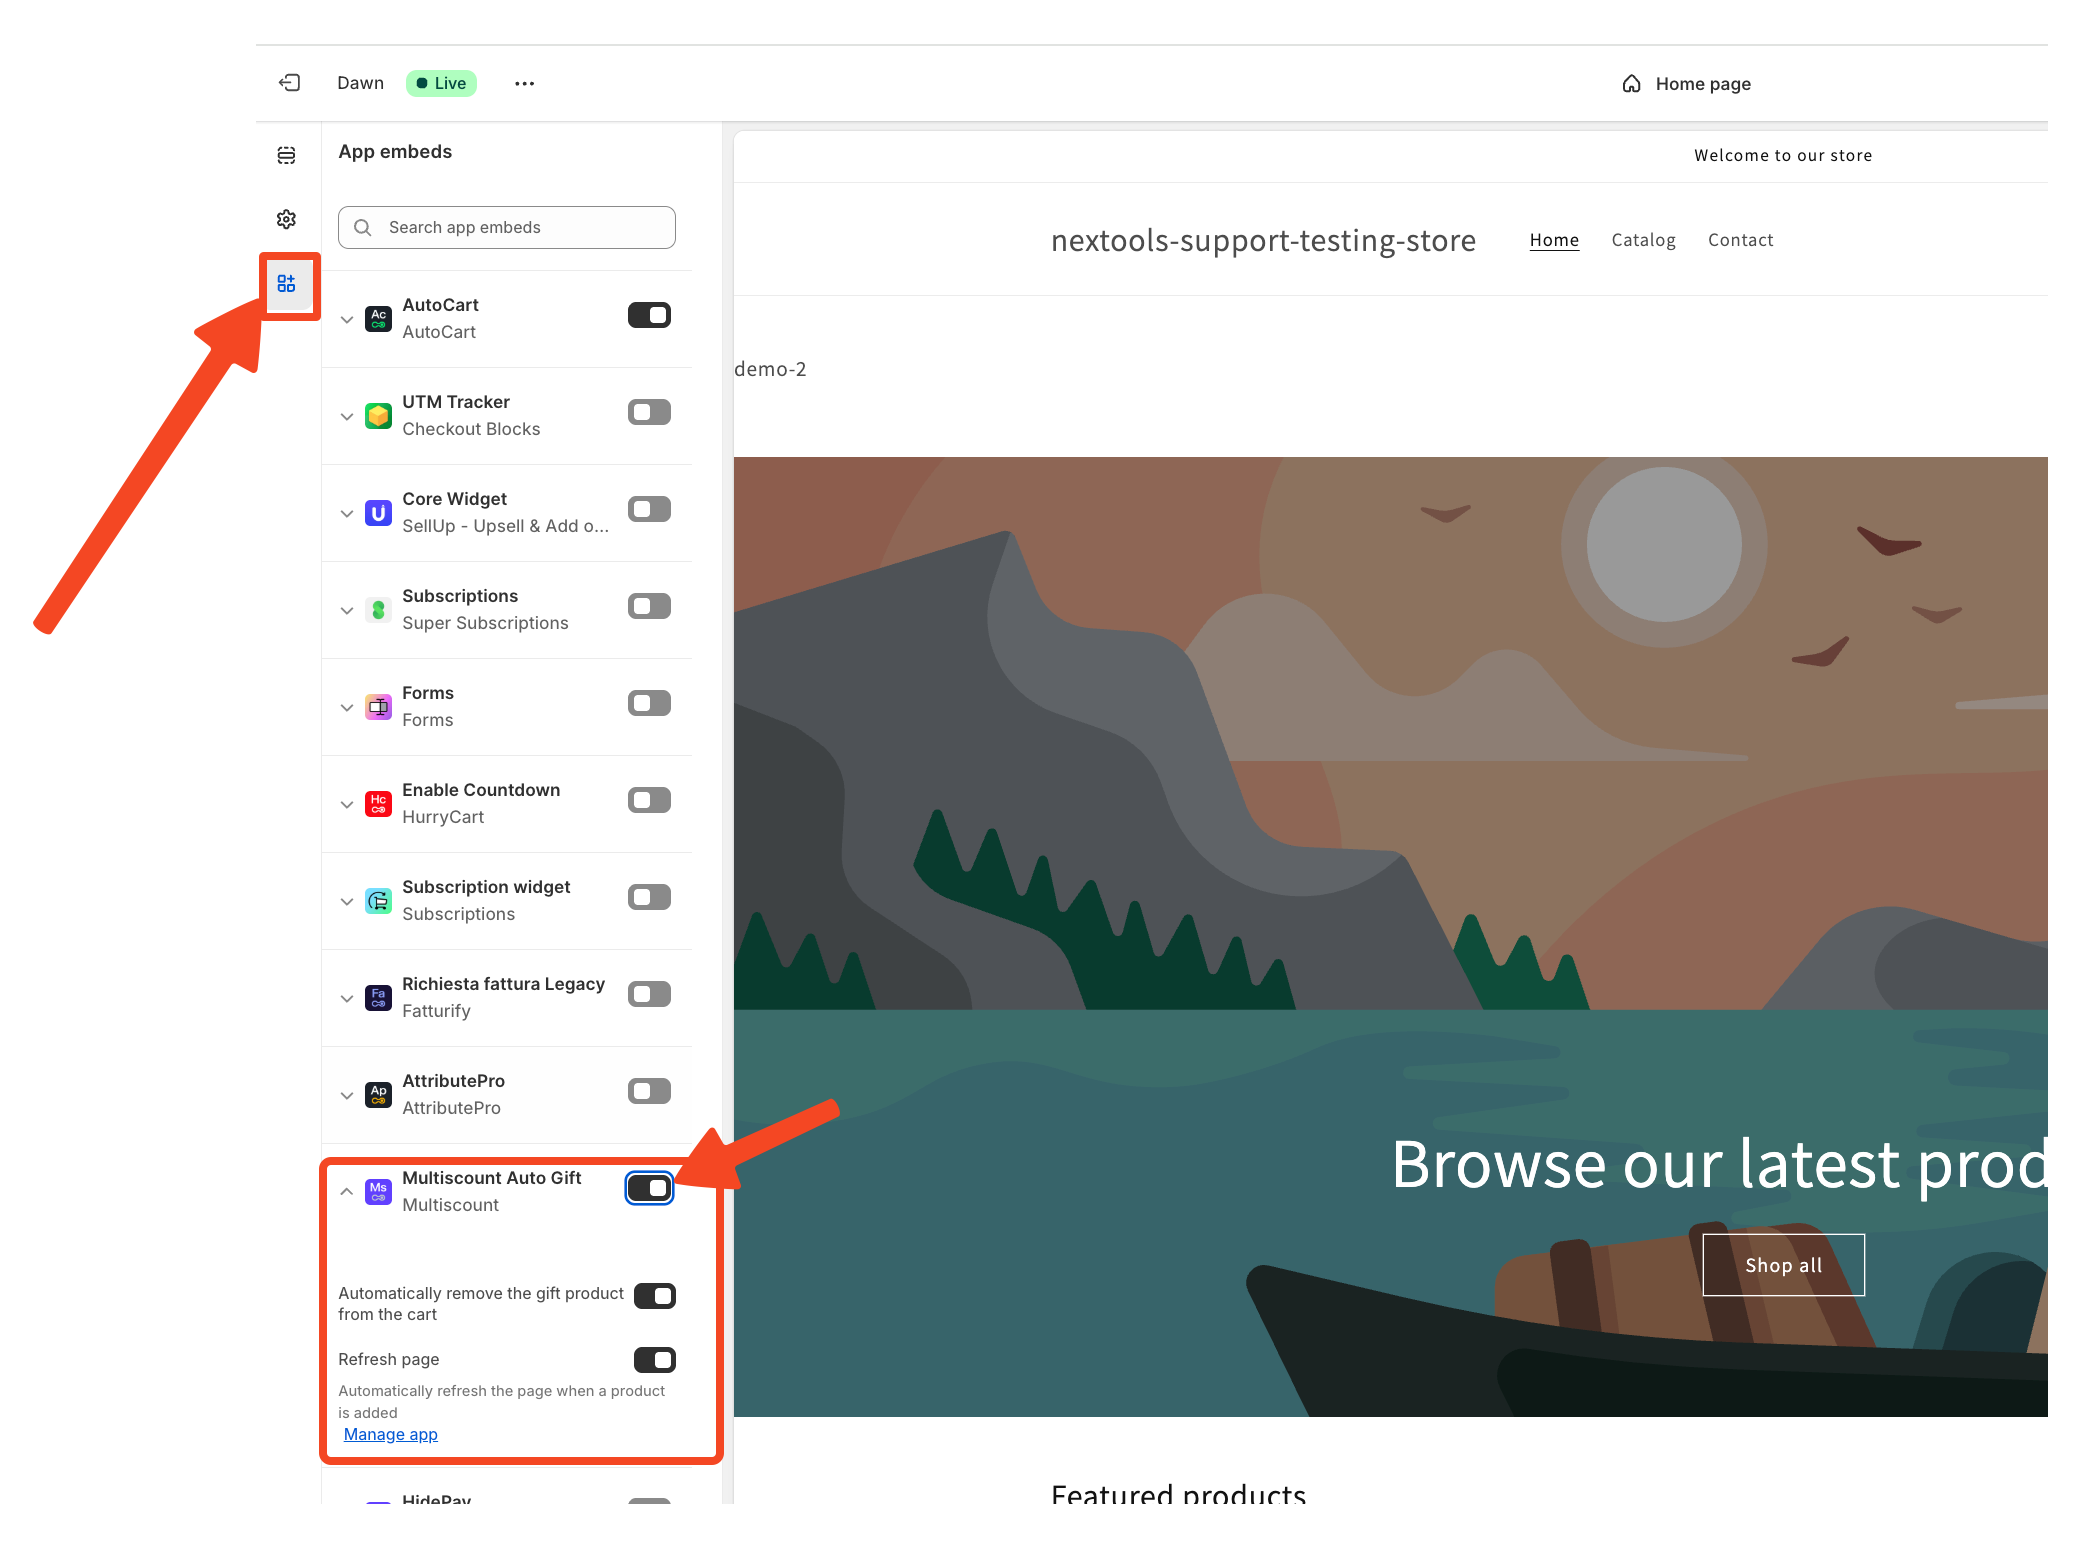
This step synchronizes the discount with your storefront and activates the automation.
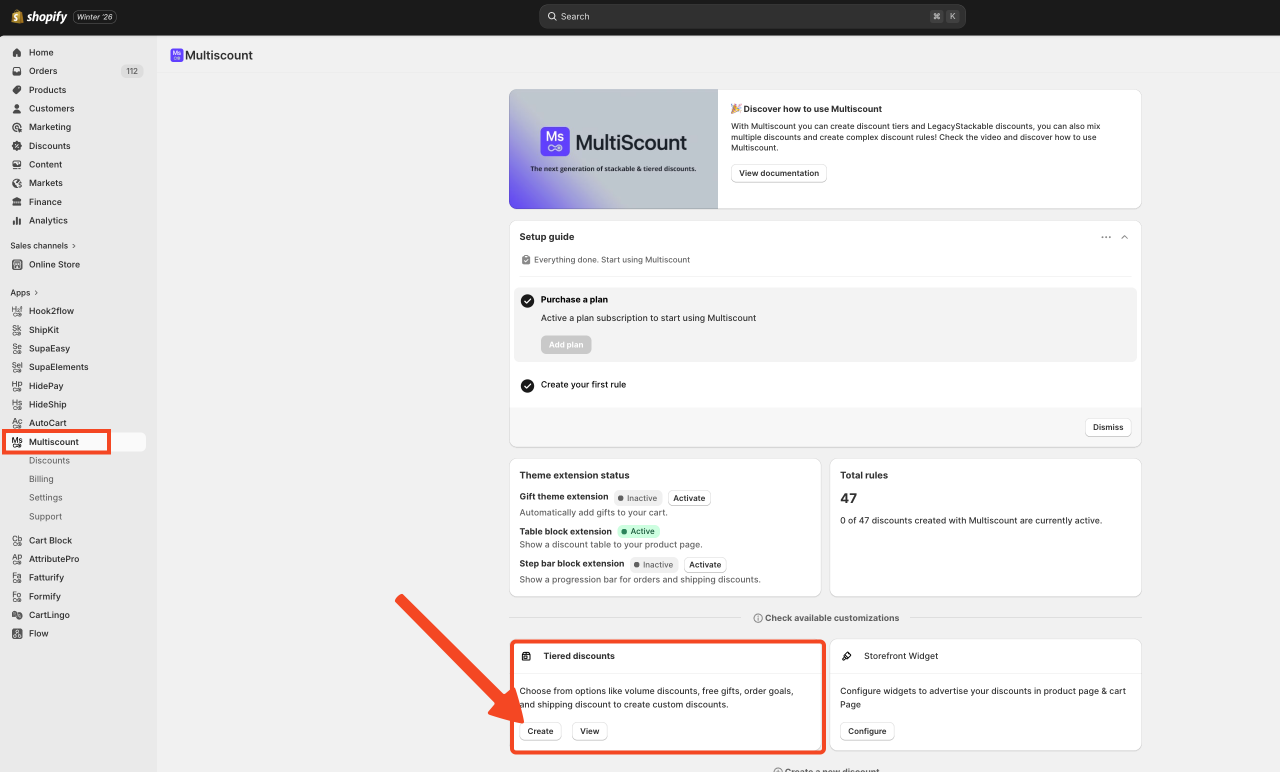
Step 2 – Create a Gift with Purchase Discount
Start by opening Multiscount from your Shopify Admin and clicking on Create Discount.
 Among the available discount types, select Gift with Purchase. This option is specifically designed to reward customers with a product that is automatically added to the cart when certain conditions are met, either for free or at a discounted price.
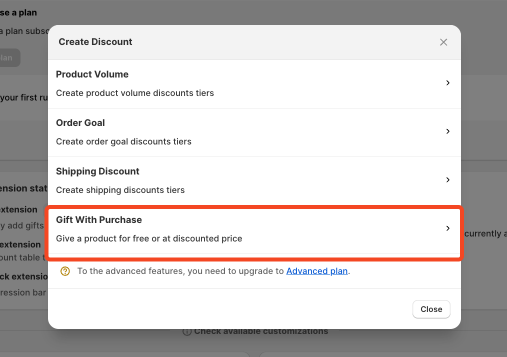
Step 3 – Configure the Gift Conditions
Once inside the discount editor, start by configuring all the conditions that customers must meet to receive the gift.
The first required step is setting the discount title, which is mandatory in order to save the discount.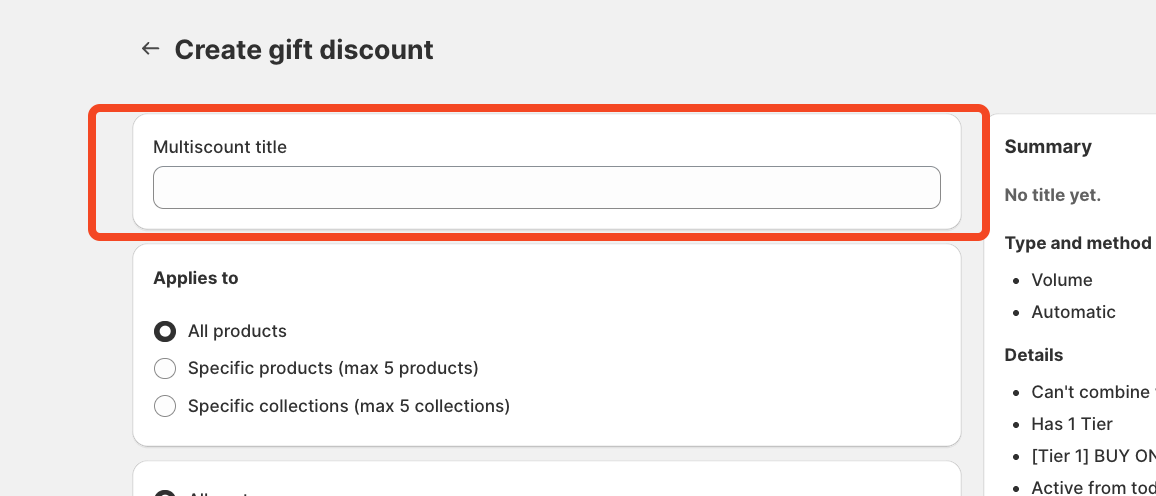
Next, decide whether the discount should apply to all products, to a specific collection, or only to selected products.
You can then choose which customers are eligible to receive the gift by configuring the customer eligibility section.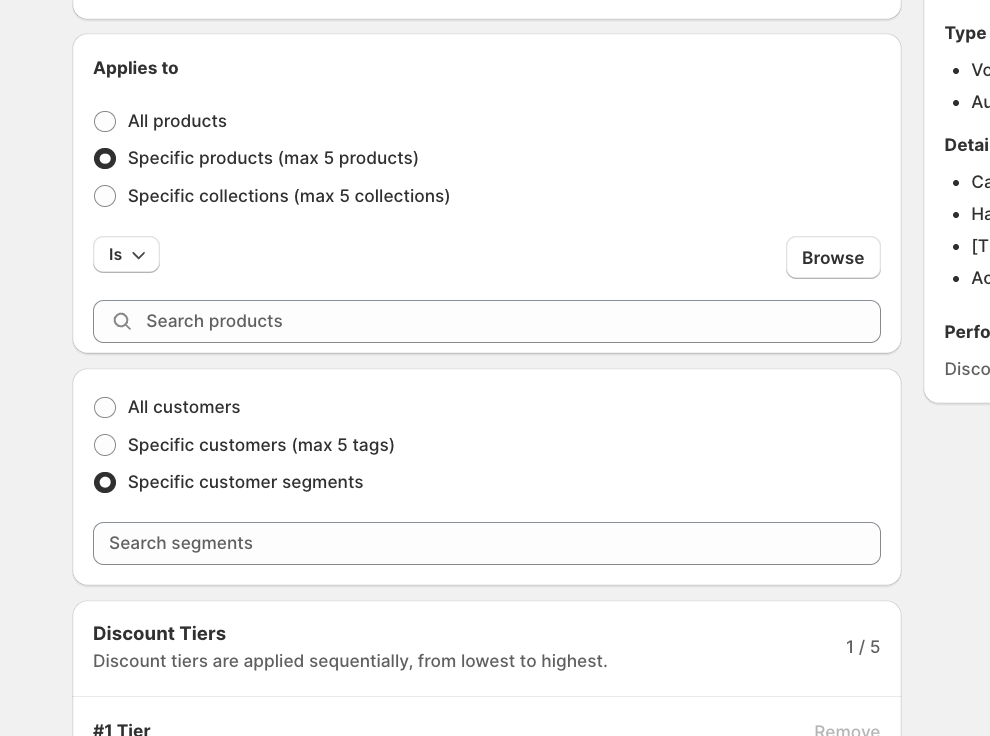
At this point, define the product you want to offer as a gift.
You can easily do this by clicking the “Browse” button and selecting the product directly from your store catalog.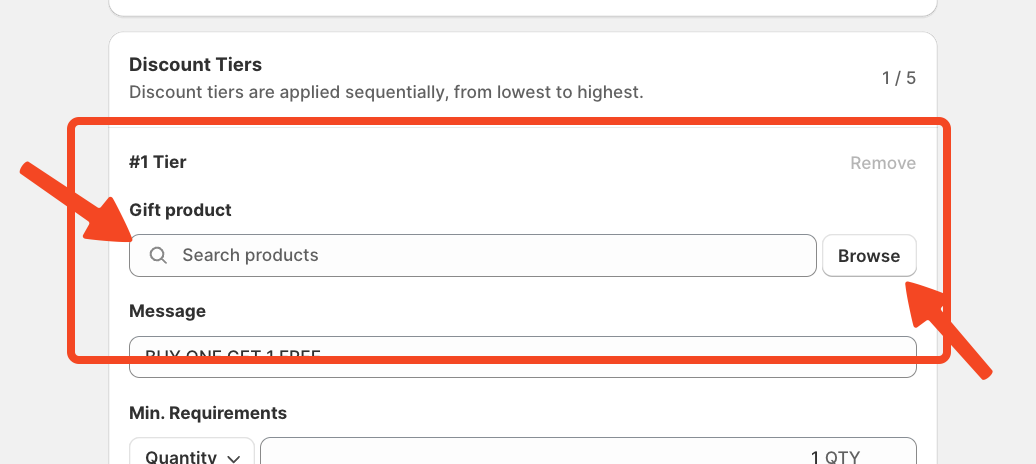
In the next field, enter the message you want to display to customers when the gift with purchase is available.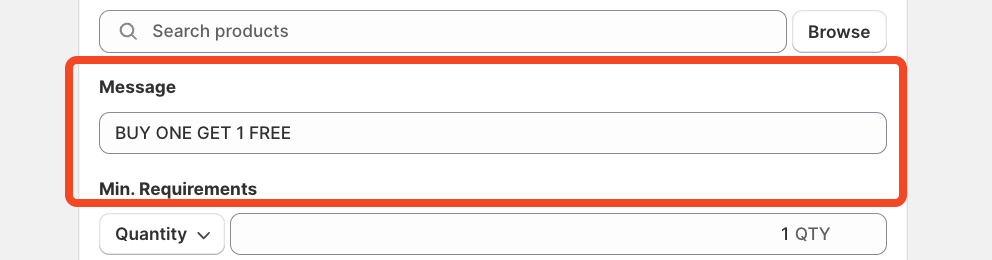
Now it’s time to define the main condition of the promotion.
Here you can set: a minimum cart amount, or a minimum quantity of products required in the cart, along with the corresponding discount logic.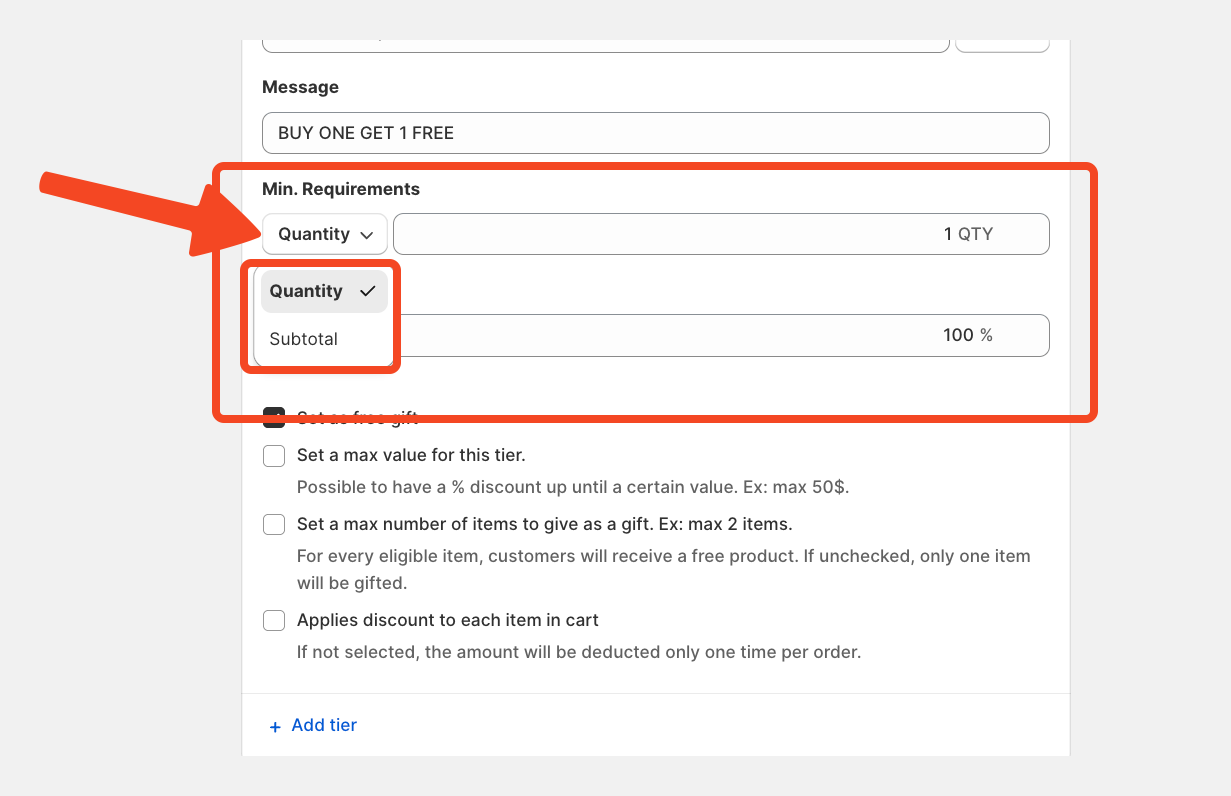
At this stage, it’s essential to enable the option “Set as free gift.”
By doing so, the gift product will be automatically added to the cart at no cost as soon as the conditions are met, without requiring any action from the customer.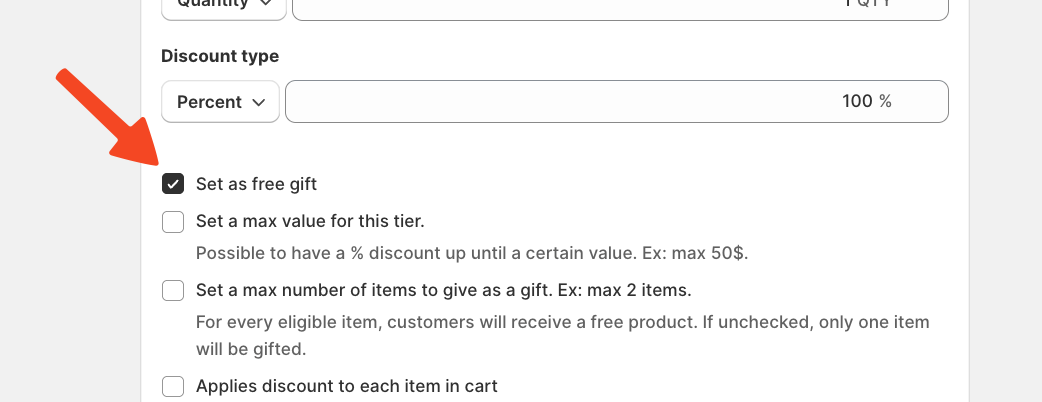
Using the advanced options, you can further refine the promotion by:
-
Setting a maximum value for the tier
-
Limiting the number of gift items
-
Defining where the discount applies
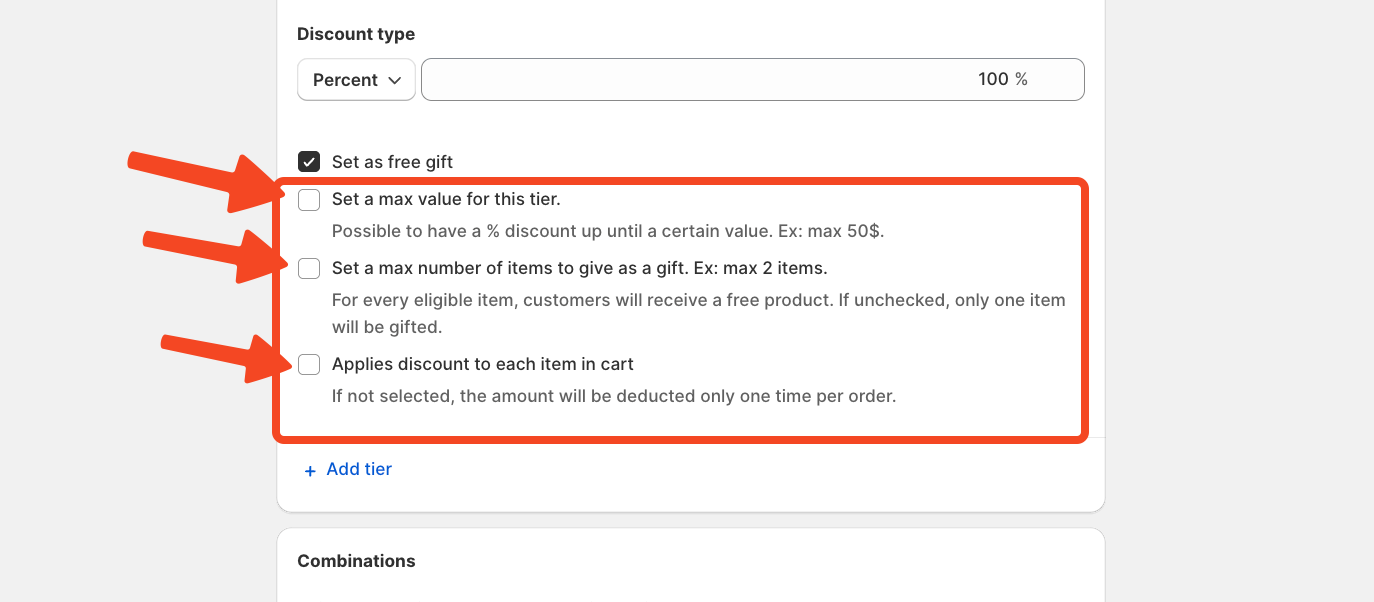
You also have the option to add additional tiers and repeat the configuration to create more complex gift rules.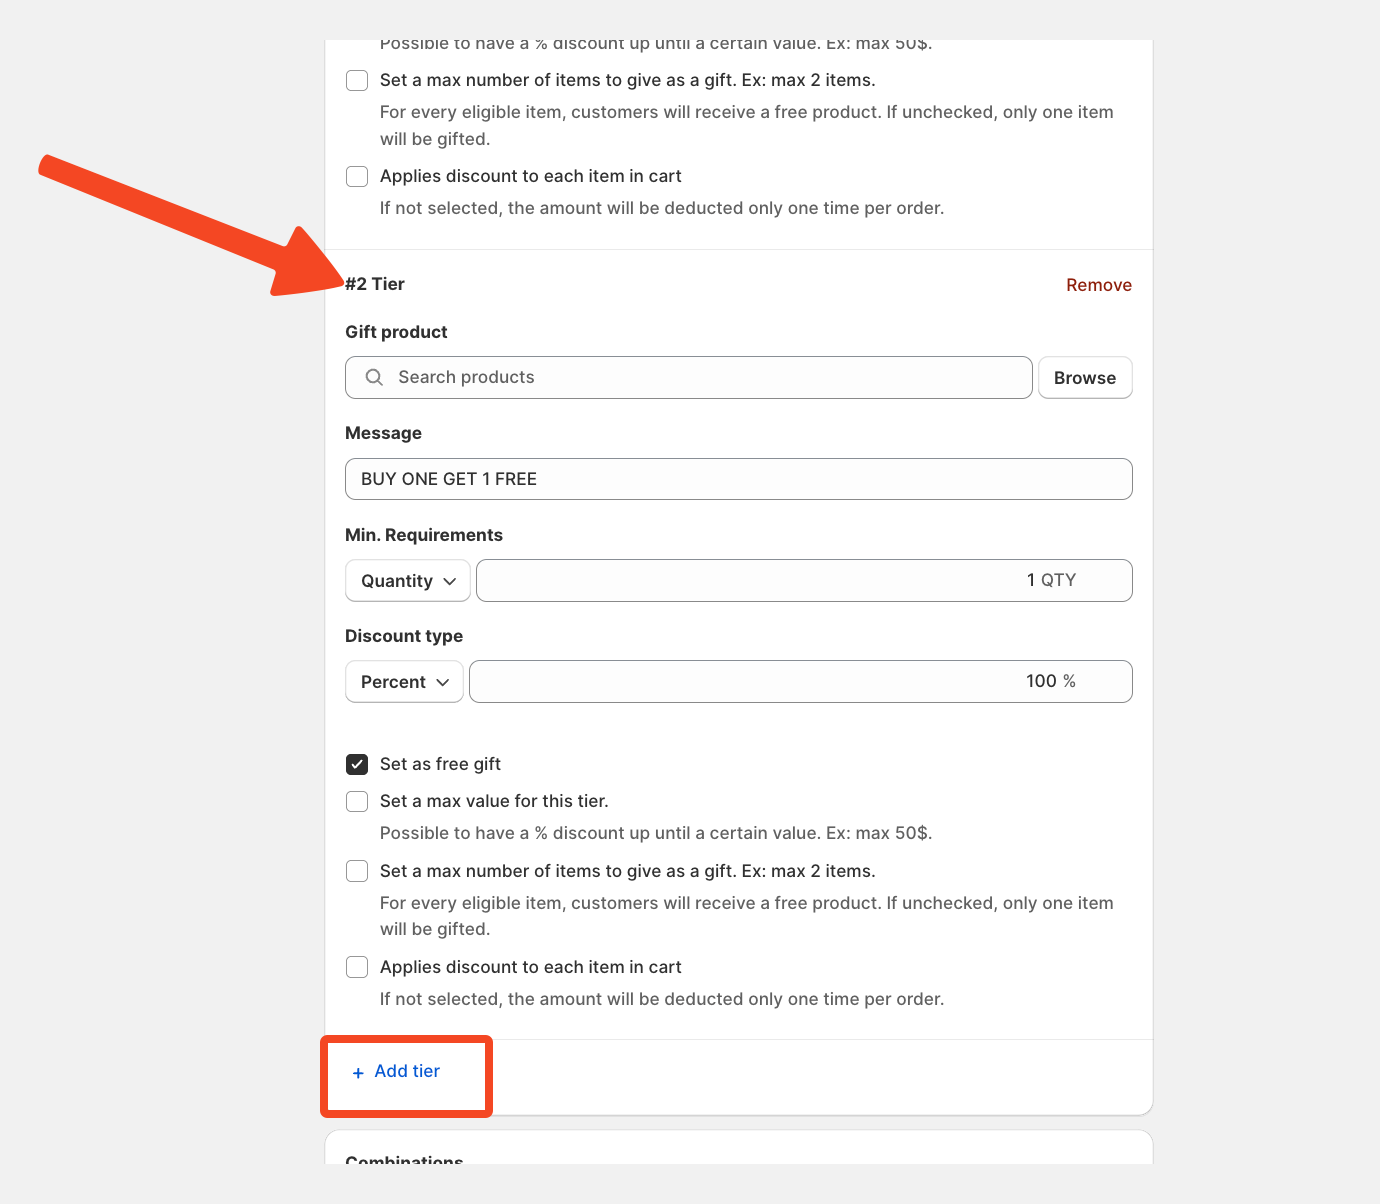
Step 4 – Choose Discount Combinations and Save
Before saving the discount, review the discount combination settings.
Here you can decide whether the Gift with Purchase promotion can be combined with other discounts currently active in your store.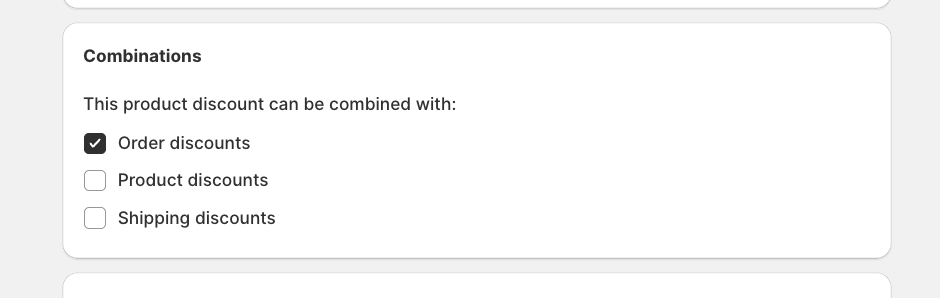
You can also schedule the discount to run during a specific date range or time period using the Active dates section.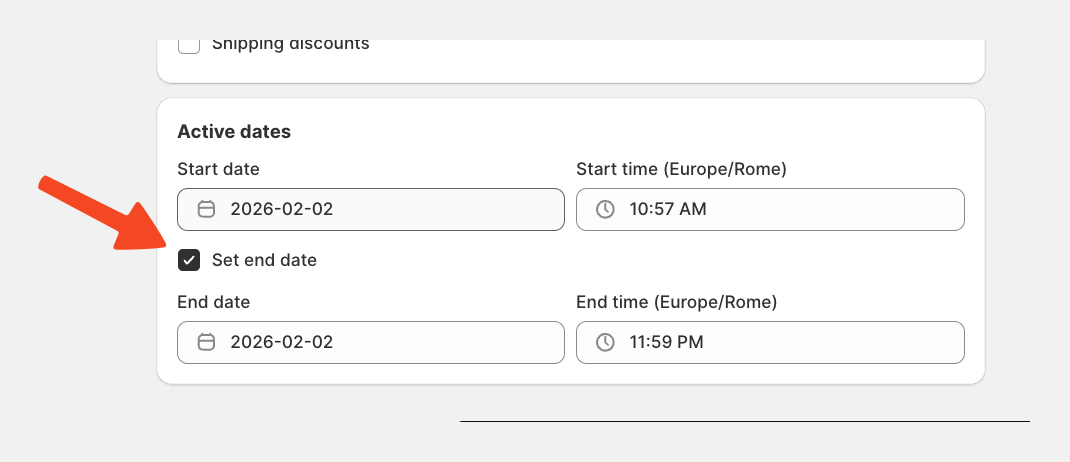
Once everything has been configured and reviewed, click Save.
You’re Ready to Go
Once your discount is configured and the Multiscount Auto Gift embed is enabled, your Automatic Gift with Purchase automation is fully active.
👉 Start testing your Gift with Purchase flow now and explore how easy it is to increase engagement and average order value with Multiscount.