 ShipKit allows you to build fully customizable Dynamic Shipping Rates using a visual, no-code flow editor. Each rate is controlled by conditions you define, making it easy to create personalized shipping experiences for different customers, products, and order types.
Follow the steps below to create your first Dynamic Shipping Rate.
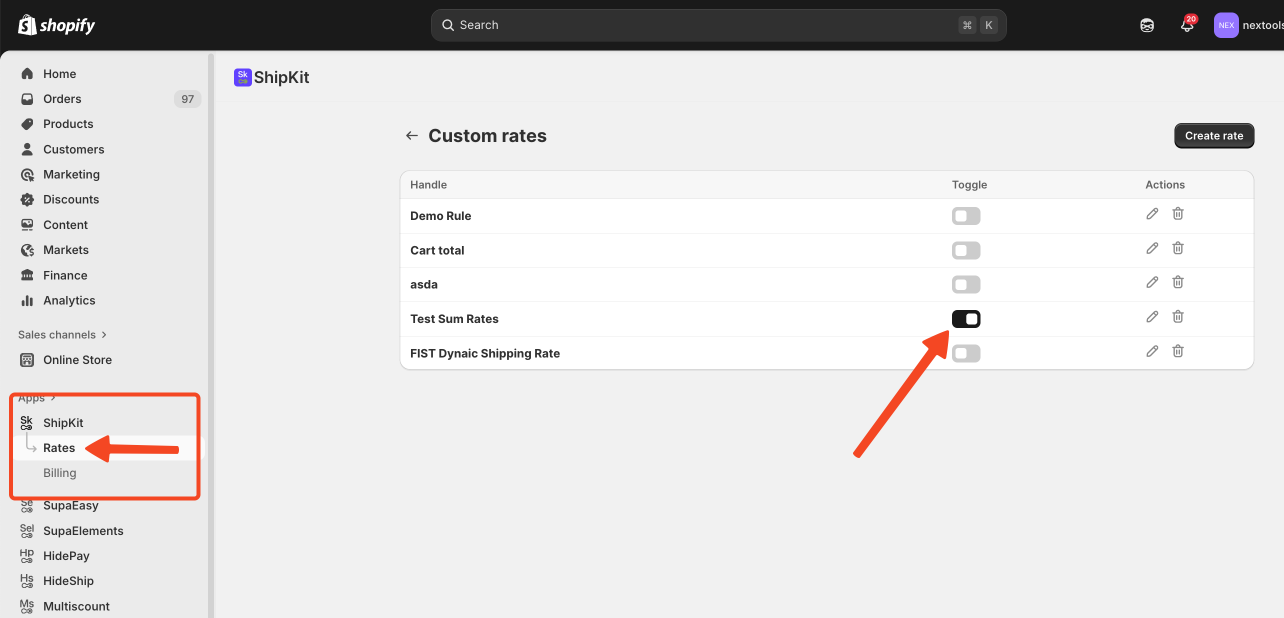
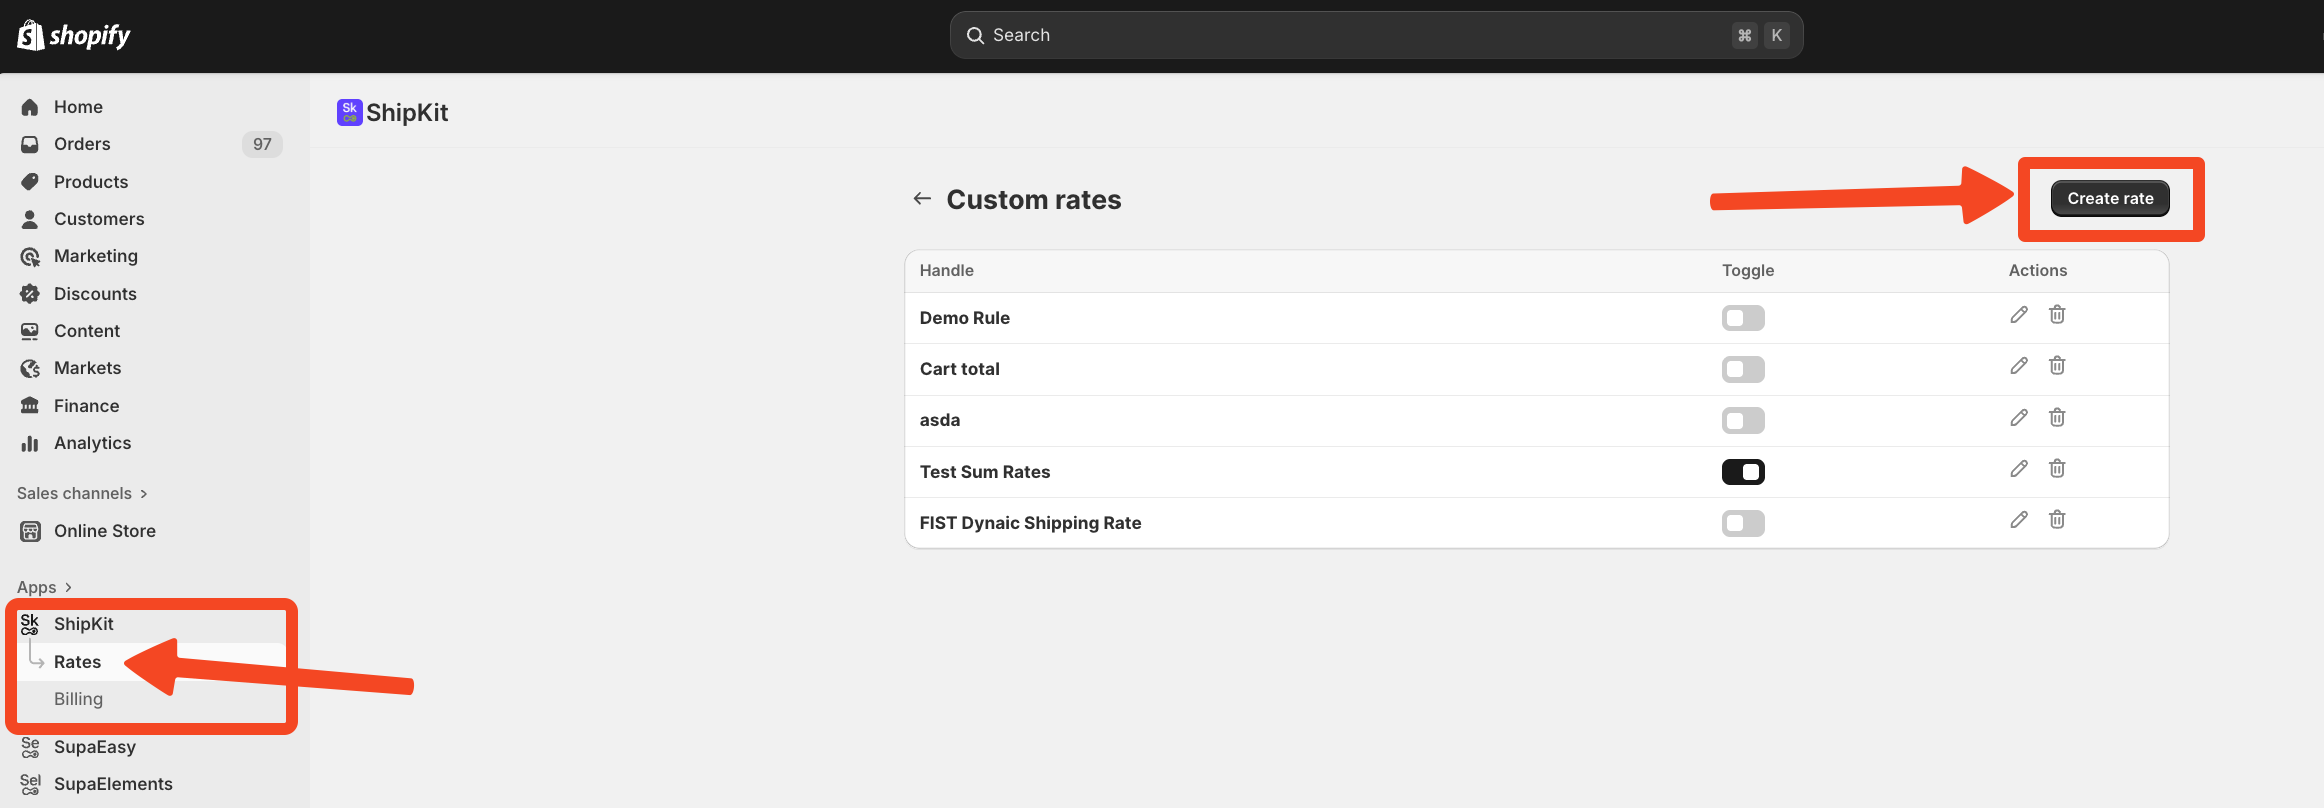
Open the ShipKit app in your Shopify Admin, navigate to the Rates section.
Now, you need to click Create Rate (top-right corner) and you will be redirected to the Flow Editor, where your new rate will be built.
Click Edit to open the visual flow builder.
This is where you design the rules that determine when the shipping rate should appear during checkout.
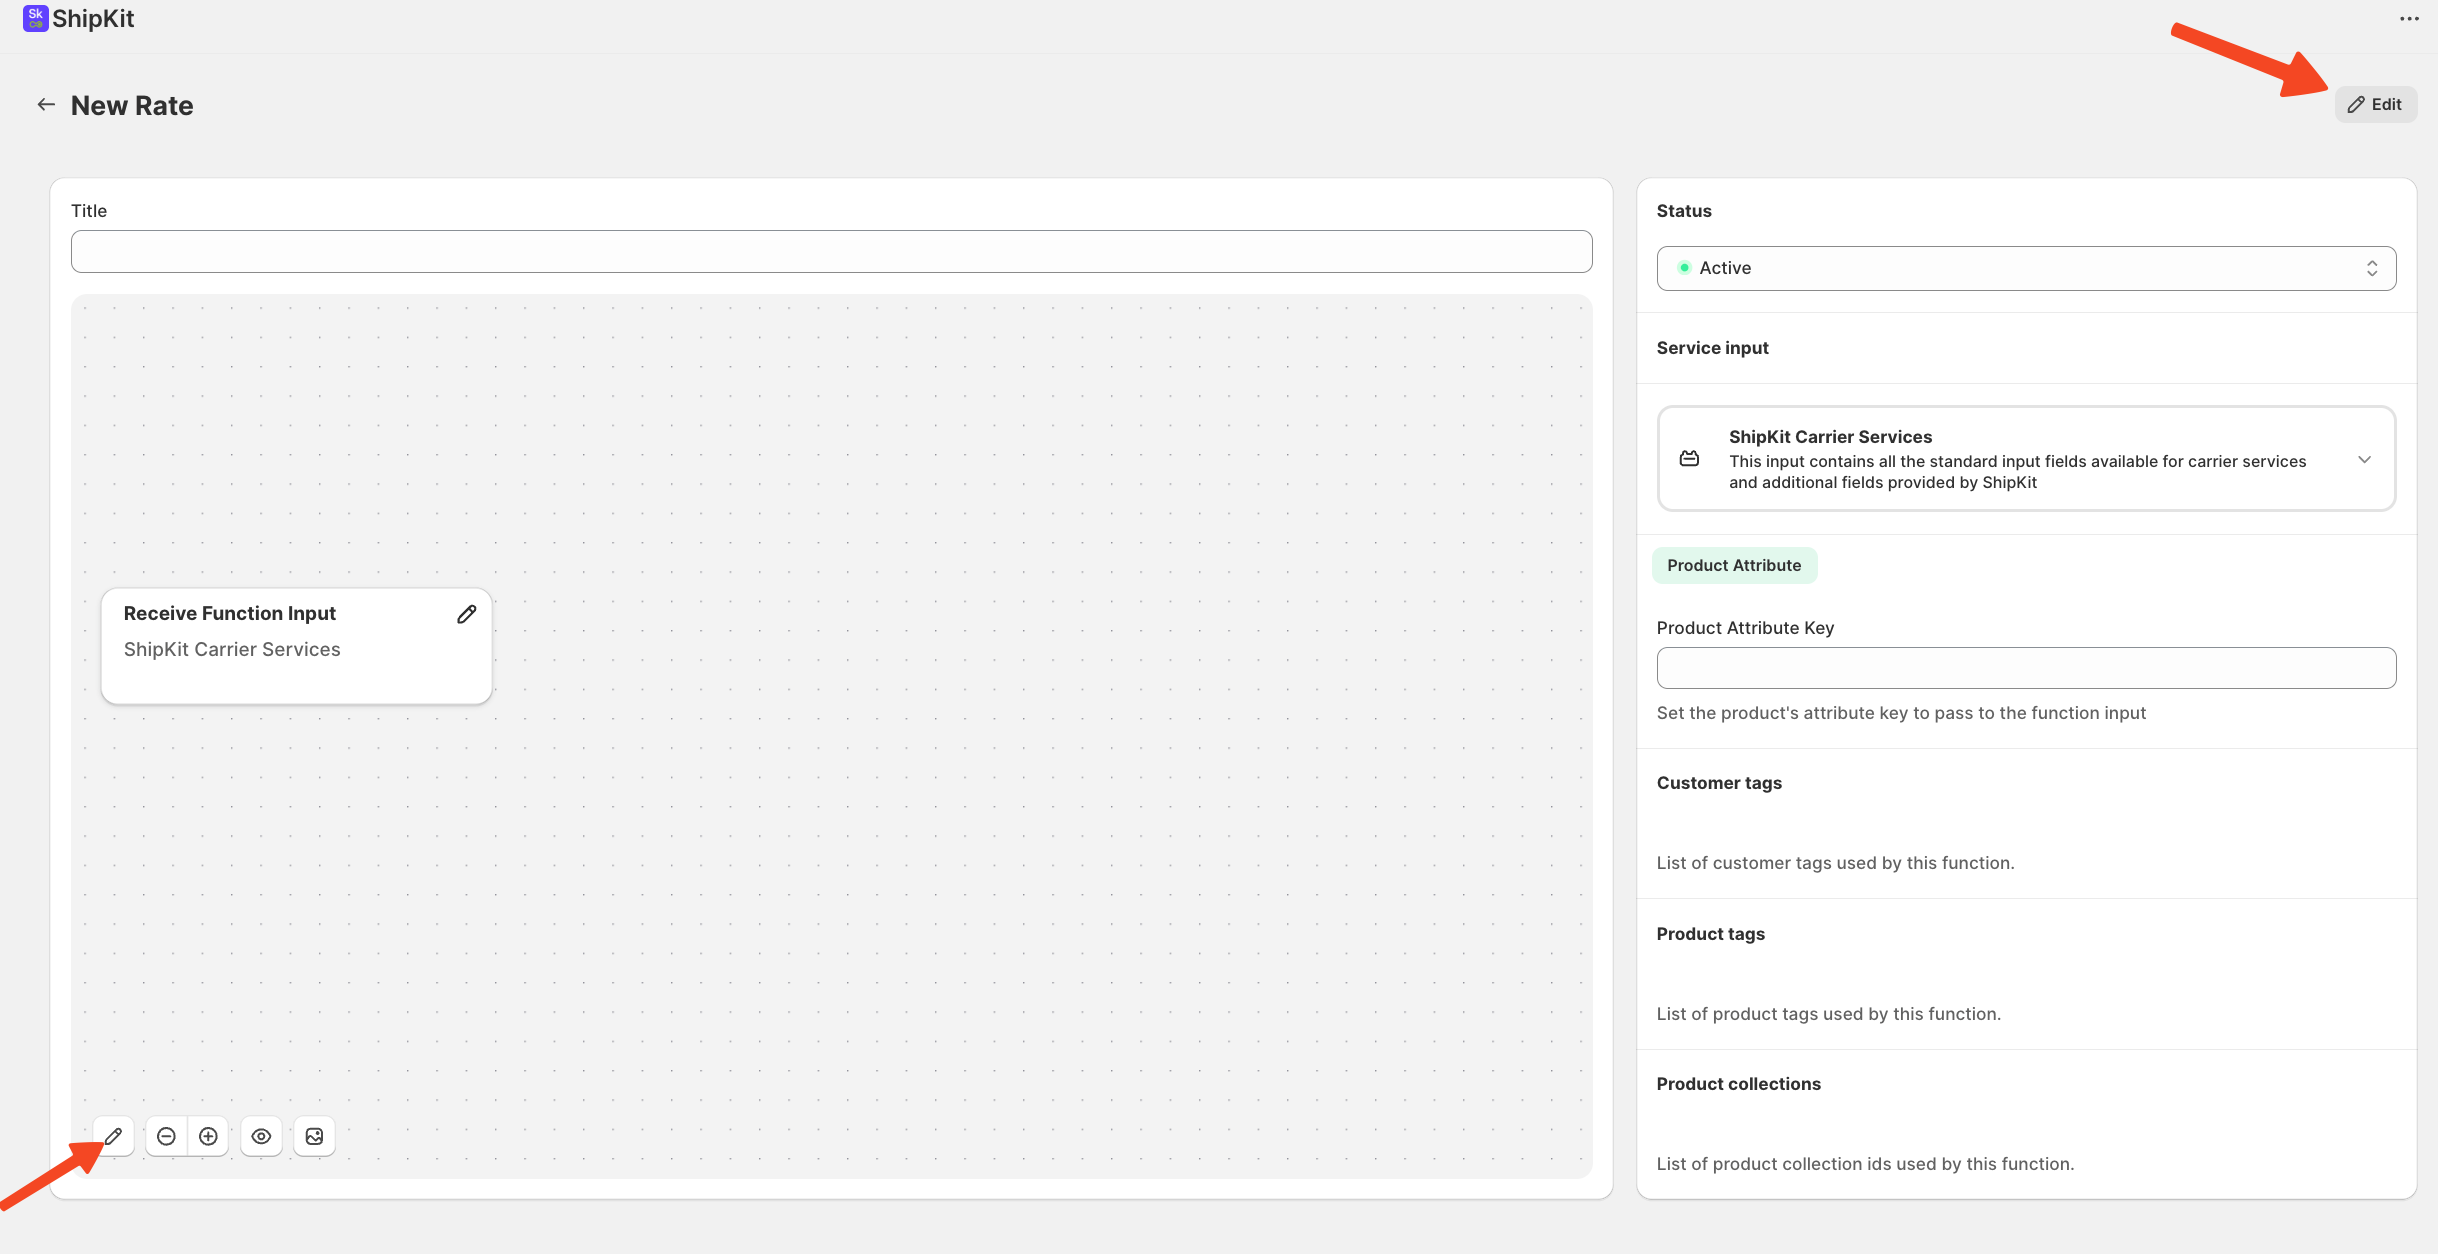
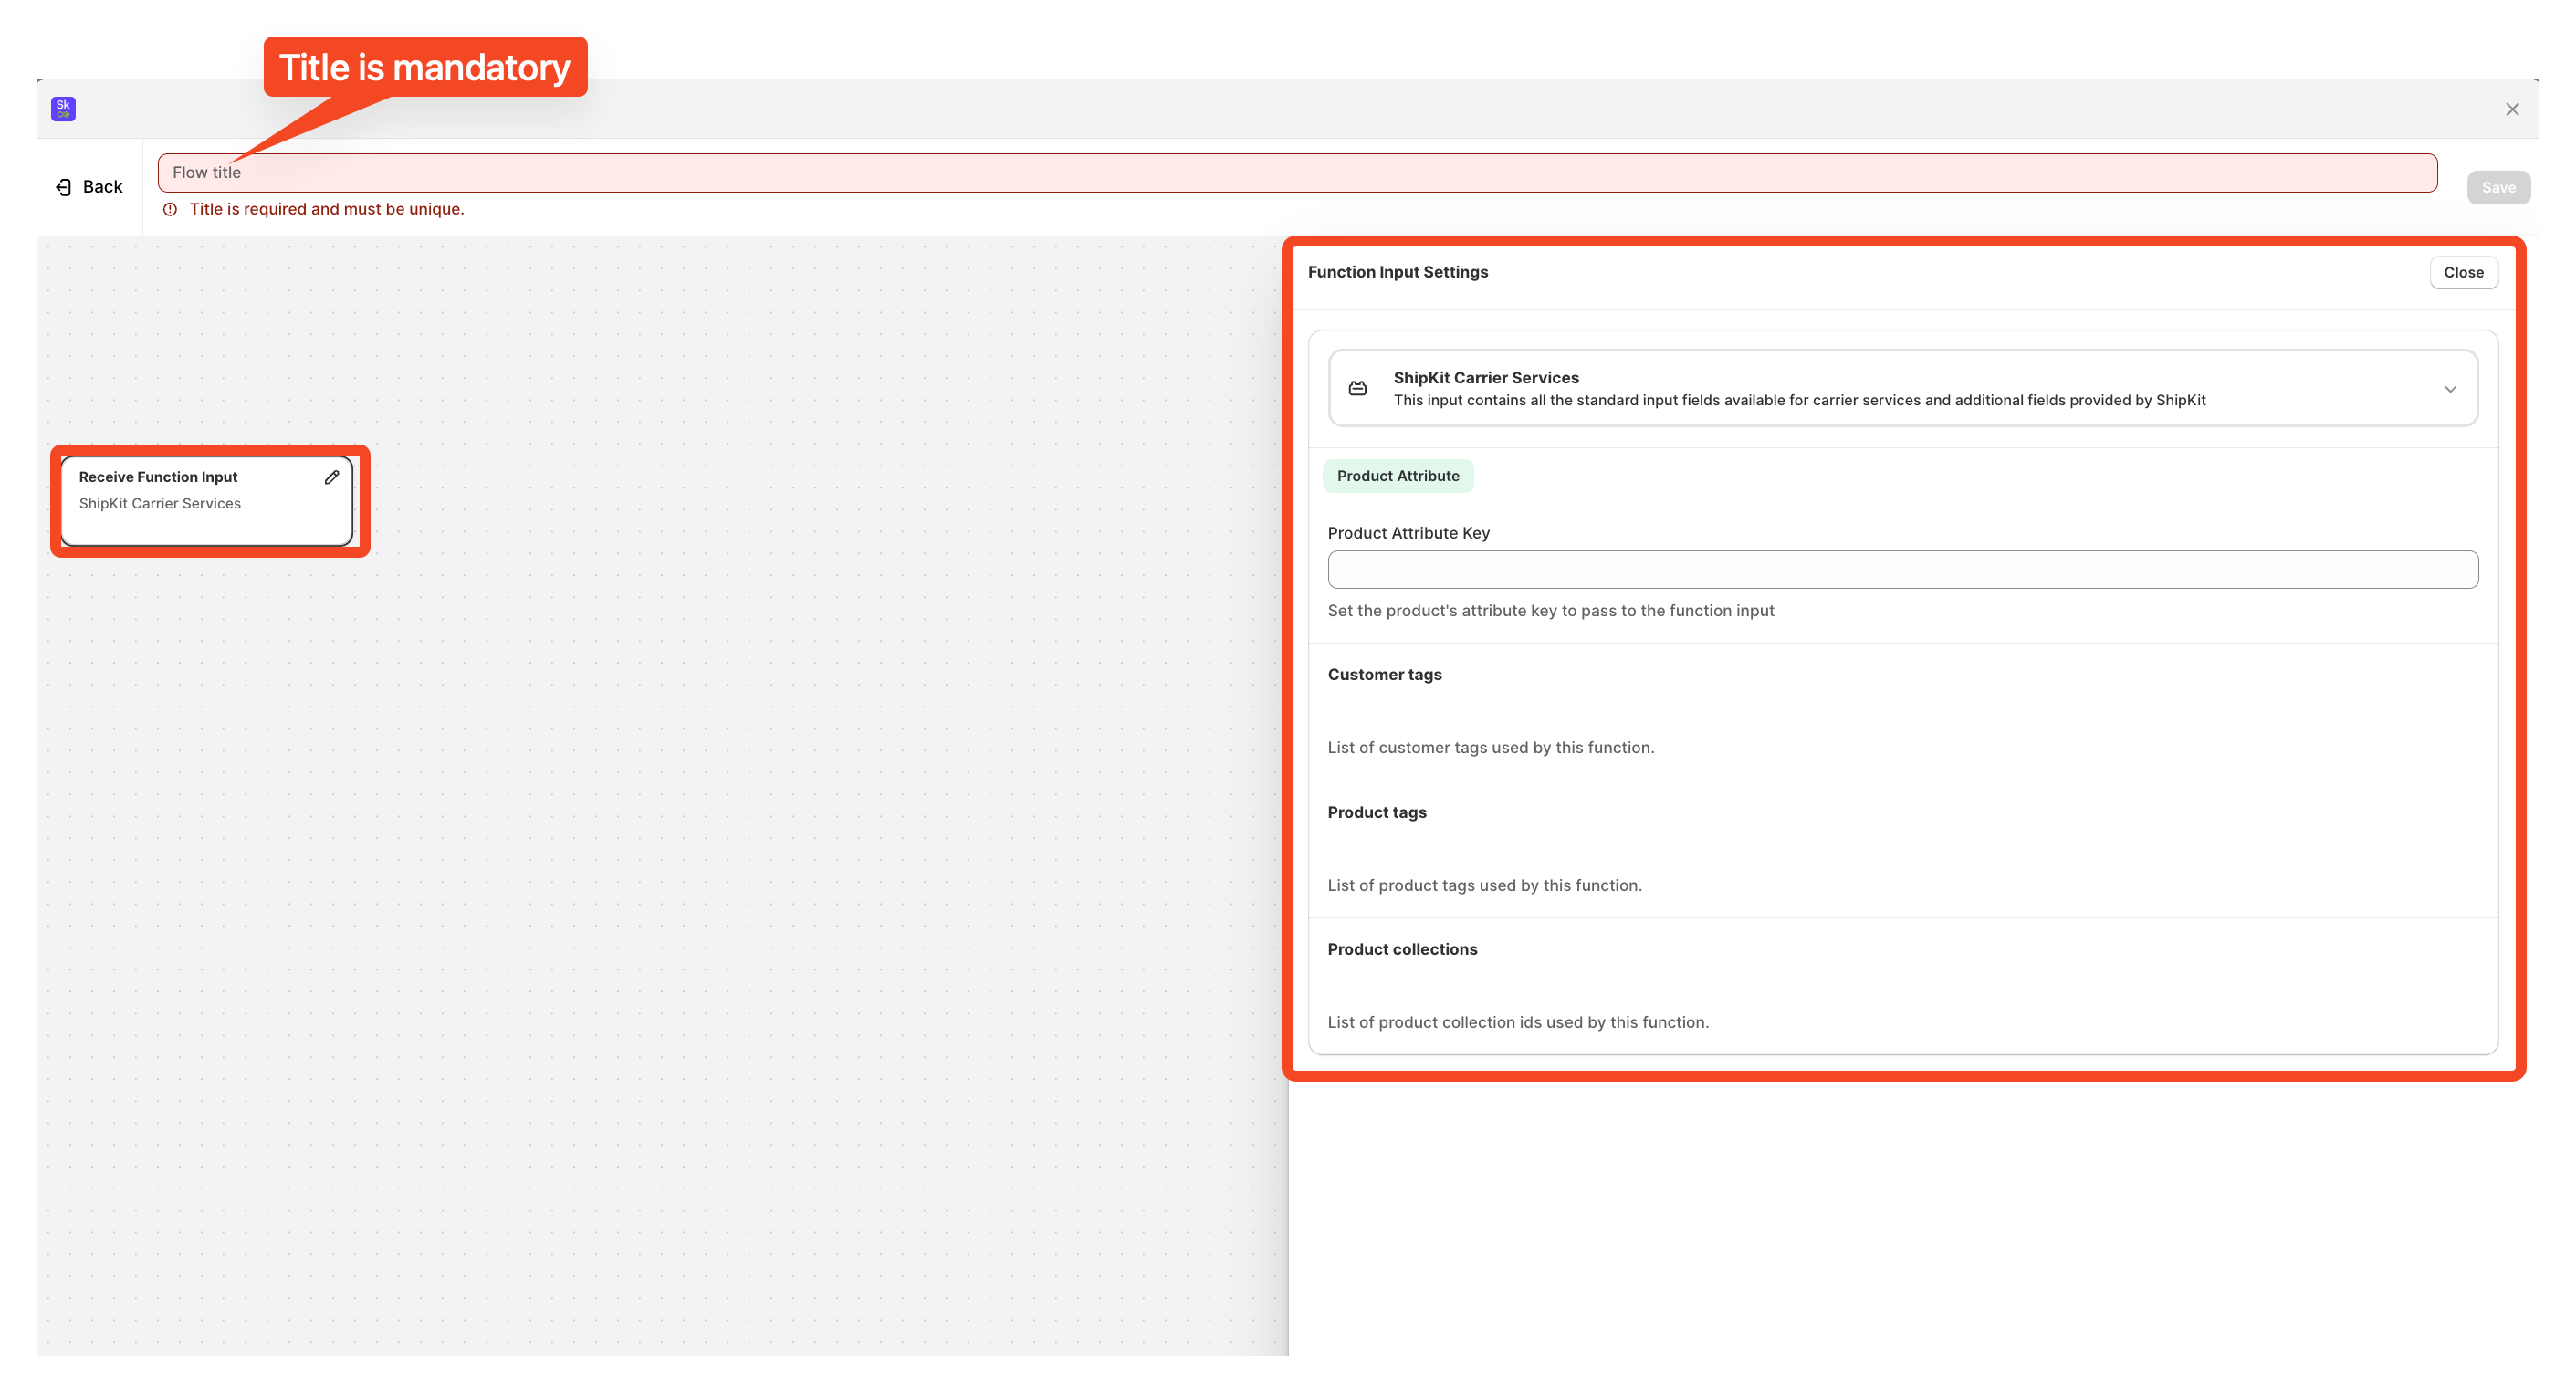
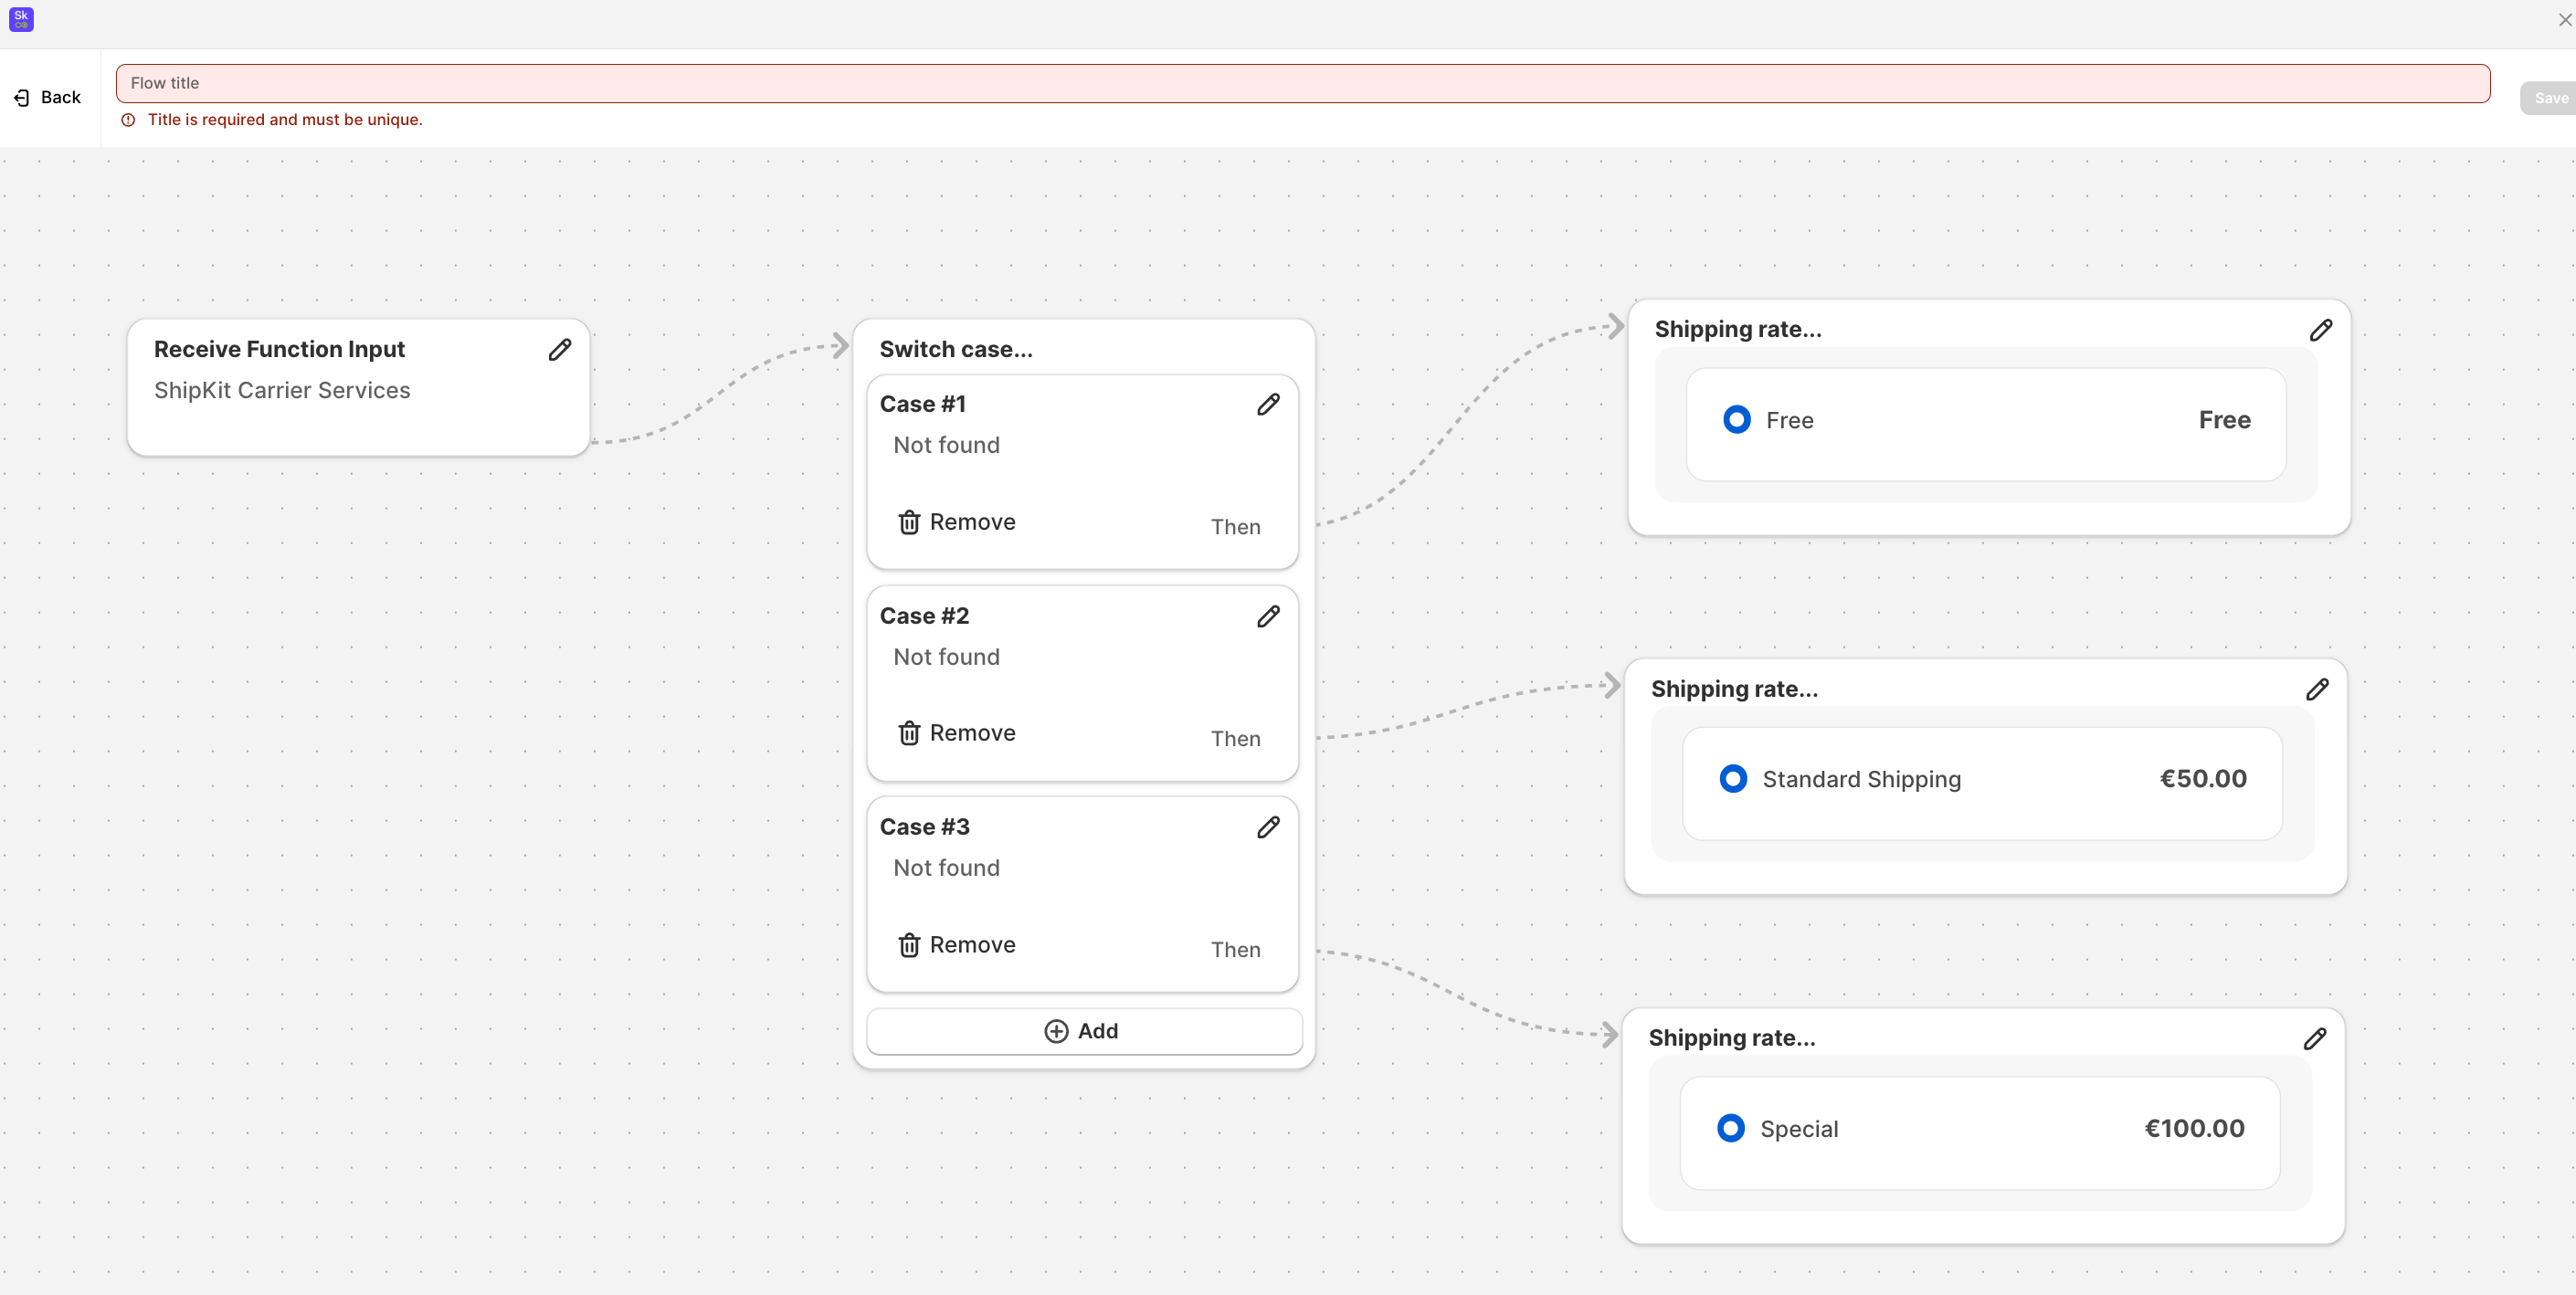
The flow always begins with a starting node.
The first node in ShipKit’s flow editor acts as a summary node. Its purpose is to collect and display the key elements that will be used throughout the flow, making it easier to keep track of the main attributes involved.
Product Attribute Key is the only field you can manually configure in the first node. In other words, the first node acts as a quick overview of which attributes are being used, without requiring any manual setup.
In ShipKit’s Flow Editor, nodes can be connected freely to build the logic you need. The system is flexible by design, but there are a couple of structural rules to keep in mind.
Every node has a small + icon in the bottom-right corner.
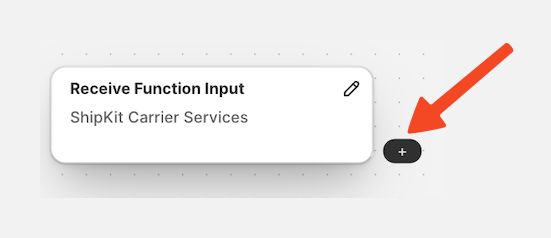
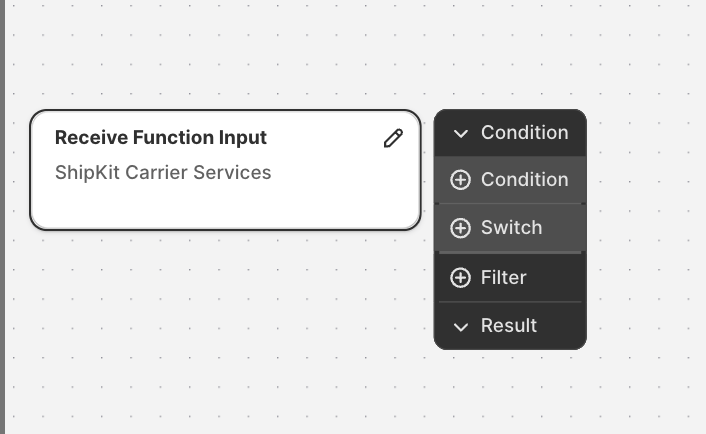
Clicking it allows you to attach the next piece of your flow. At this stage, you can choose between three main elements:
• Condition
• Switch
• Filter
• Result
Condition
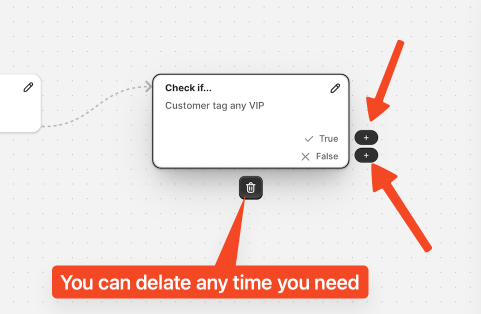
A Condition node lets you define a rule that can be true or false.
This is useful when you want to show a shipping rate only under certain circumstances, for example:
-
Only if the cart total is above a specific amount
-
Only if the product has a certain tag
-
Only if the destination is a specific country
- Only if the Customer has or not a specific tag
If the condition evaluates as True, the flow follows one path.
If it’s False, you can redirect the flow to a different rate or a different path.
To set the condition in the node you can simply click in the node and a setting page will open on the right side.
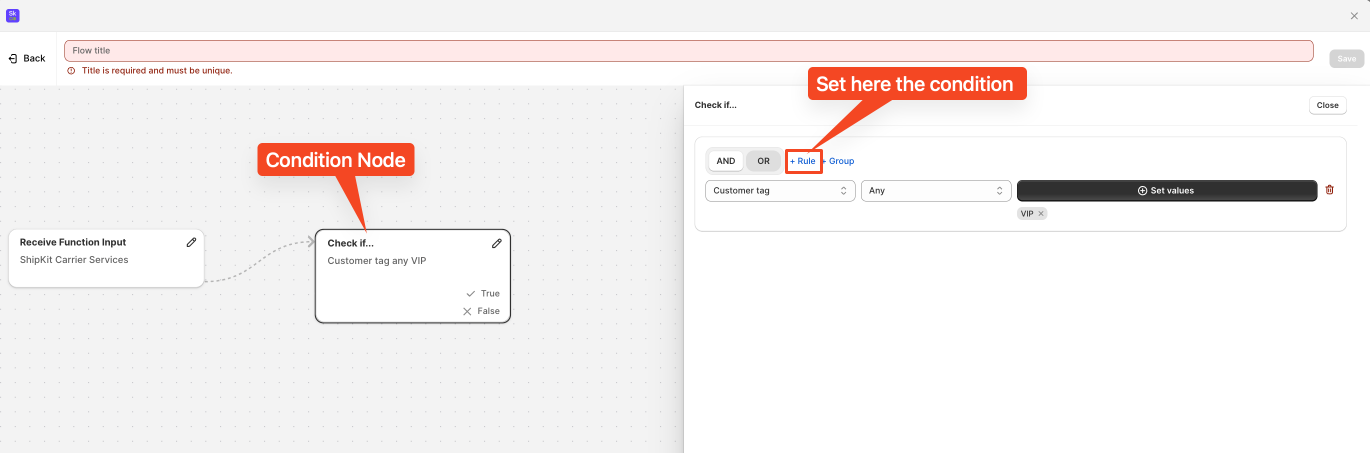
After opening the condition window, you can now choose the exact condition you want to use for your rule.
The interface allows you to create highly flexible logic:
-
Select a single condition that triggers your rule
-
Add multiple conditions to refine the behavior
-
Decide whether conditions should work together (all must be true) or independently (any of them can be true)
Using this panel, you can build simple or advanced rules that adapt perfectly to your shipping scenario.
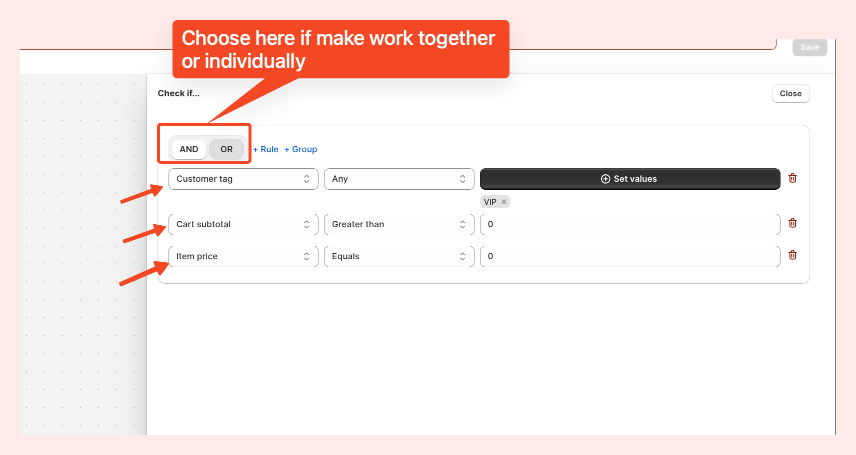
If you select OR, the node will be validated as soon as at least one condition is true.
Switch
A Switch is ideal when you need multiple outcomes based on different values.
It lets you easily deliver personalized rates depending on your scenario.
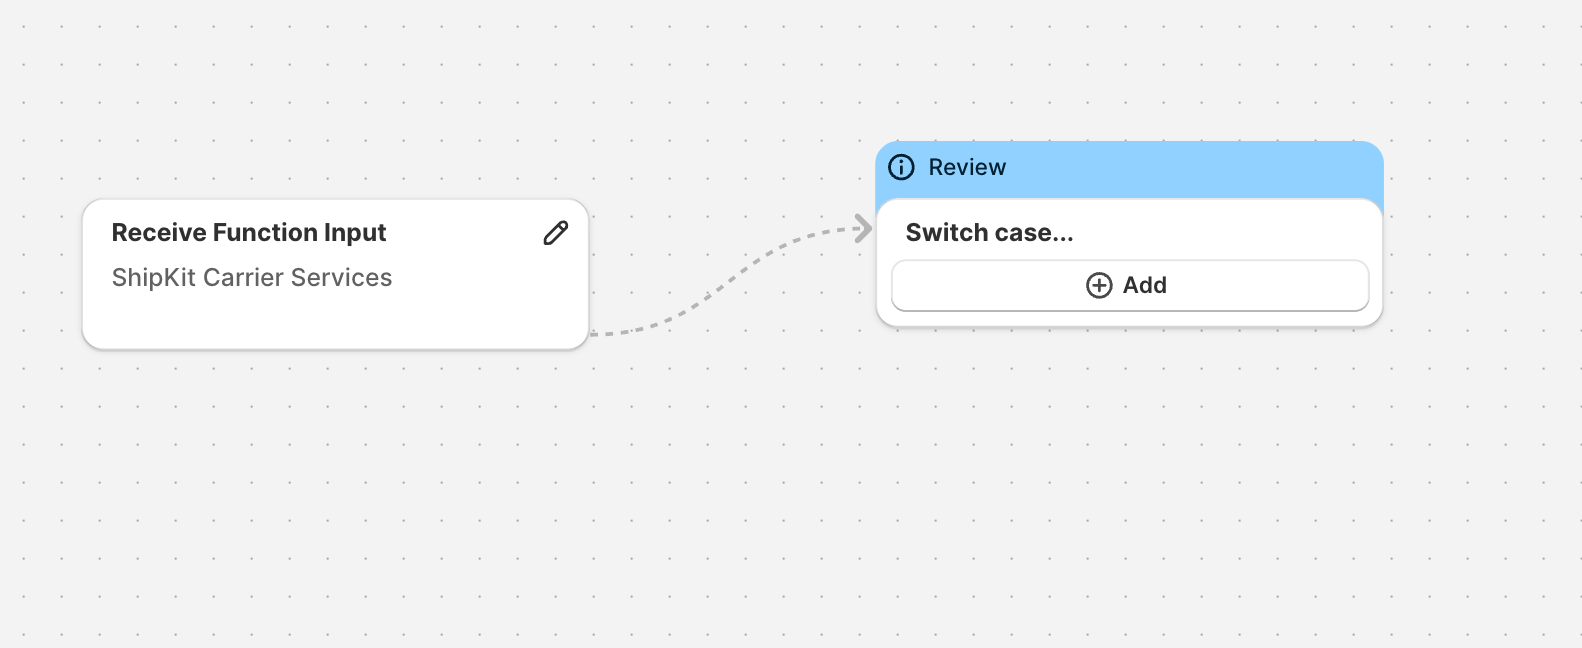
In the Switch you can easily create a selection for those cases where you need to personalize a Shipping rates for different Tags, products, volumes, etc.
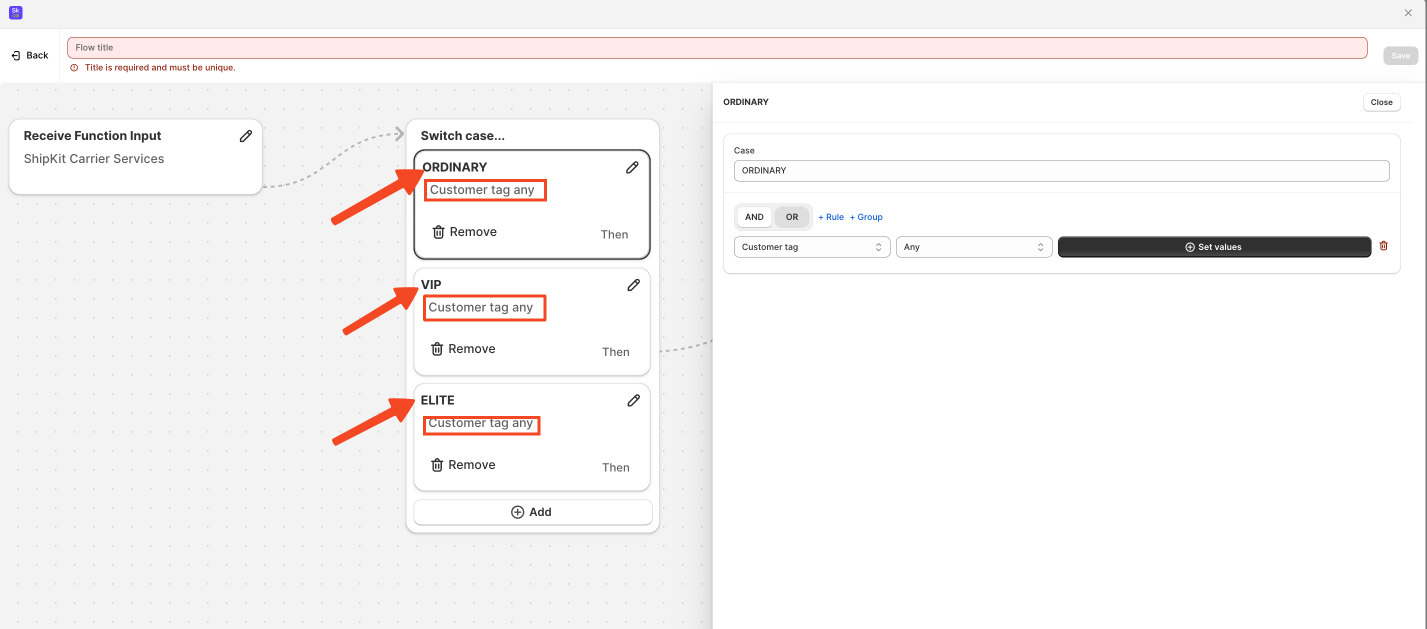
For example, you could offer:
-
A special rate for many VIP customers
-
A wholesale rate for many B2B buyers
-
A standard rate for different type of products
Each Node (“case”) within the switch becomes its own branch, which you can link to different shipping rates.
Filter
Filter nodes help narrow down which items or attributes should be considered.
They’re optional, but helpful in complex setups.
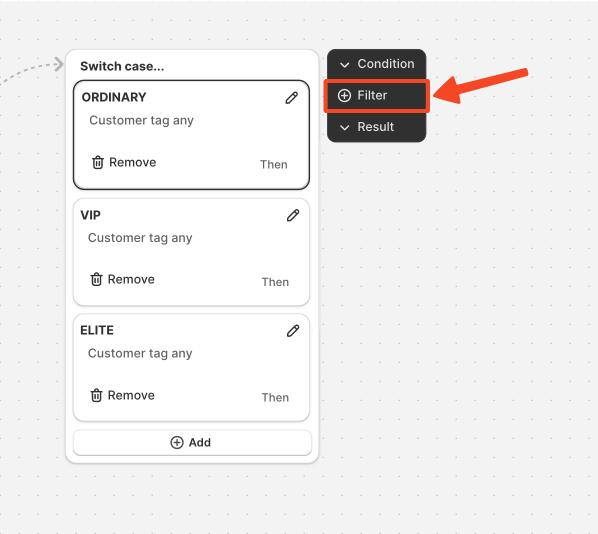
With the Filter you can also decide what part of the cart you want to target if the Initail cart or the Current cart

Result
After adding a condition to the first node and decided if set a filter, it’s time to define the shipping rate itself.
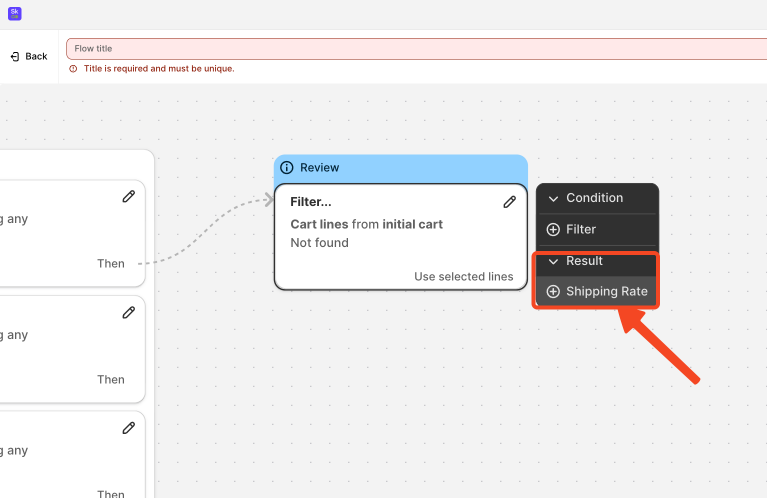
To do this you Add a Result node on the + on the right corder of the node and Select Shipping Rate. A new node appears where you can customize the final rate.
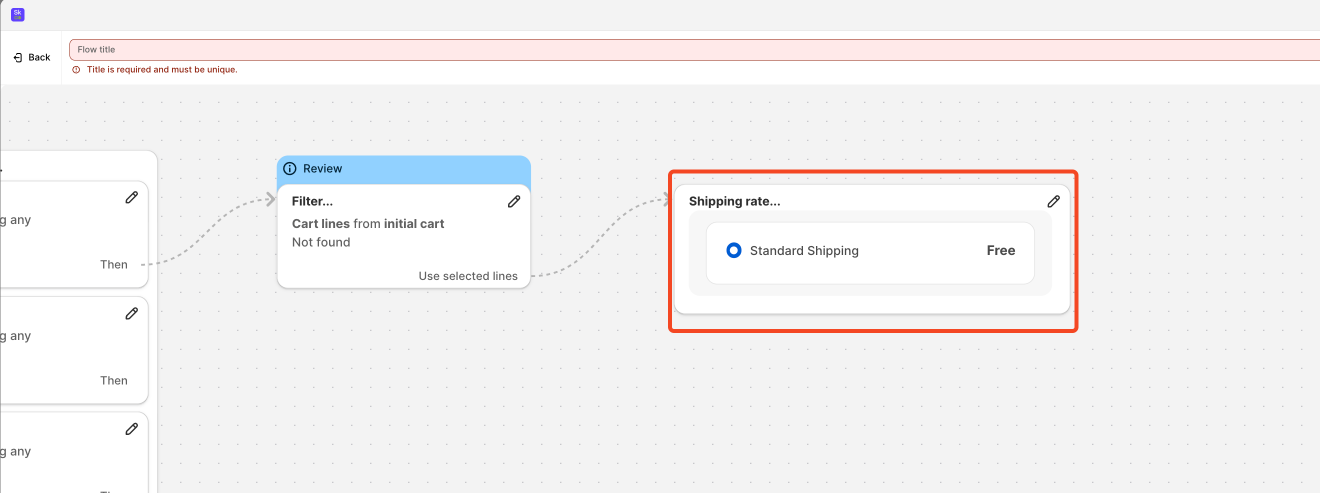
Double-click it, and you’ll be able to set:
-
The name your customers will see
-
A description (optional but useful)
-
The pricing method
When you price the method you can decide how to price it, you can do it by
Price Type
-
Fixed price (you define a Flat rate)
-
Percentage of the cart total
-
Price per unit, depending on how many items are in the cart
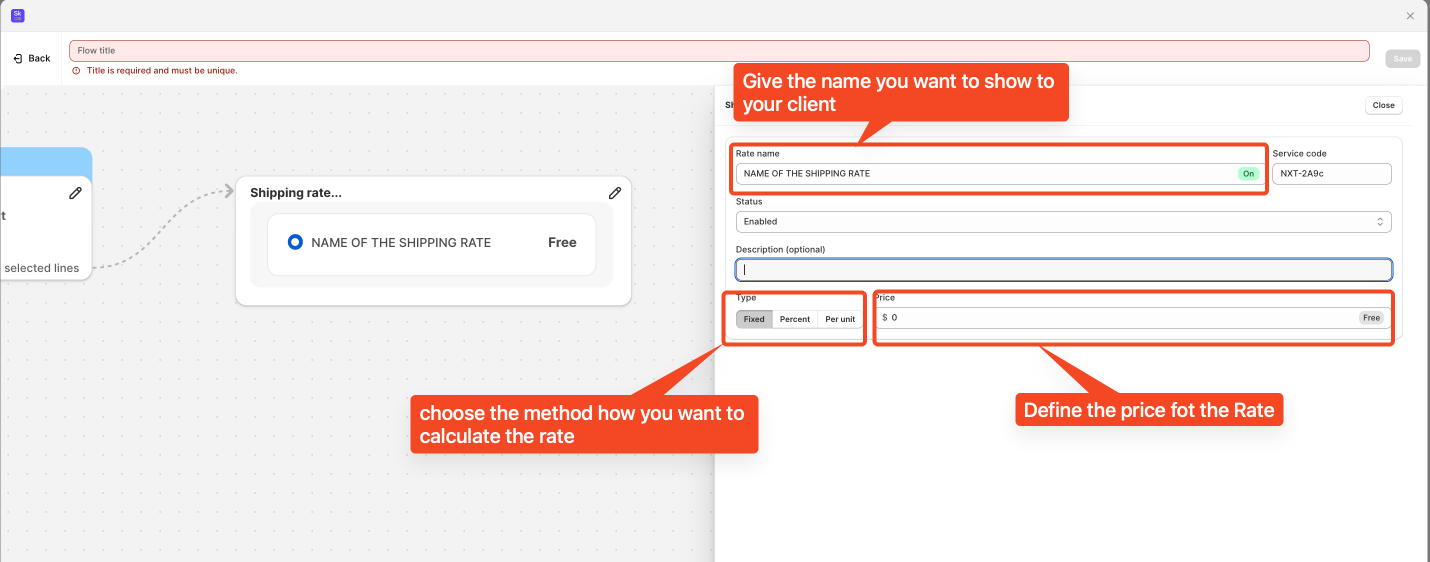
These options make the rate extremely adaptable. Whether you want a simple flat fee or a dynamic formula that changes based on quantity or order value, ShipKit gives you full control.
When everything looks good you add the title to the Rule then you can click Save.
This will make your new Dynamic Shipping Rate becomes active immediately and will appear in Shopify Checkout whenever the conditions of your flow are met.
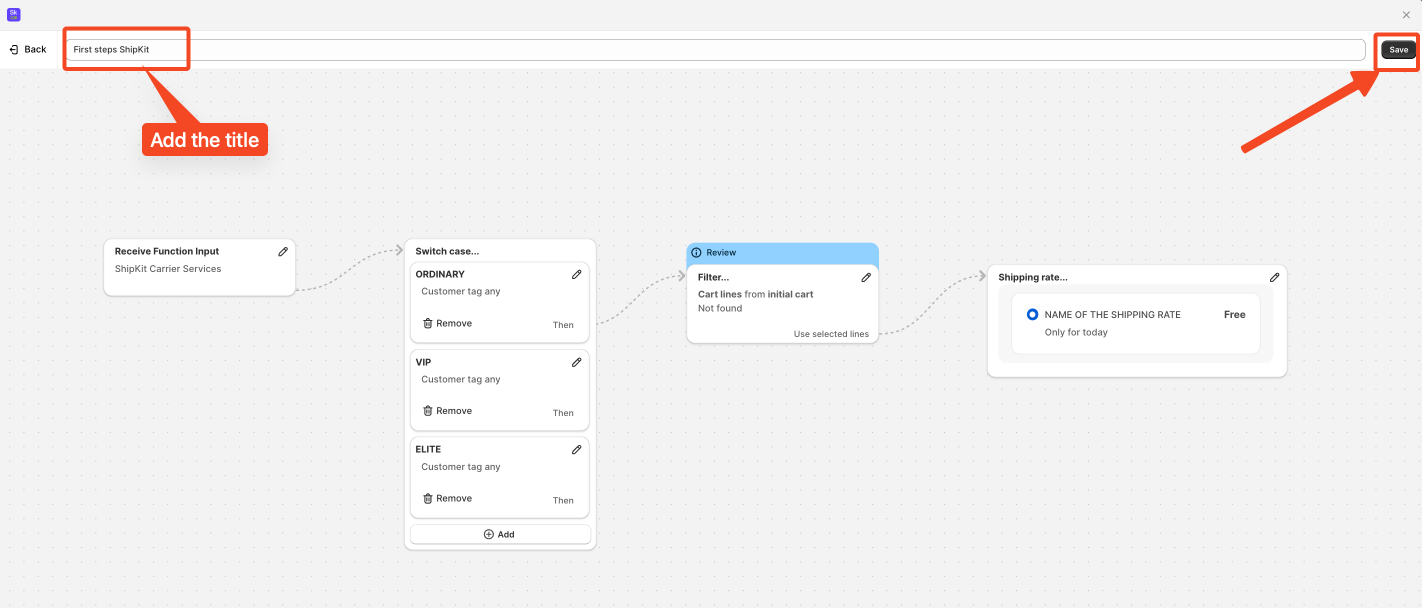
Your rule will now be listed in the Rates section, and you can switch it on or off whenever you need, giving you full control over when this special rate is available to your customers.