In this tutorial, we'll walk you through the step-by-step process of creating a special offer with the "Headless" feature using the SupaElements application by Nextools.
Let's see how to set up the rule!
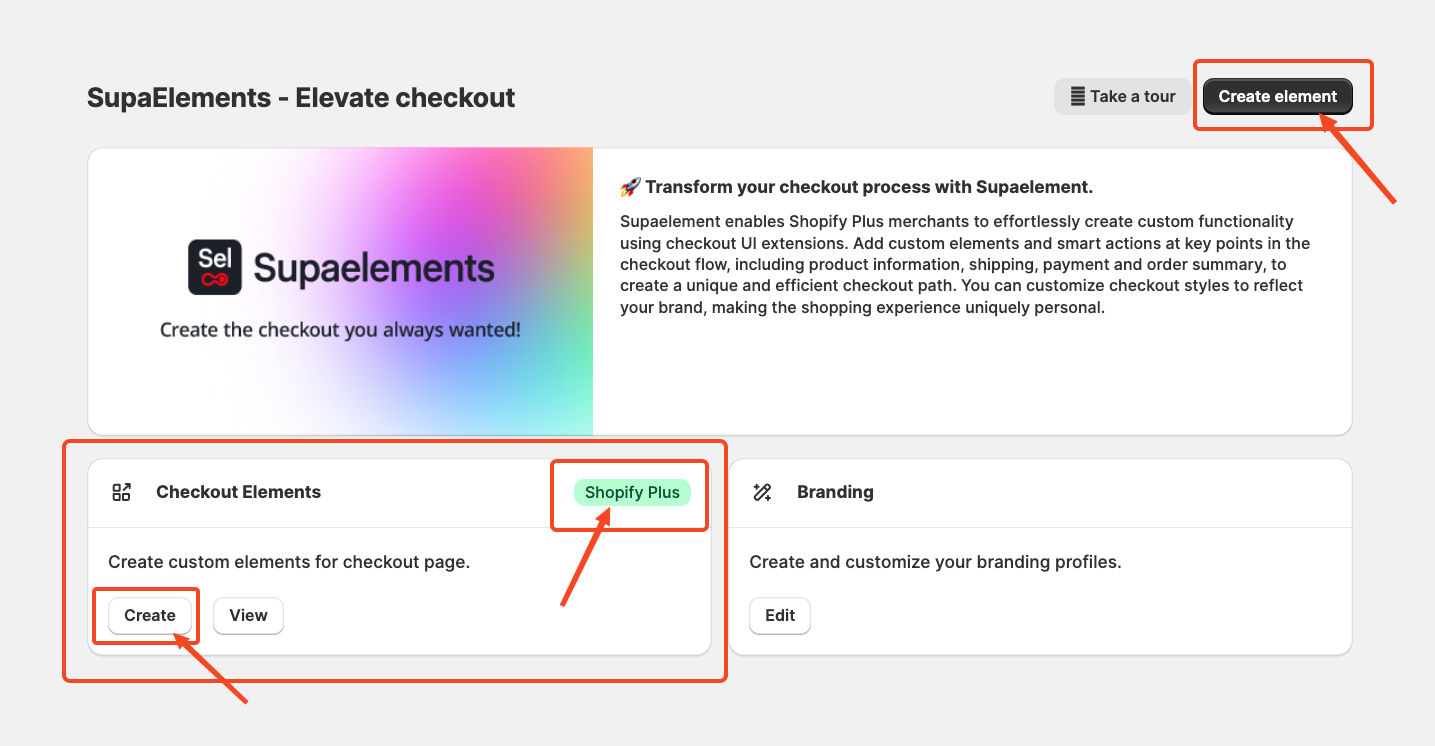
Click on "create element" or the "create" button in the highlighted part
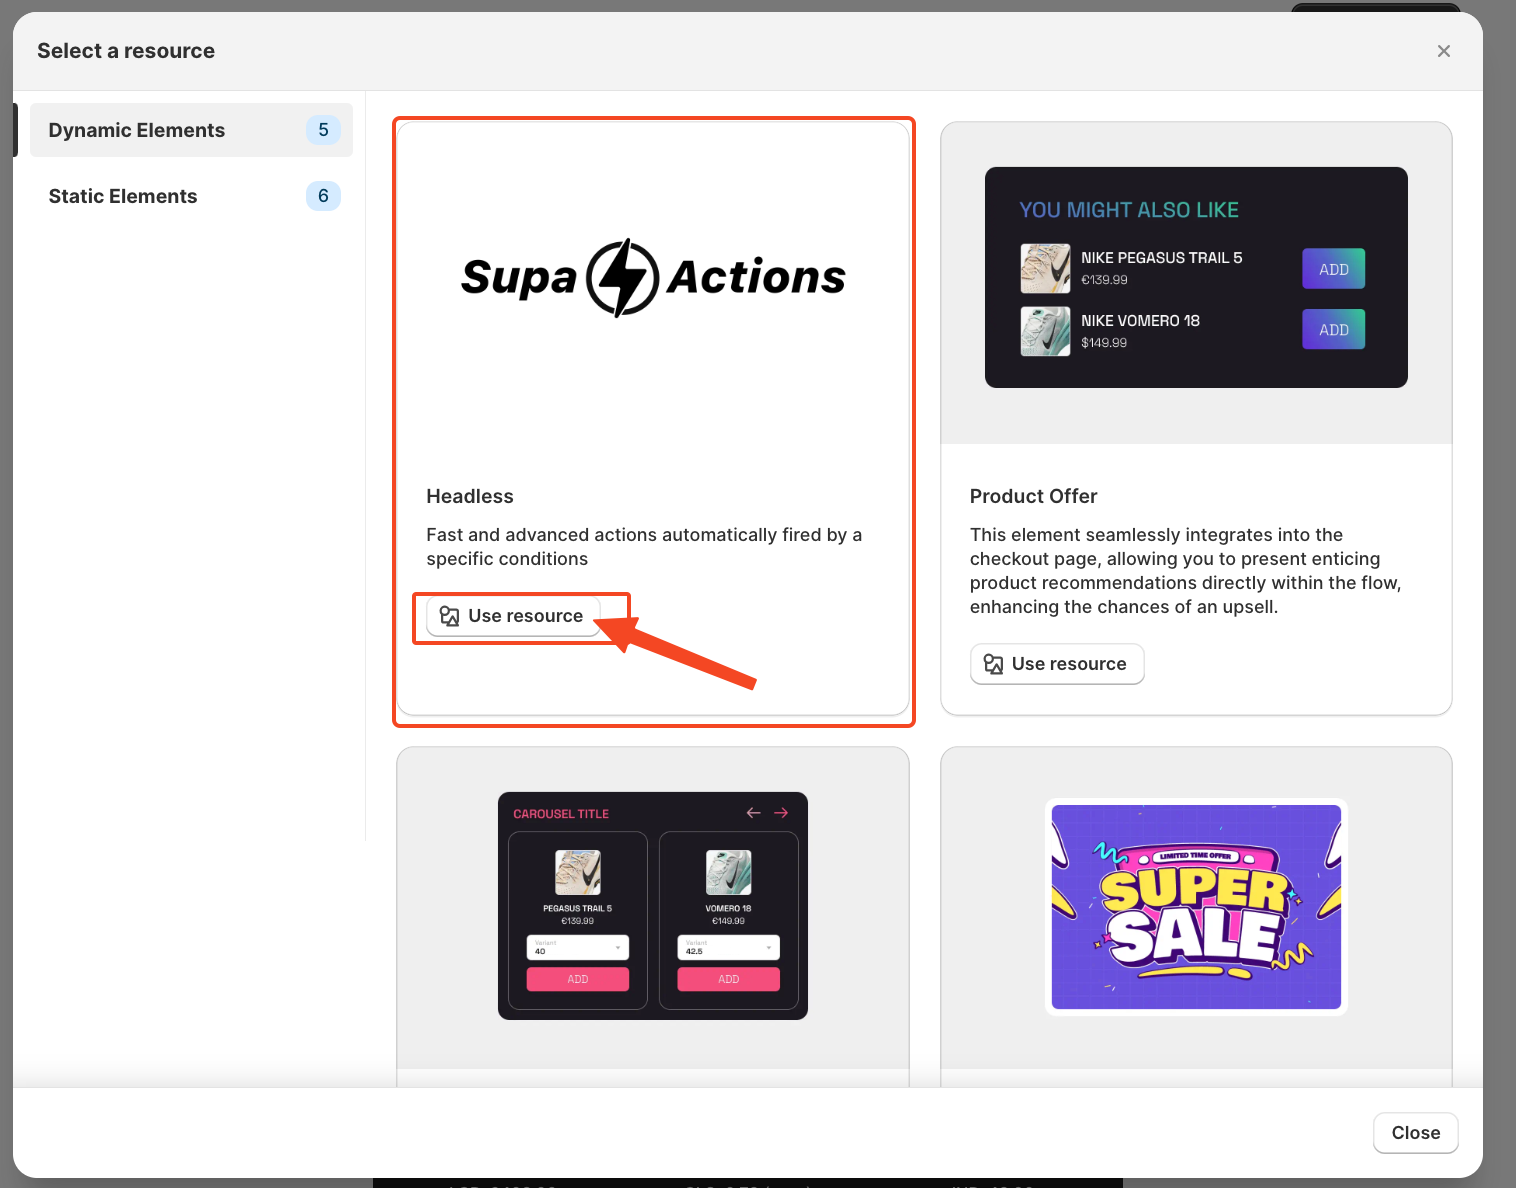
A pop-up window will appear. From there, select “Dynamic Element” and choose “Headless”. Next, click on “Use Resources” within the Headless option to proceed.
Start Creating the Element Configuration
Now we'll begin setting up the element configuration for the headless. Once you enter the configuration page, it looks like this.
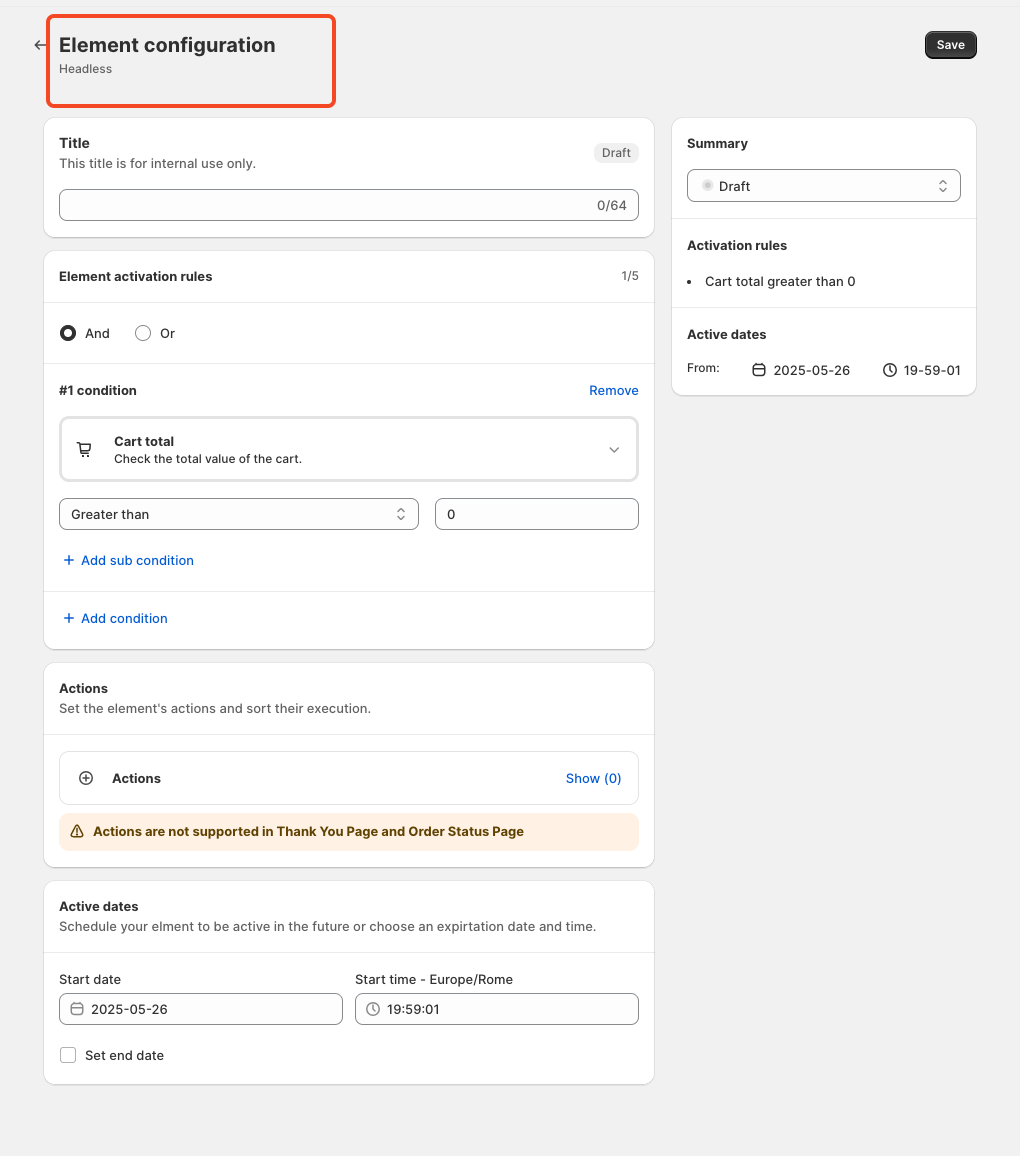
Add a Title: The first step is to enter a title for the rule. This title is for internal reference only and does not impact your live store directly. However, choosing an appropriate title is important, as it will also be used later in the App Block. I will explain again later in the article where and how to use the title.

Set Element Activation Rules
After naming your SupaElement rule, you'll configure the Element Activation Rules. You can choose between AND and OR logic based on your specific requirements. How to use this feature?
Use AND logic when you want multiple conditions to be true at the same time.
For example, if the cart total is greater than 0 and the total cart quantity is greater than 5.
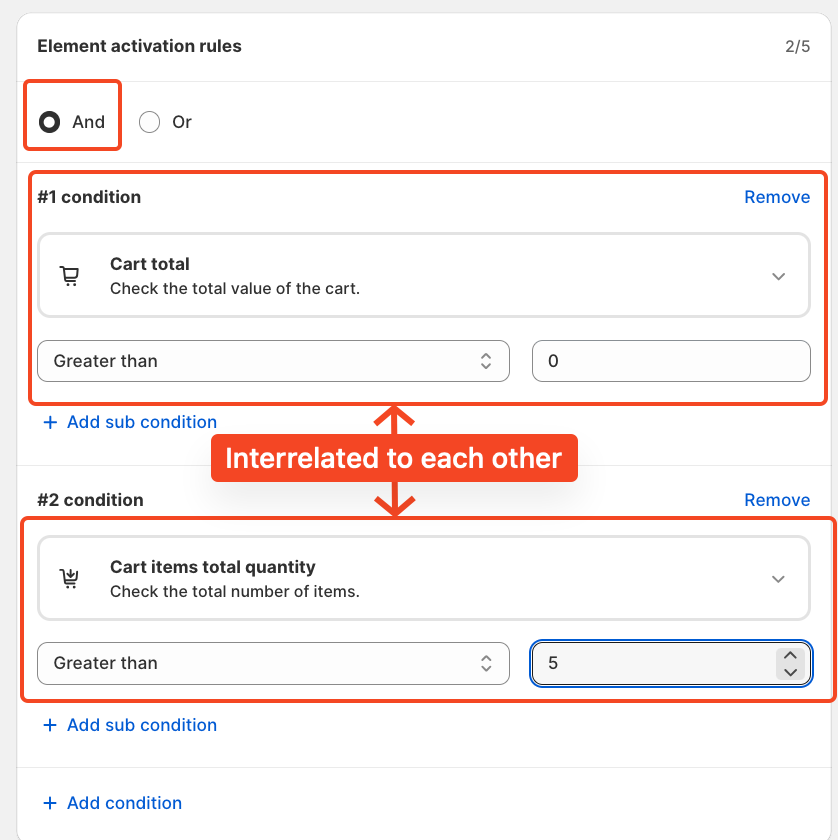
Use OR logic when you want any one of the conditions to be true.
In this case, the same conditions apply to cart total greater than 0, or cart quantity greater than 5, but they are evaluated independently. The rule will fire if either of the conditions is met.
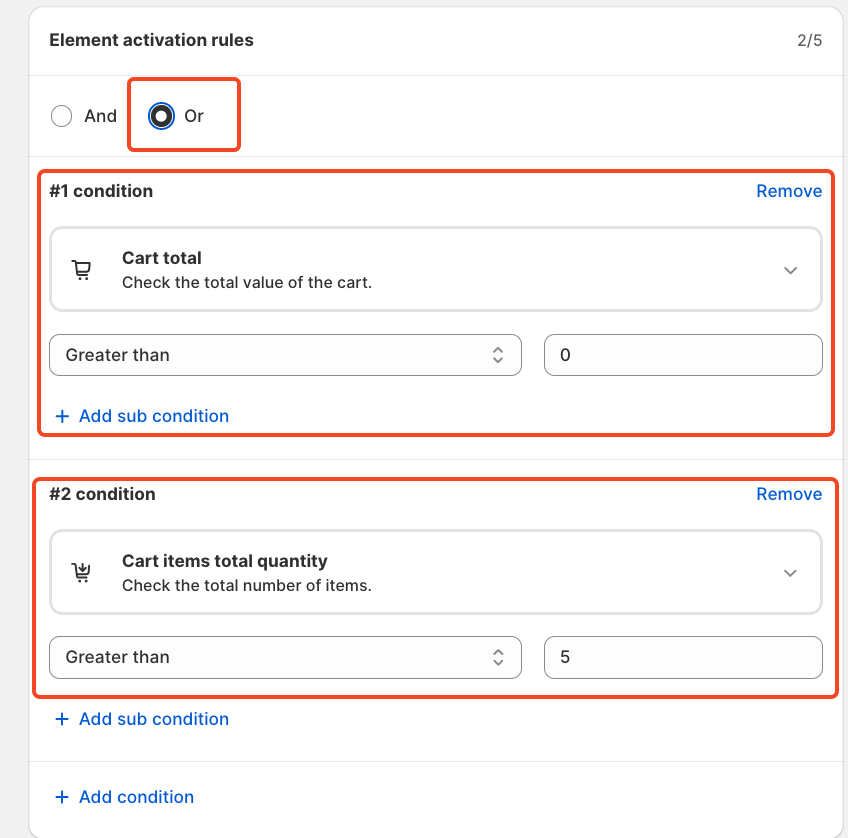
Each rule contains up to five conditions, and you can also create sub-conditions for more detailed targeting.
We've included multiple options to give merchants greater flexibility in how they present product offers at checkout and to choose the condition. Simply click on the drop-down and choose as per your need.
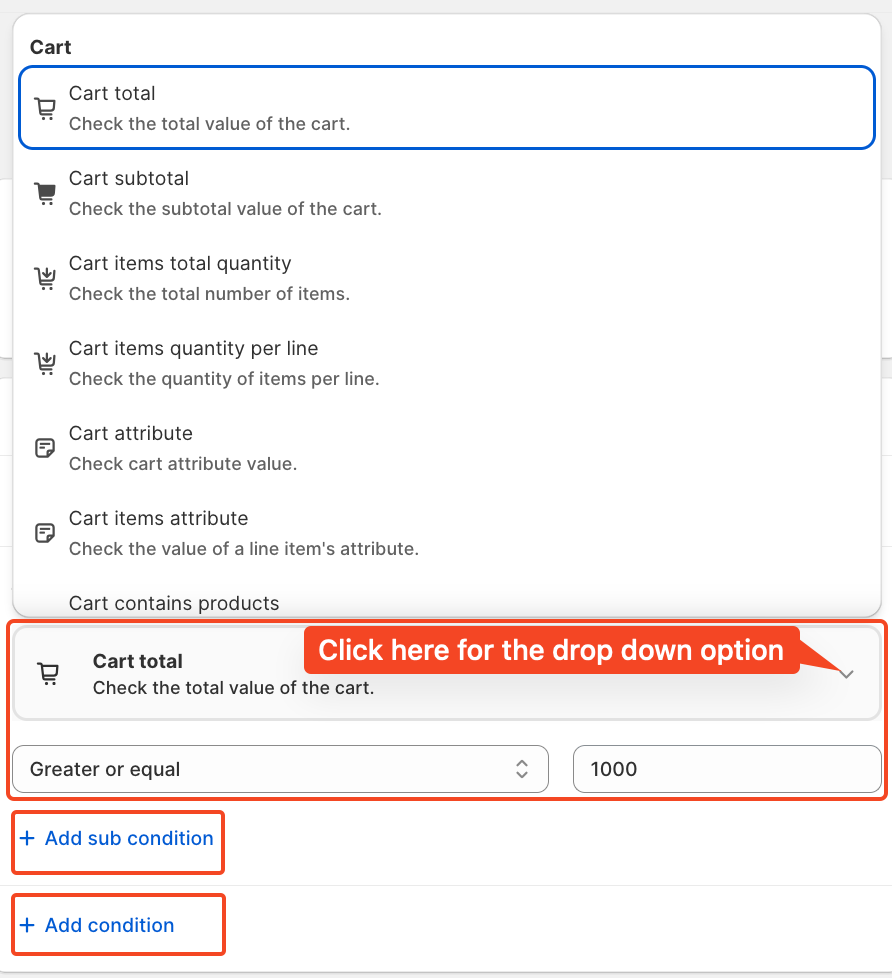
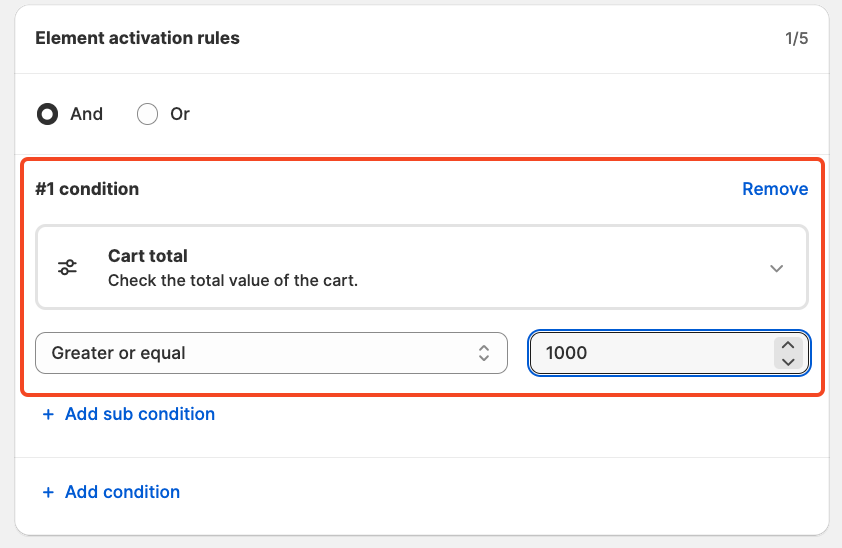
For this tutorial, we'll use the condition: Cart total greater than 1000. And a single condition and not a double condition.
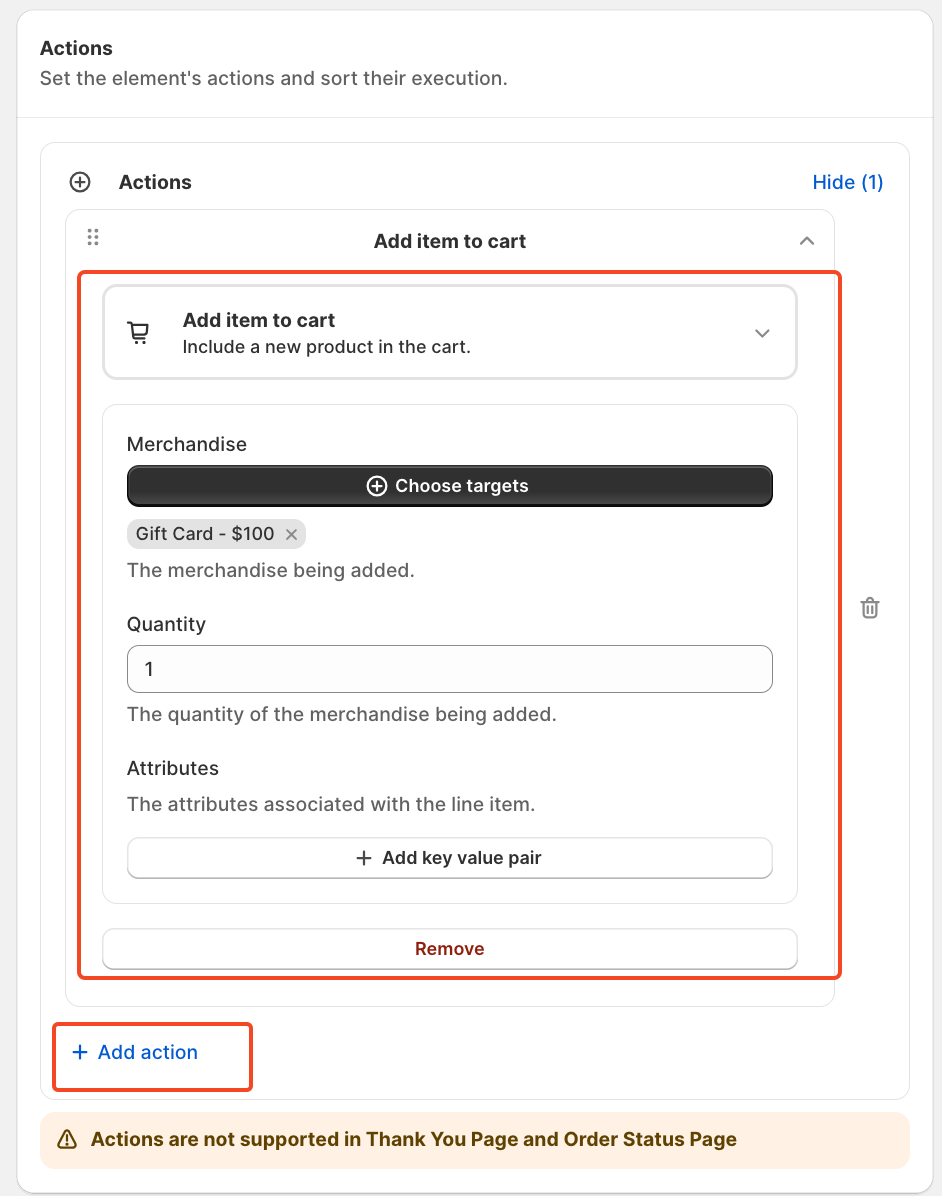
An action allows you to modify the cart based on the selected condition.
We chose the actions and conditions that will trigger the display of the created element —in other words, when the element should appear. You can add multiple actions to a single.
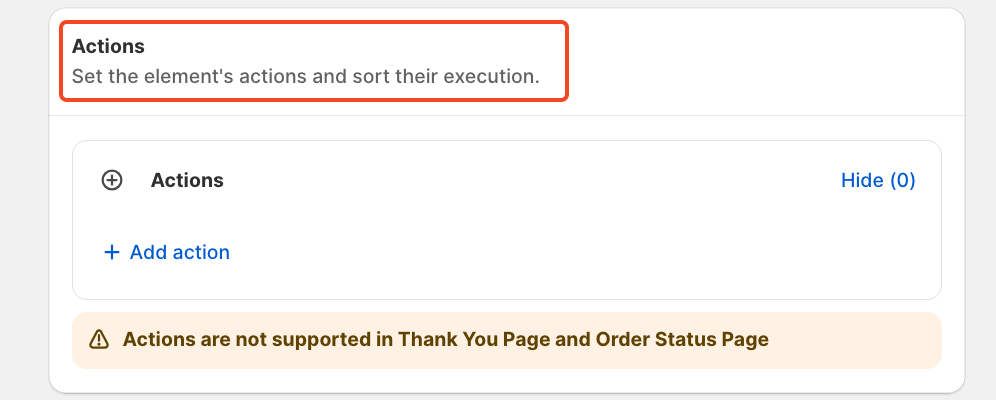
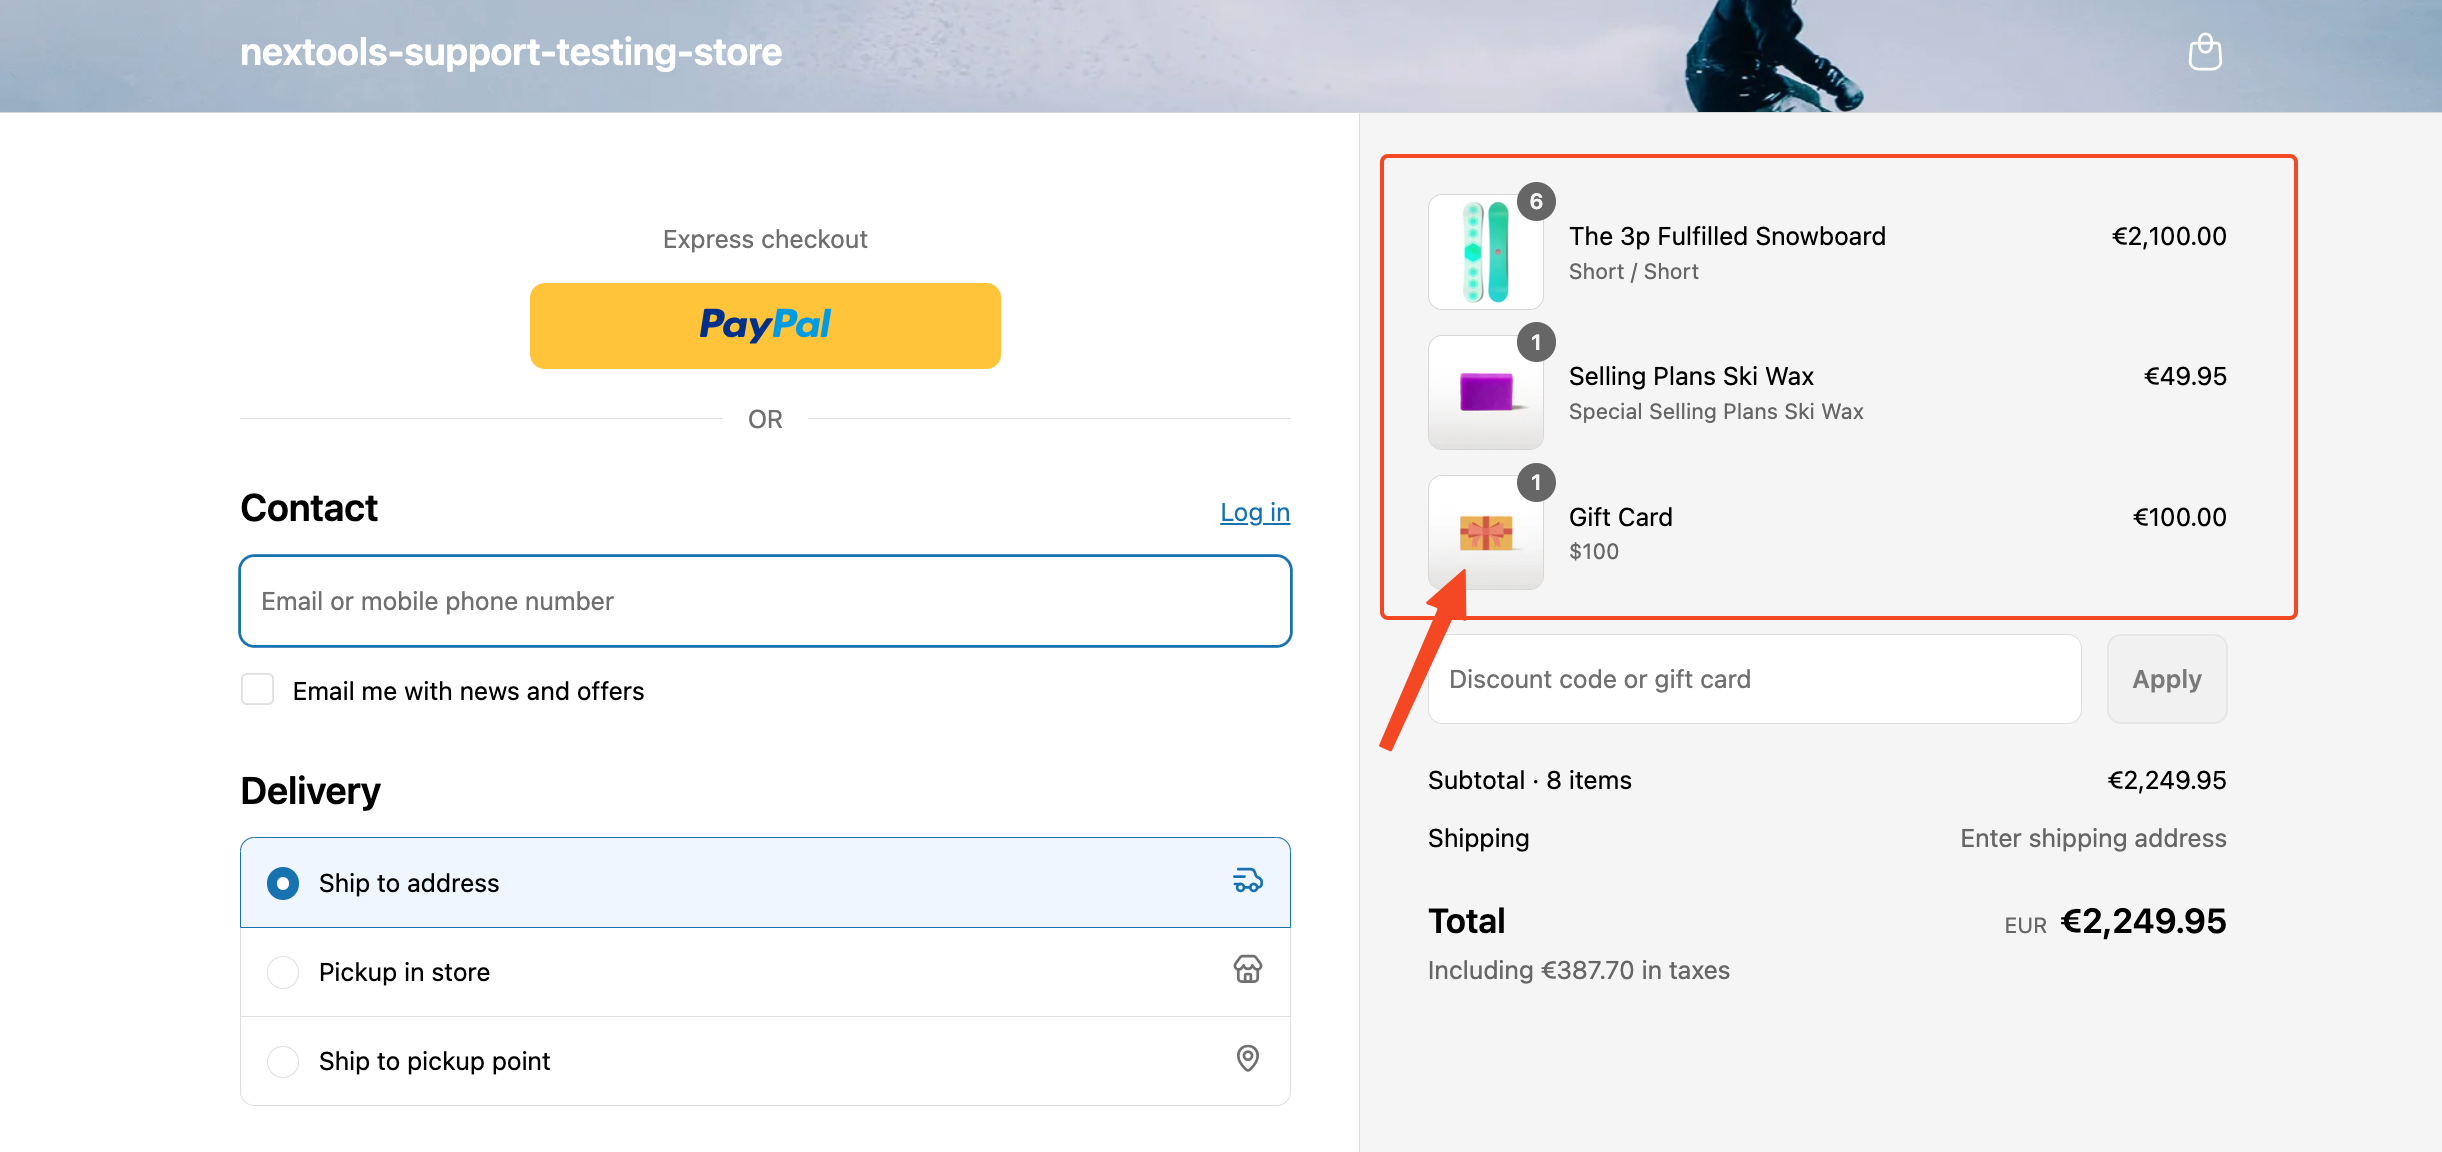
For this example, we are selecting the action "Add item to cart," where the merchandise is a $100 gift card with a quantity of 1. However, you can choose different actions and specify more than one quantity if needed.
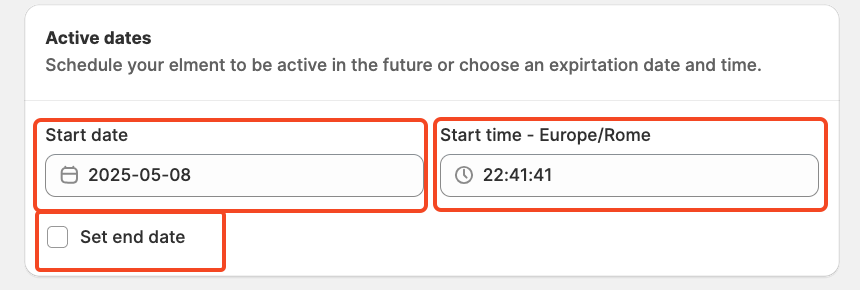
Set the start and end dates, along with the time, to control when the offer appears. This is perfect for managing seasonal promotions, holiday campaigns, or limited-time flash sales.
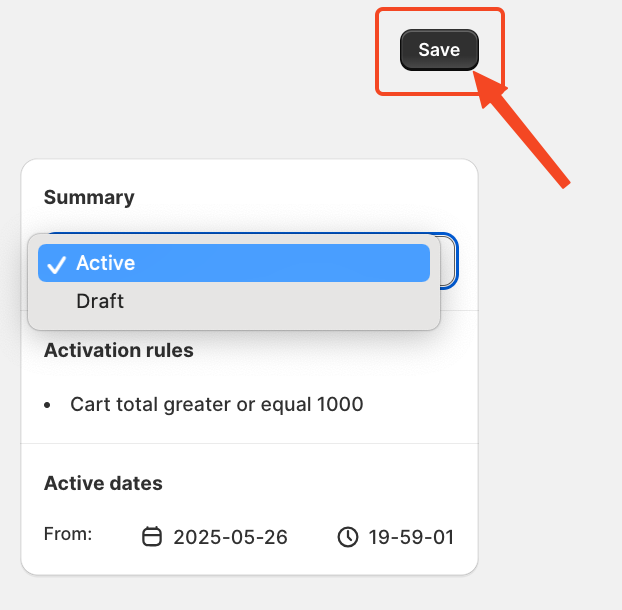
Finally, review the summary, activate the rule, and save it.
After saving and activating the rule, the final step is to choose where to display your offer. To do this, go to your store's checkout page customisation section and add the SupaElements app block (if it's not already added).
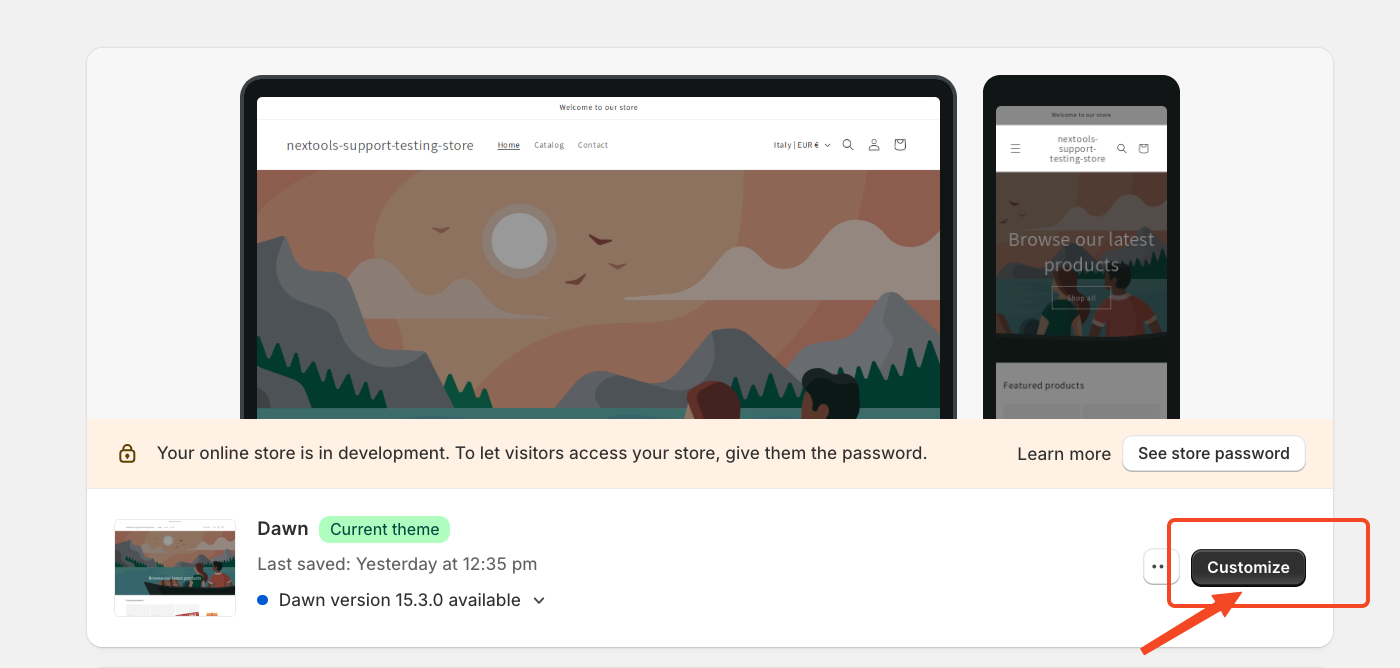
Then,
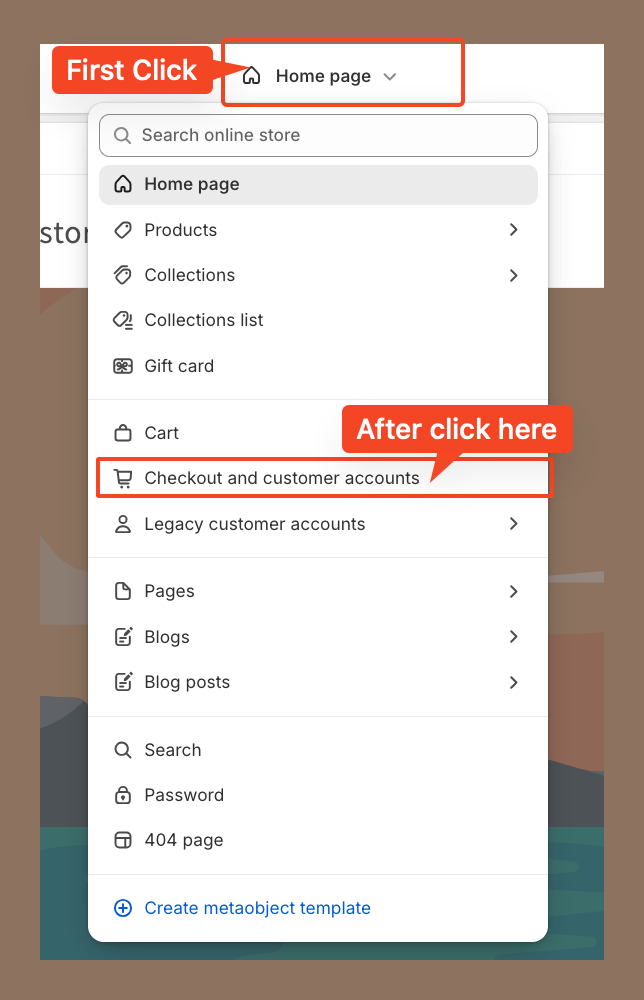
Now we place the element at the top of the checkout page.
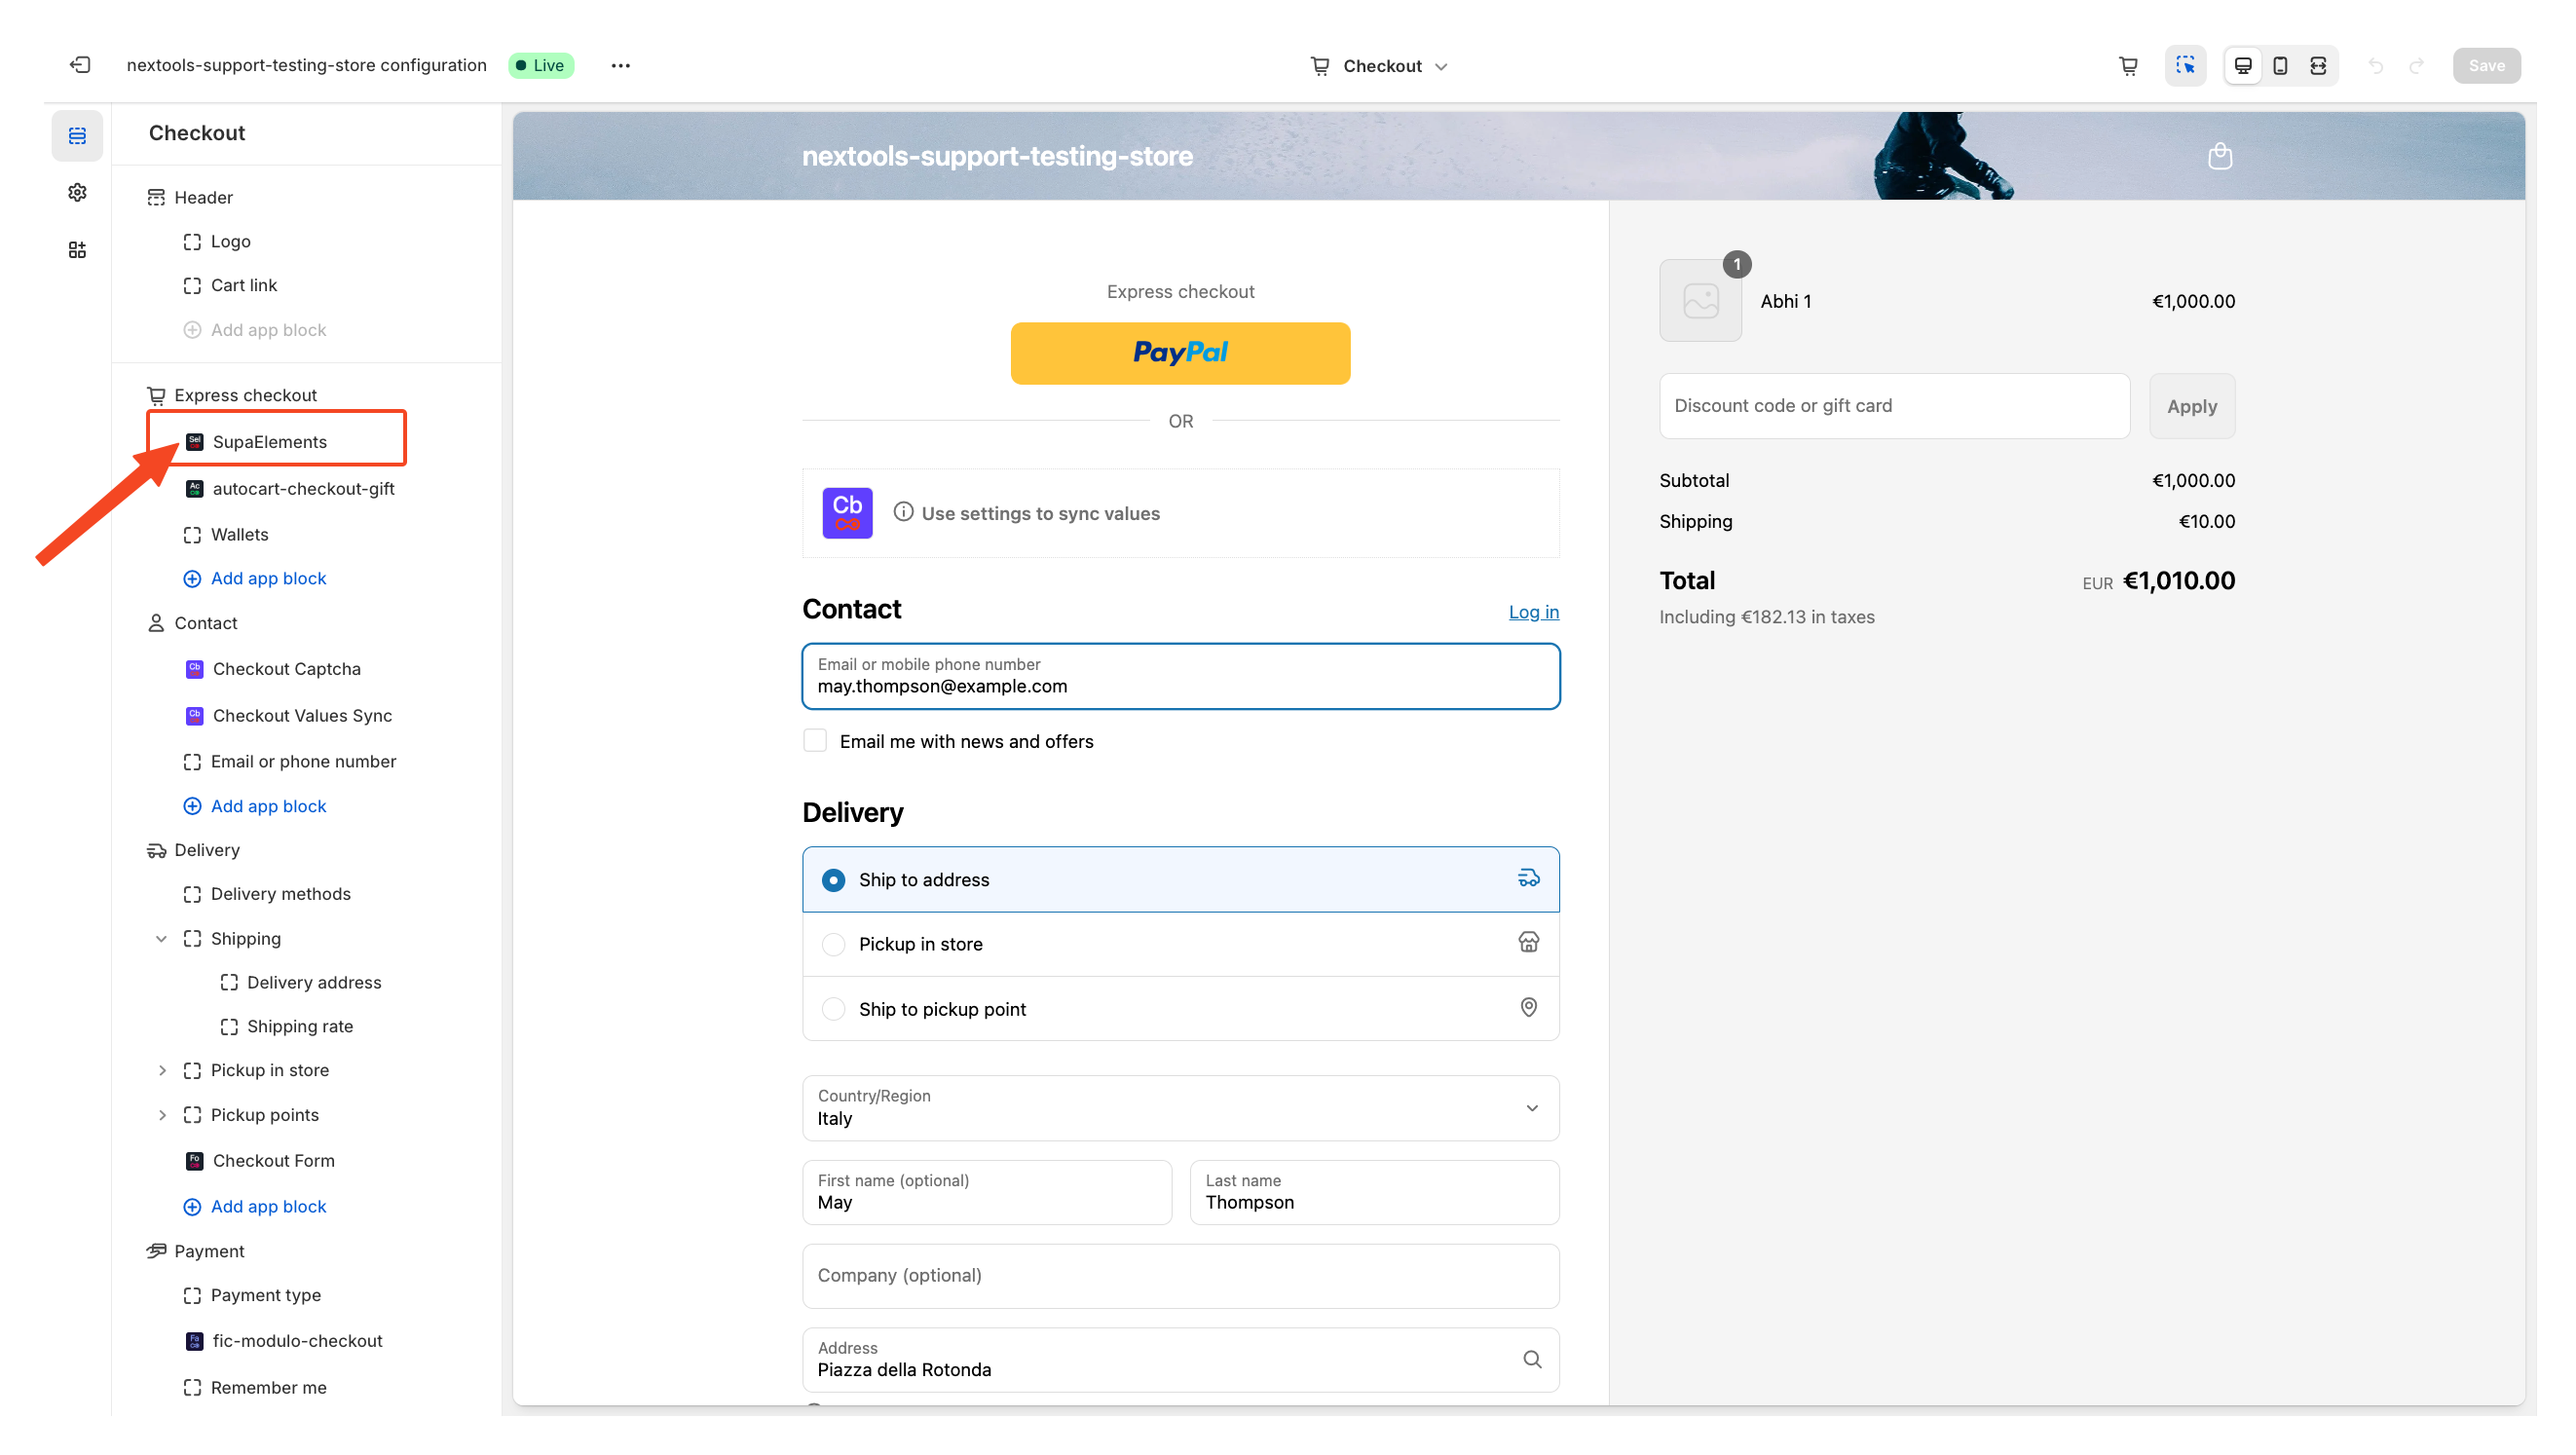
Next, open the element, and add the name of the elements you have created in the “Element Name” field.
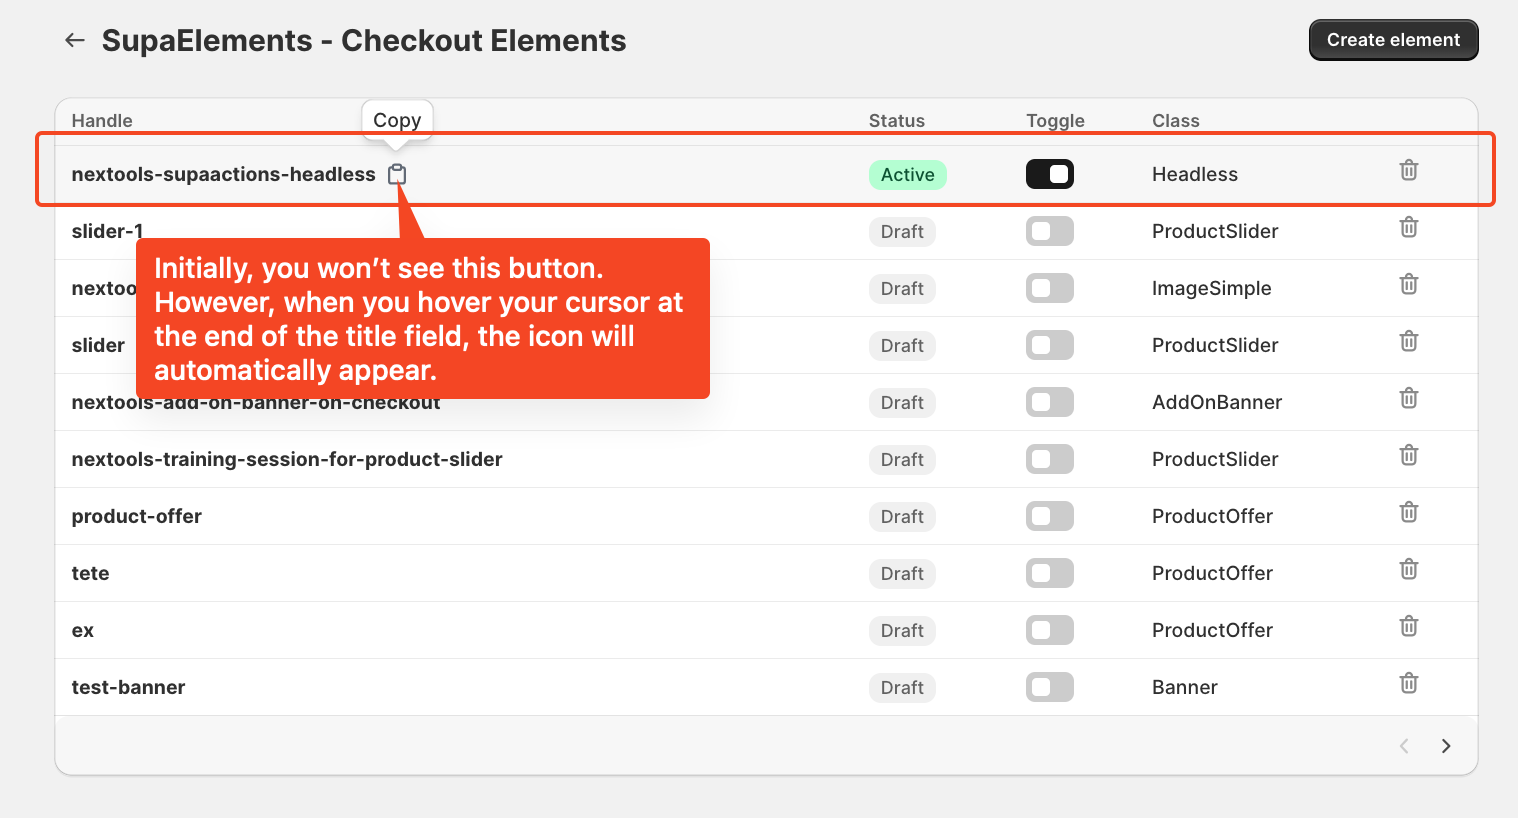
You have three options on how you can get the correct name:
- Copy it from the configuration page,
- Copy it from the dashboard
- Manually type the name.

Or from Dashboard
Enter the title of the newly created element, making sure it exactly matches the name used in your configuration, and then save the page.
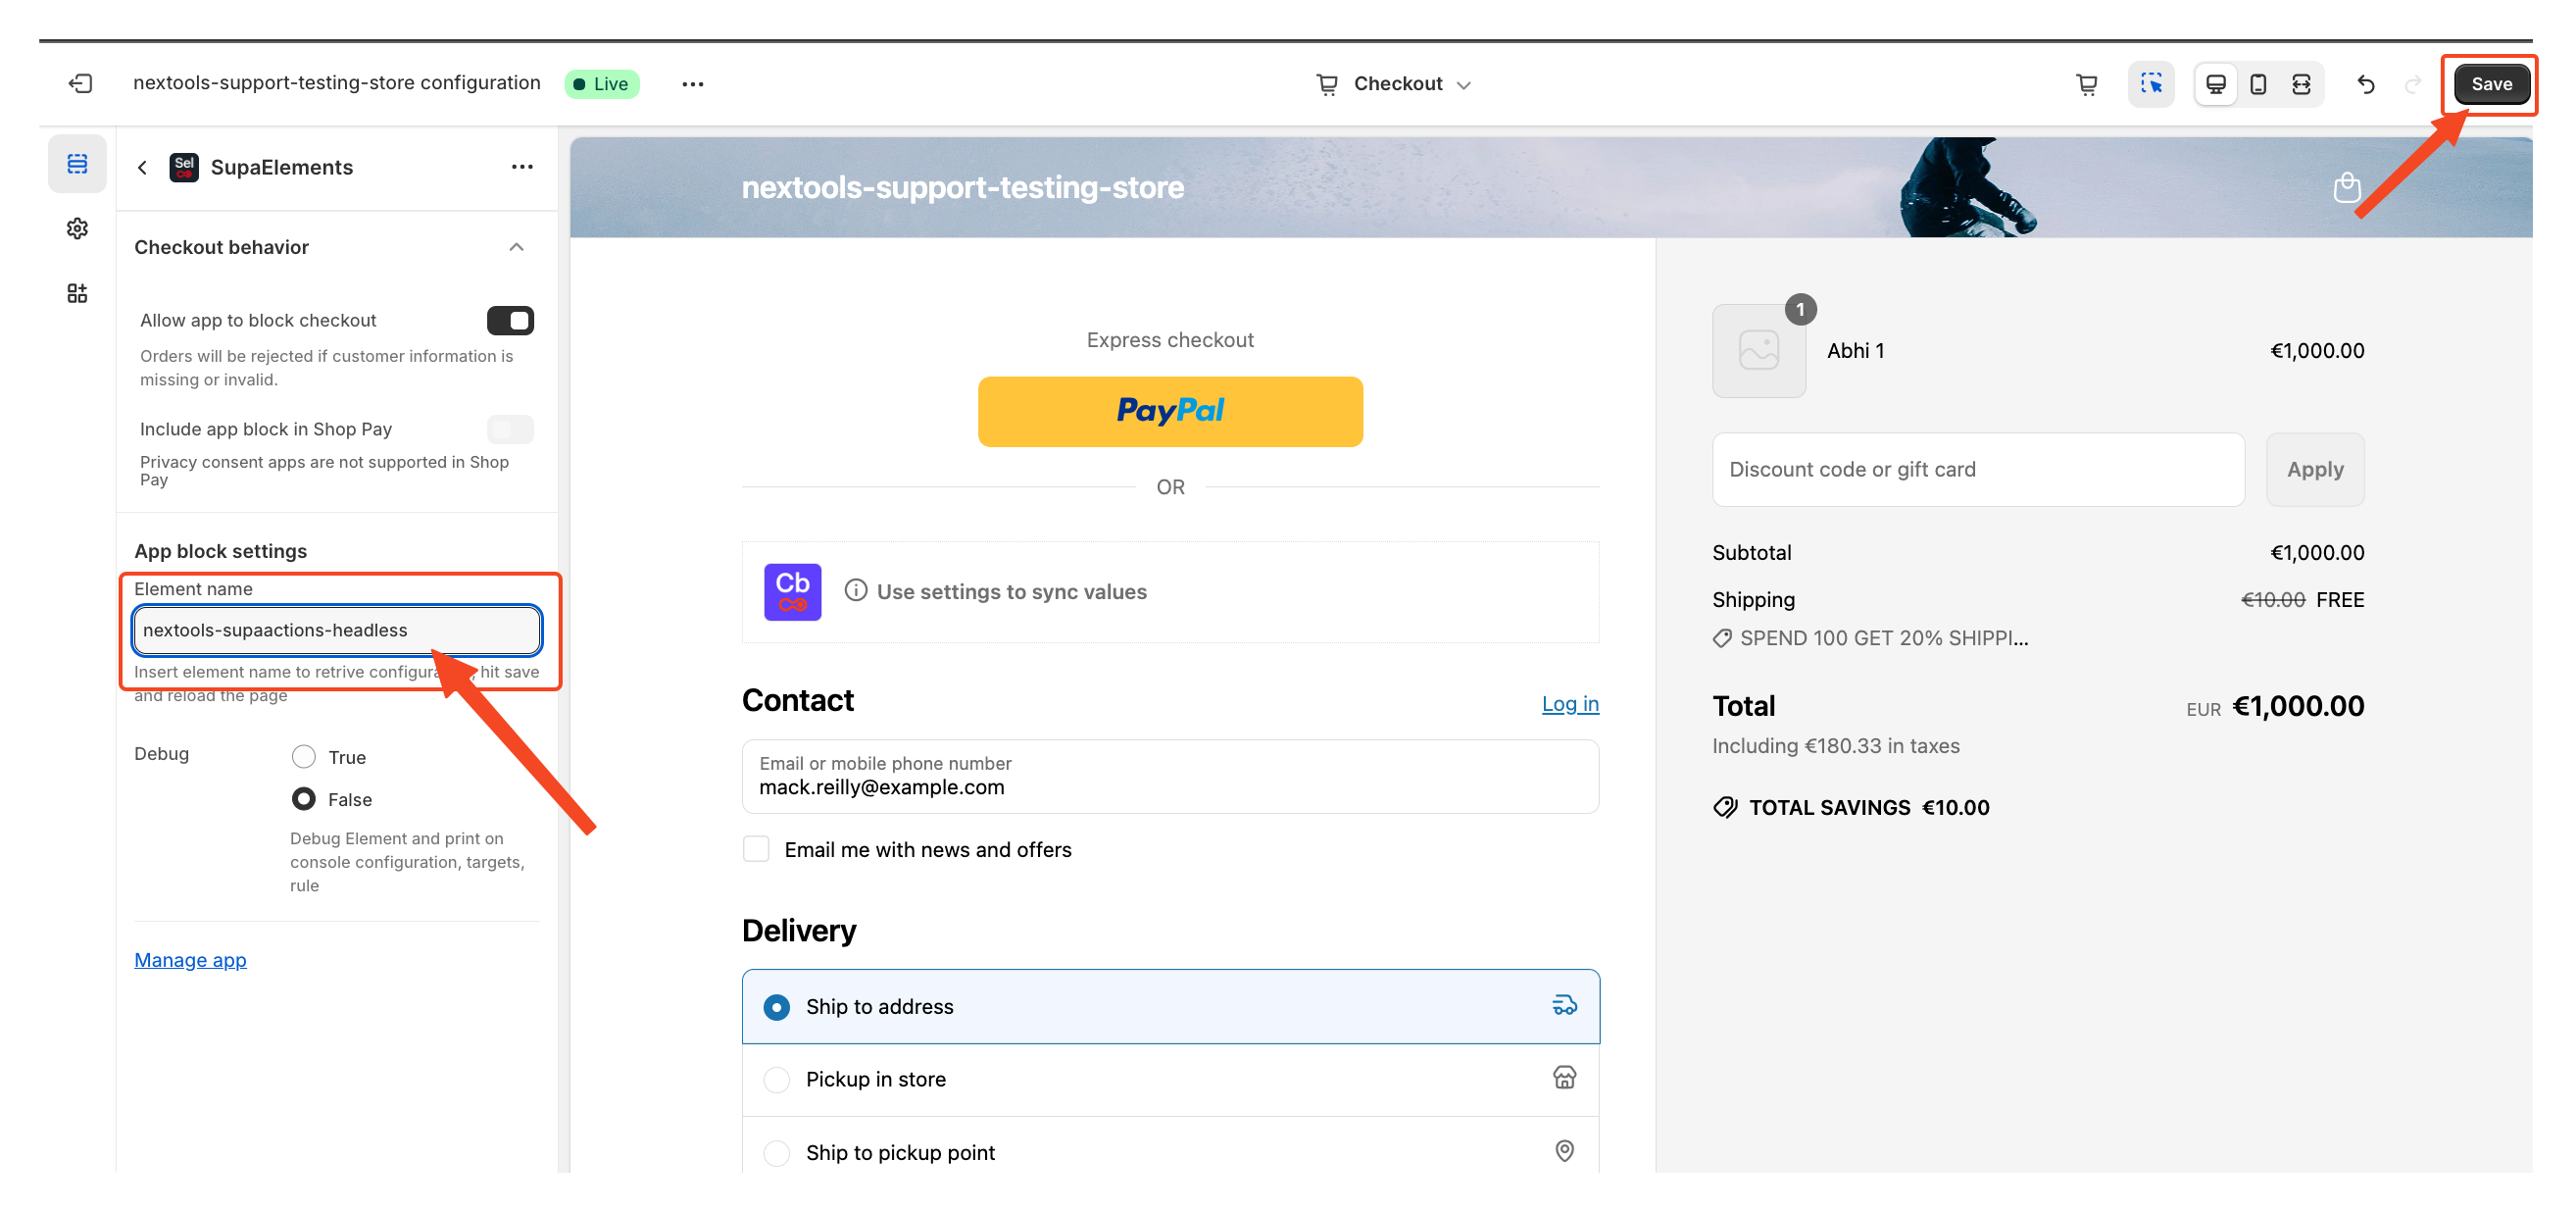
Once all the information is correctly entered and the rule is properly set up and saved within the app block, the corresponding items will automatically appear on the customer's checkout page. You'll be able to see the final result directly in the checkout.
Activate any plan today and enjoy a 7-day free trial to explore all the features risk-free.
Want to know how to get SupaElements for free or discount? Check out our FAQ!
If you need further assistance, feel free to contact us via support email or connect with us directly through HelpCrunch.