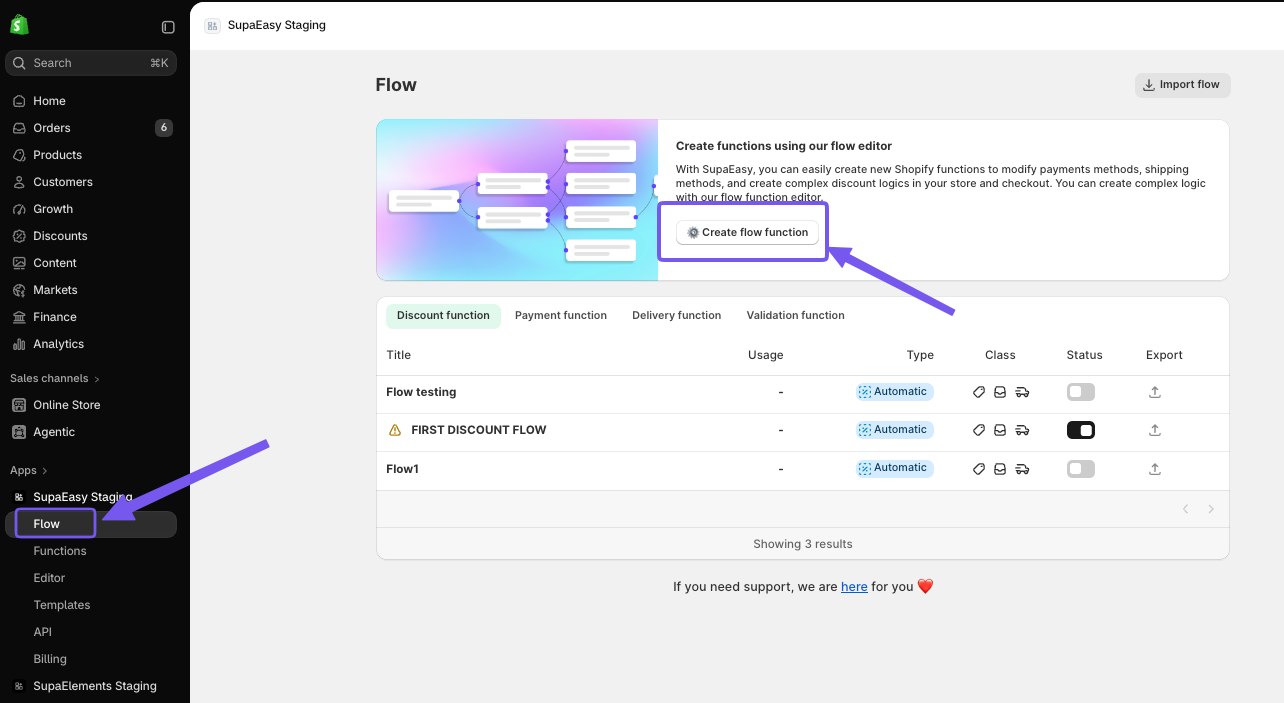
To create a new function in Flow, go to the Flow dashboard and click the “Create Flow Function” button.
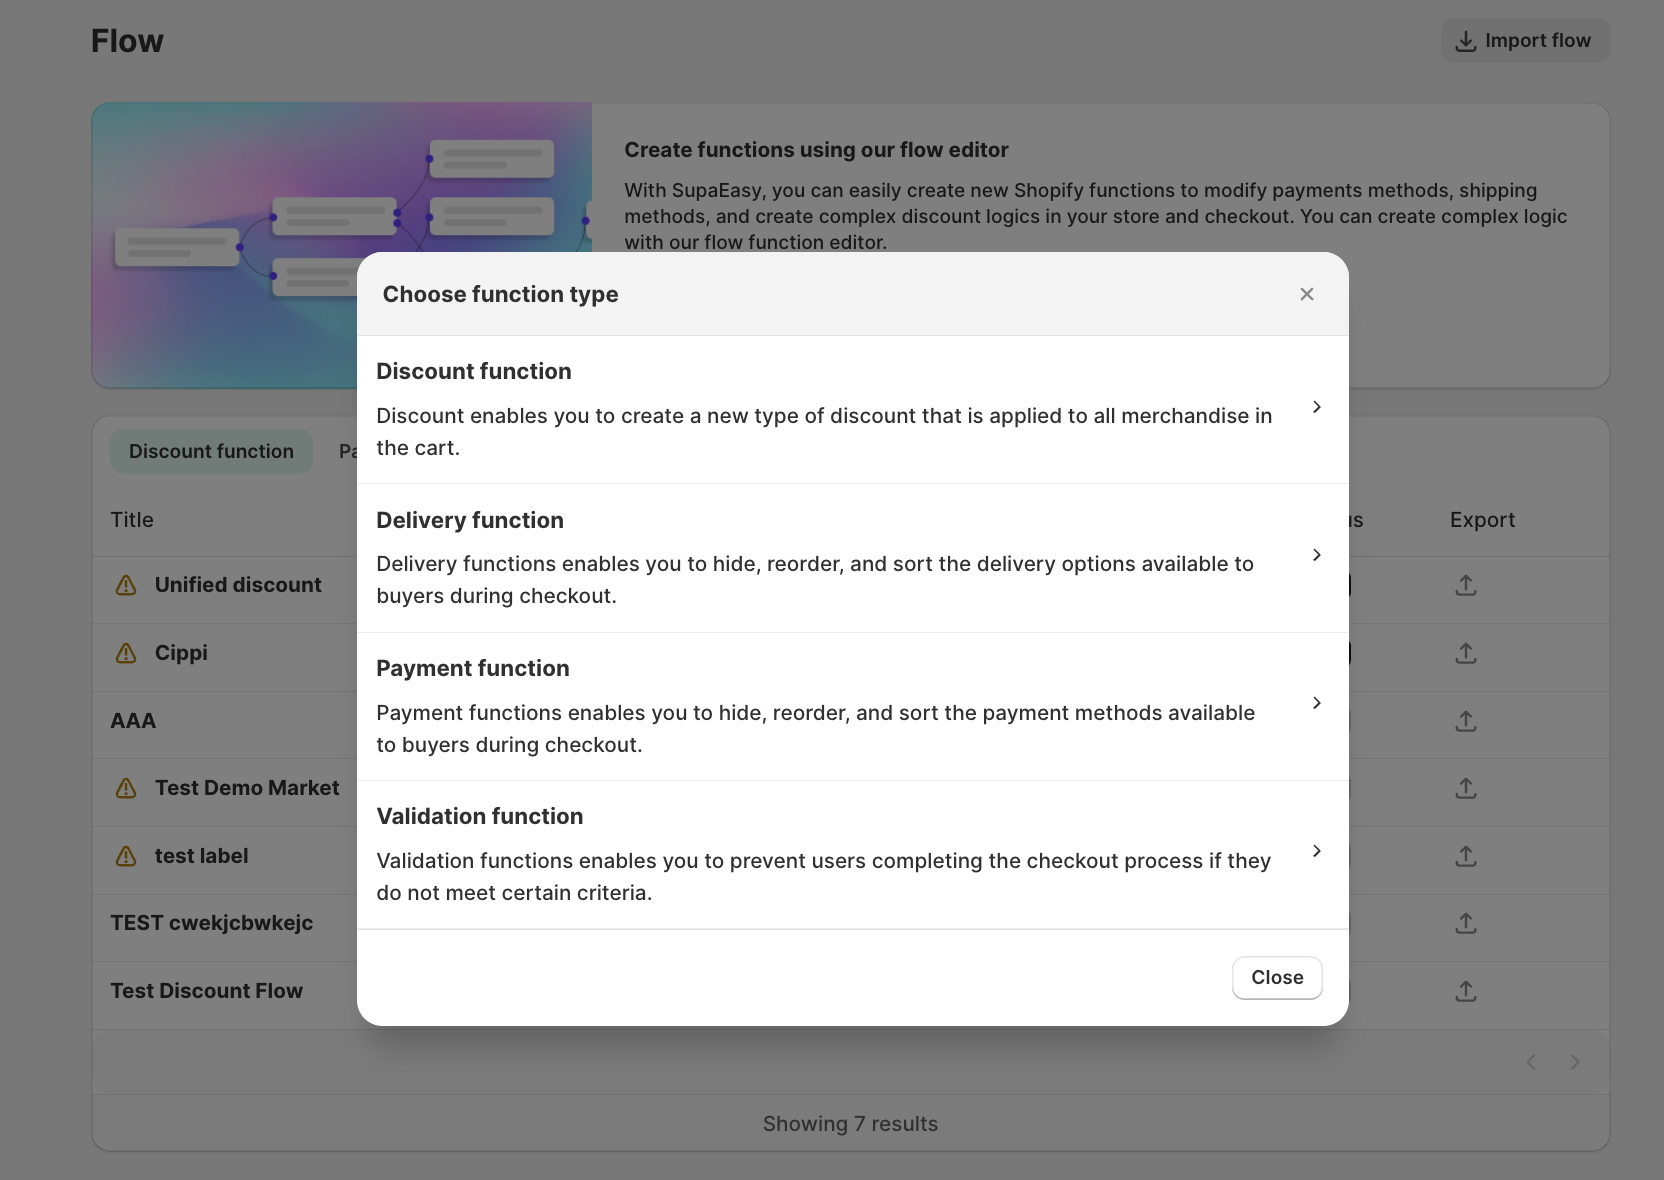
A popup will appear asking you to select the type of function you want to create.
Once you’ve made your selection, you’ll be taken to the function preview page.
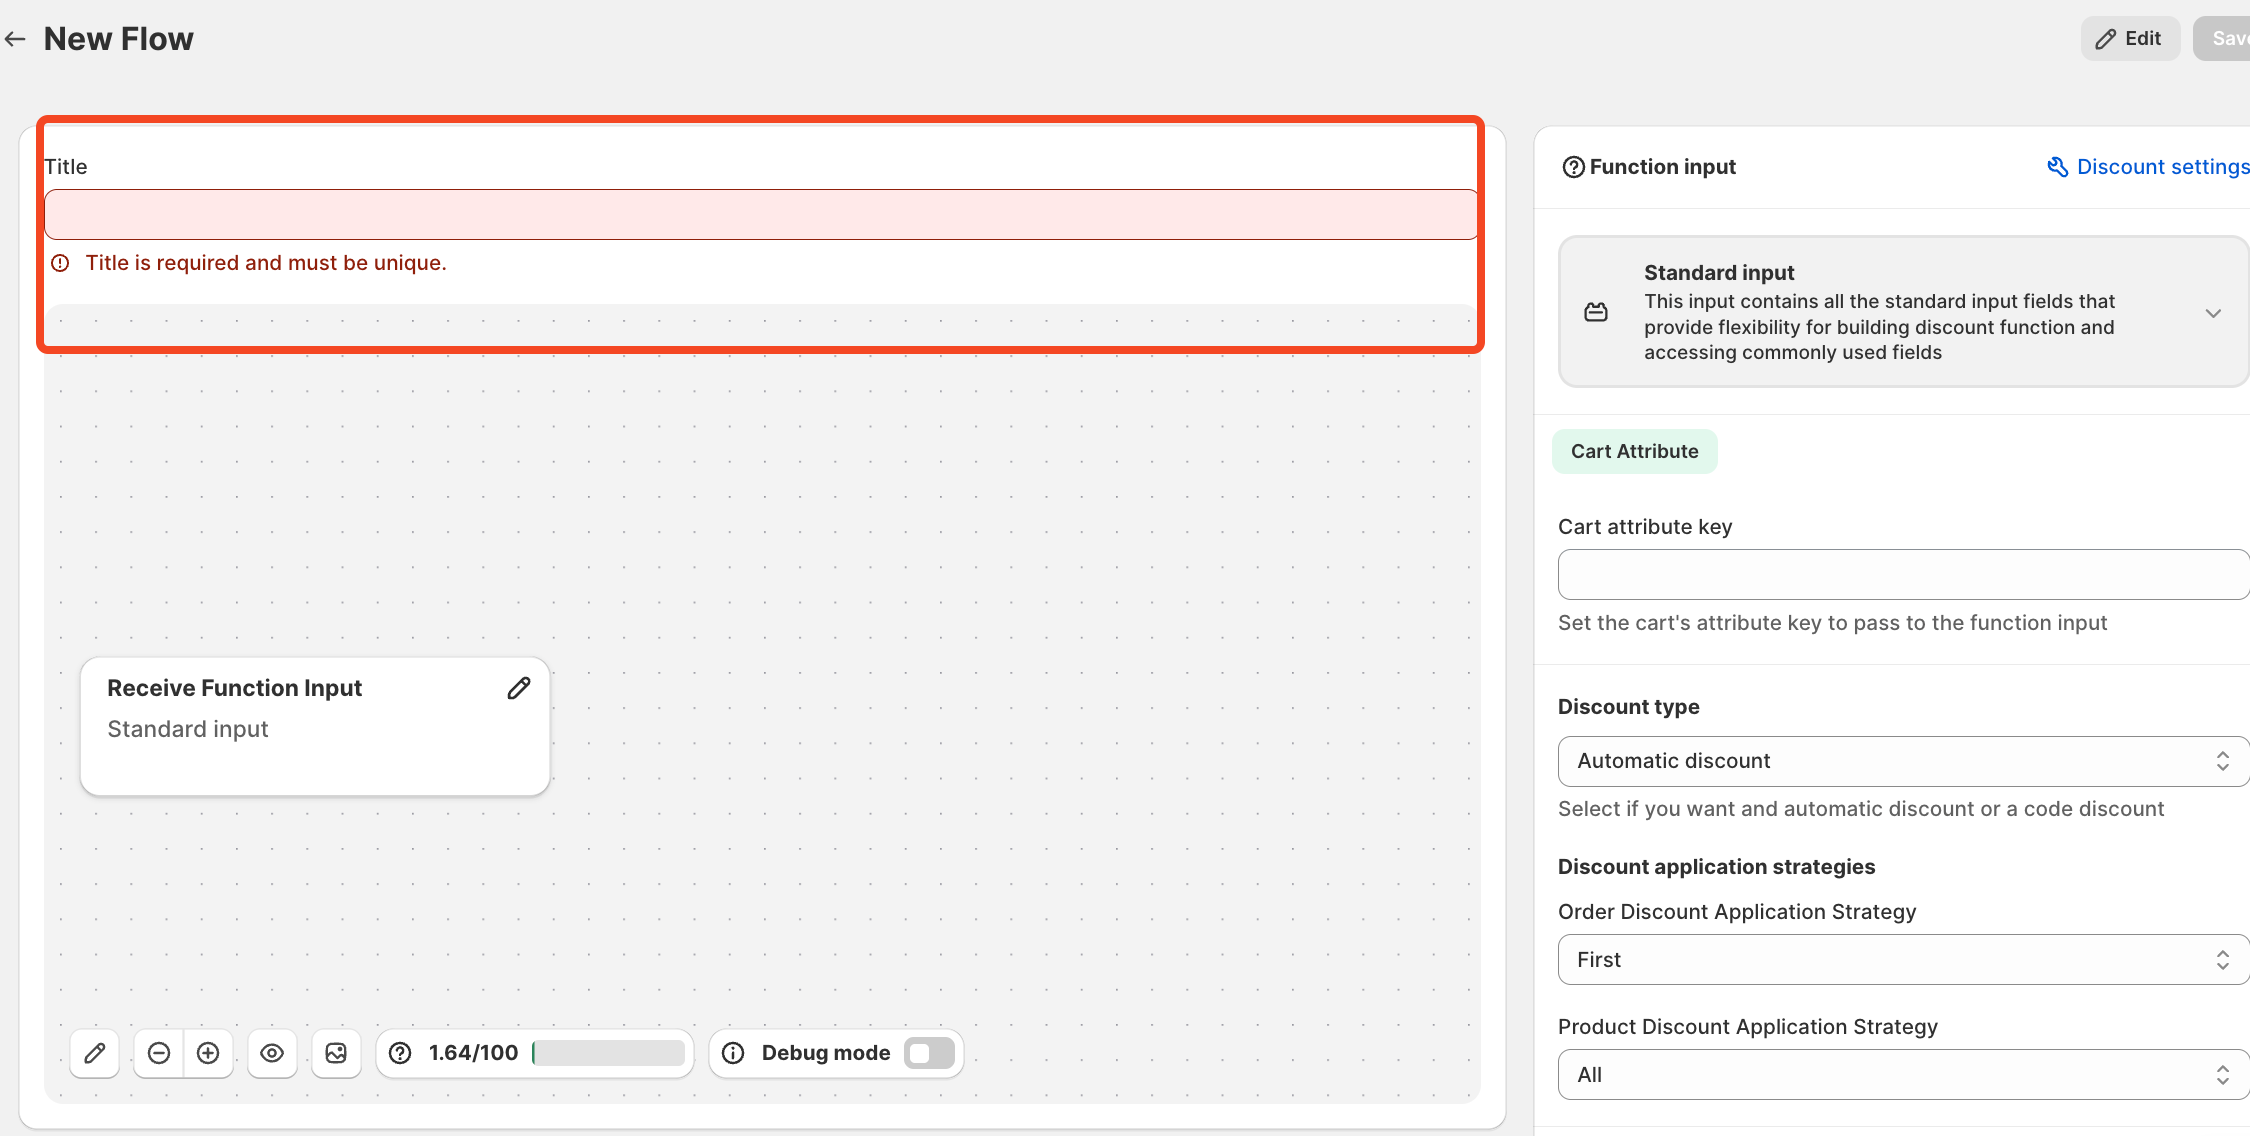
At the top, enter a title for your function, this is required to save it.
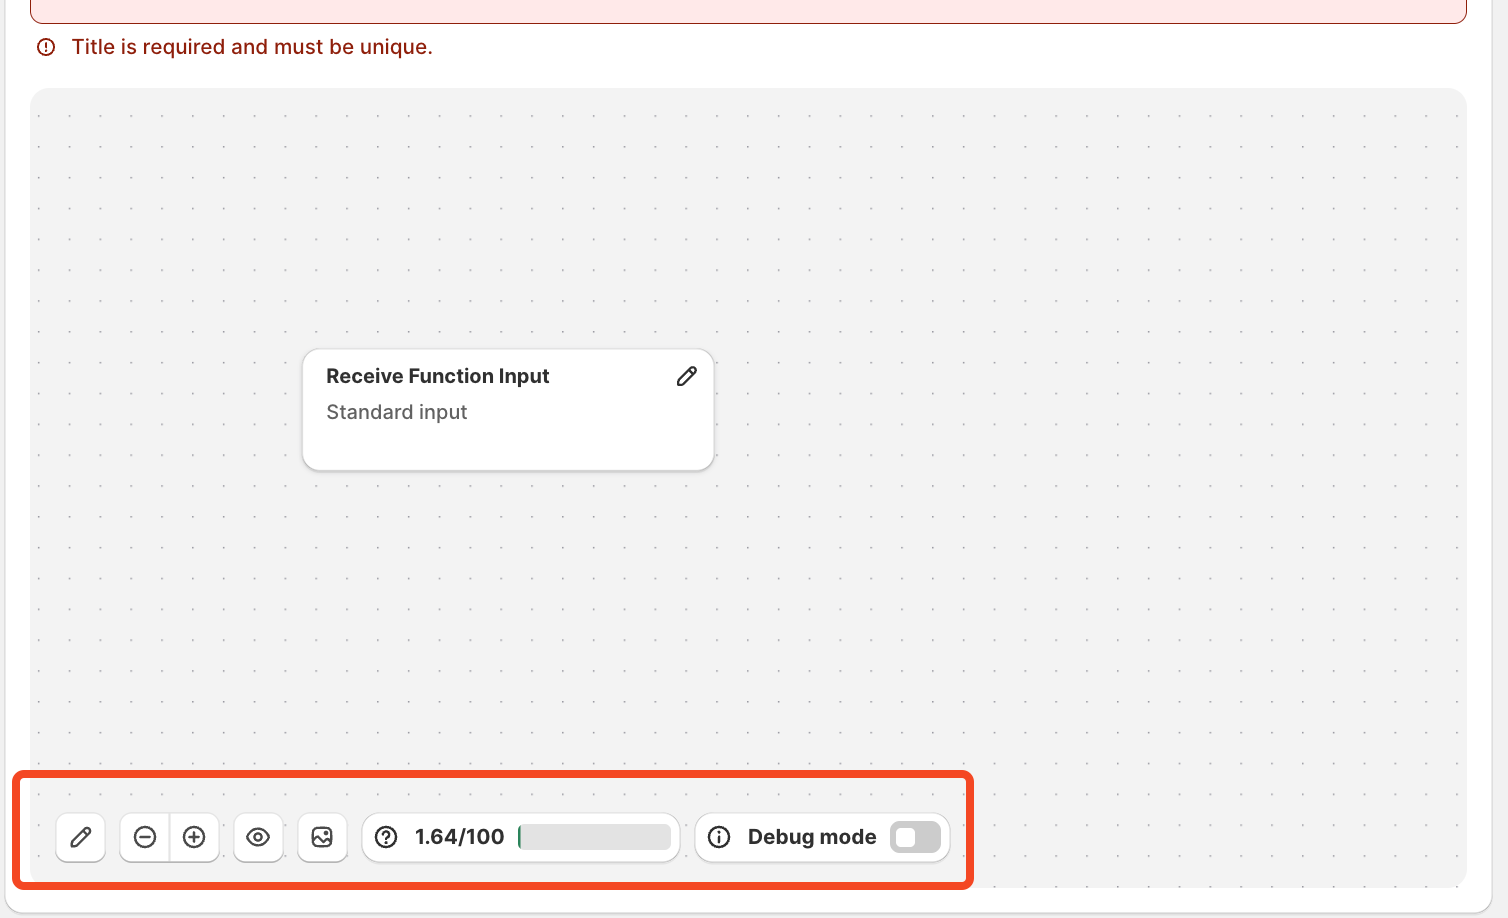
Below the title, you’ll find the visual builder, which will display all the logic blocks and connections of your function. Since it’s a new rule, the canvas will be empty.
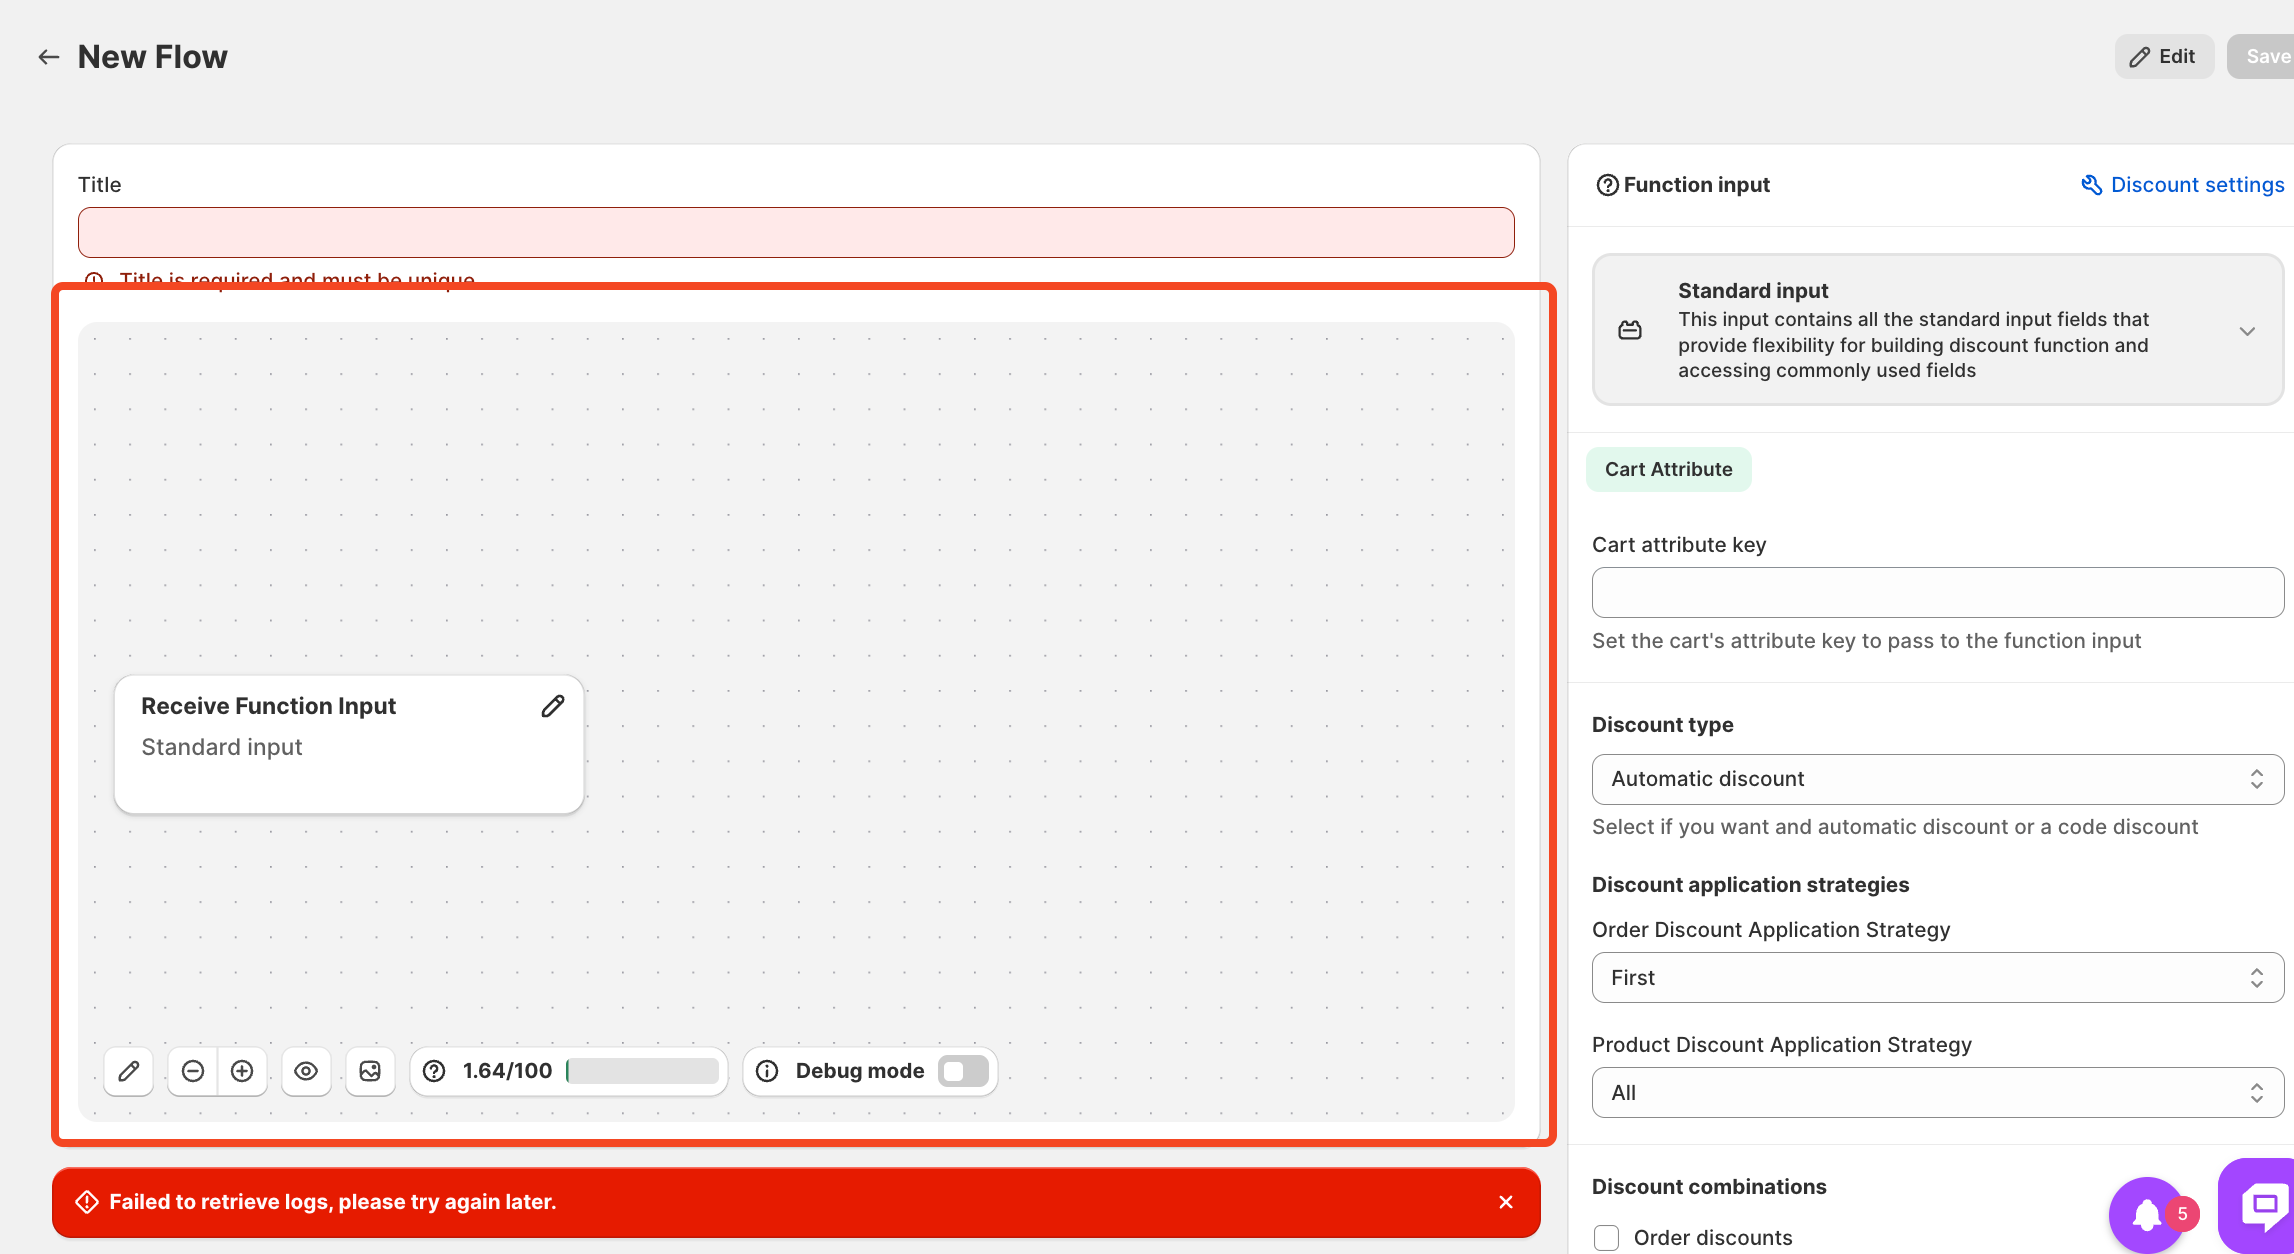
At the bottom of this visual area, you’ll find the main controls:
-
Edit the function
-
Zoom in or out of the view
- Fit view
-
Take screenshots
-
Check function complexity
-
Use the Debug button (only needed when working with support)
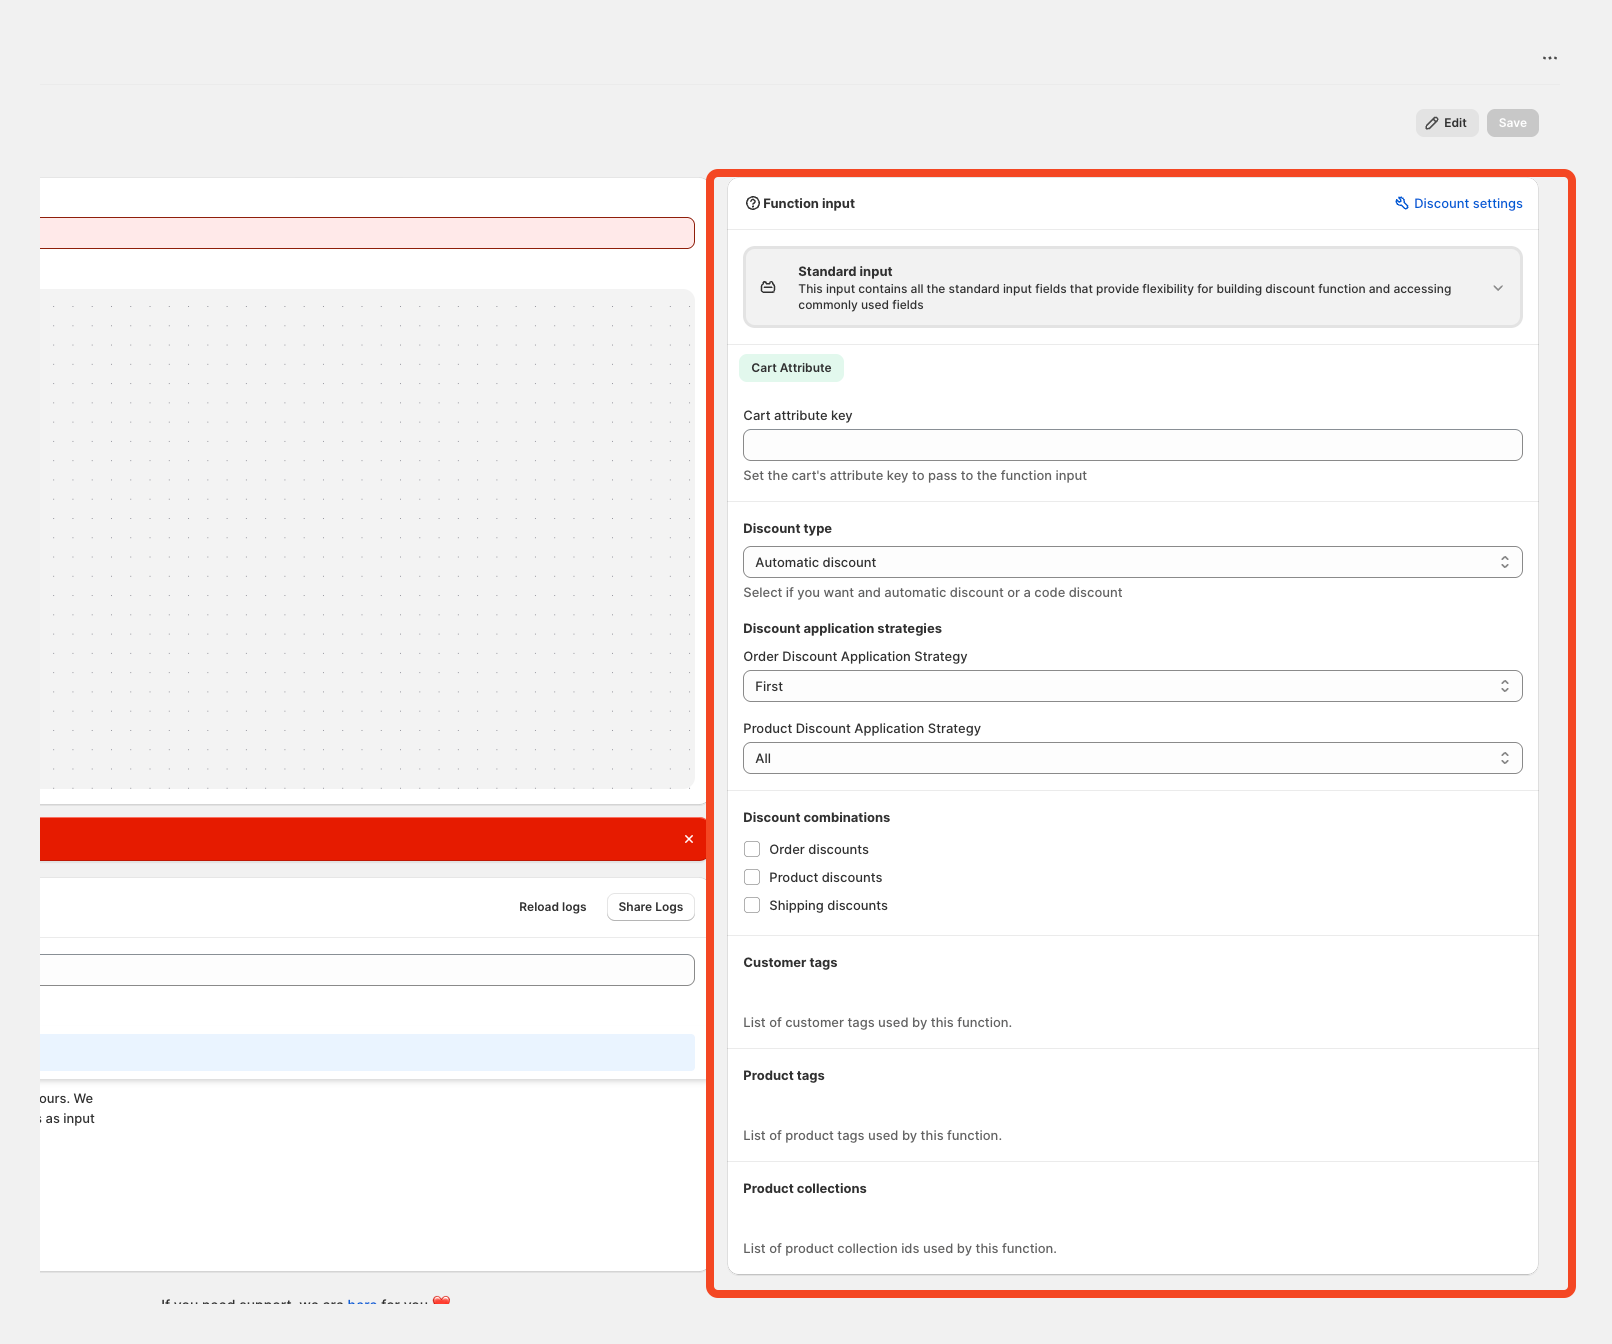
On the right-hand side, there’s a dynamic menu that updates based on the type of function you’re creating. This is where you’ll enter key parameters such as tags, collections, discount type, and other options.
At the bottom of the page, there’s a Logs window that lets you track activity and behavior related to your Flow functions.
These logs are generated automatically by Shopify whenever the function runs, but they must be Activated manually to be accessible.
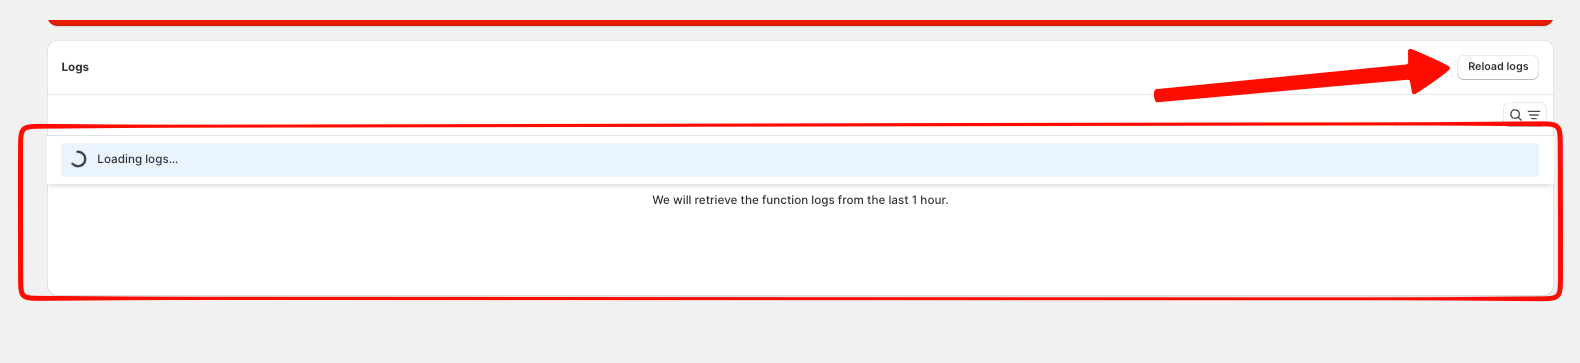
To access them, simply activate the specific scopes in the Scopes section.
