One of the most powerful features of Flow is its ability to manage multiple conditions within a single rule, allowing you to create targeted, personalized discounts for different product groups all from one discount function, automatic or with Code Discount.
Let’s see how to build it step by step
Step-by-step: Create a Personalized Discount with Flow
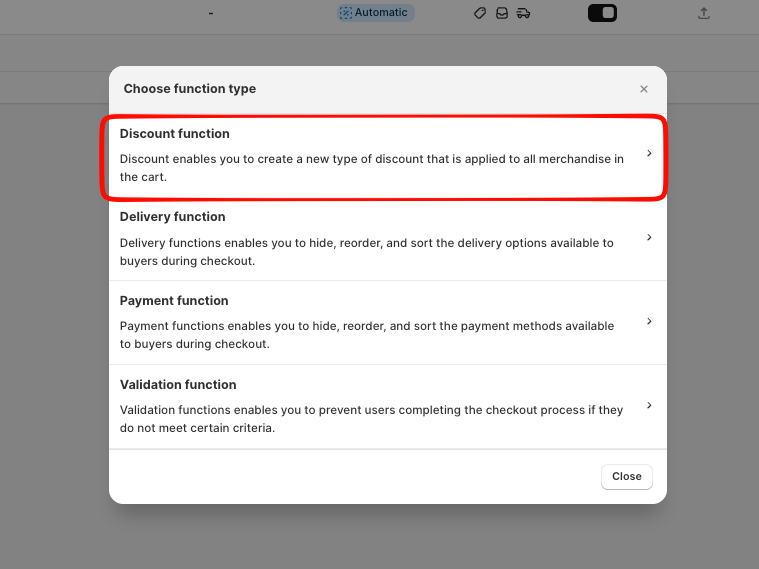
From the Flow dashboard, click “Create Flow Function” and choose Discount Function from the list.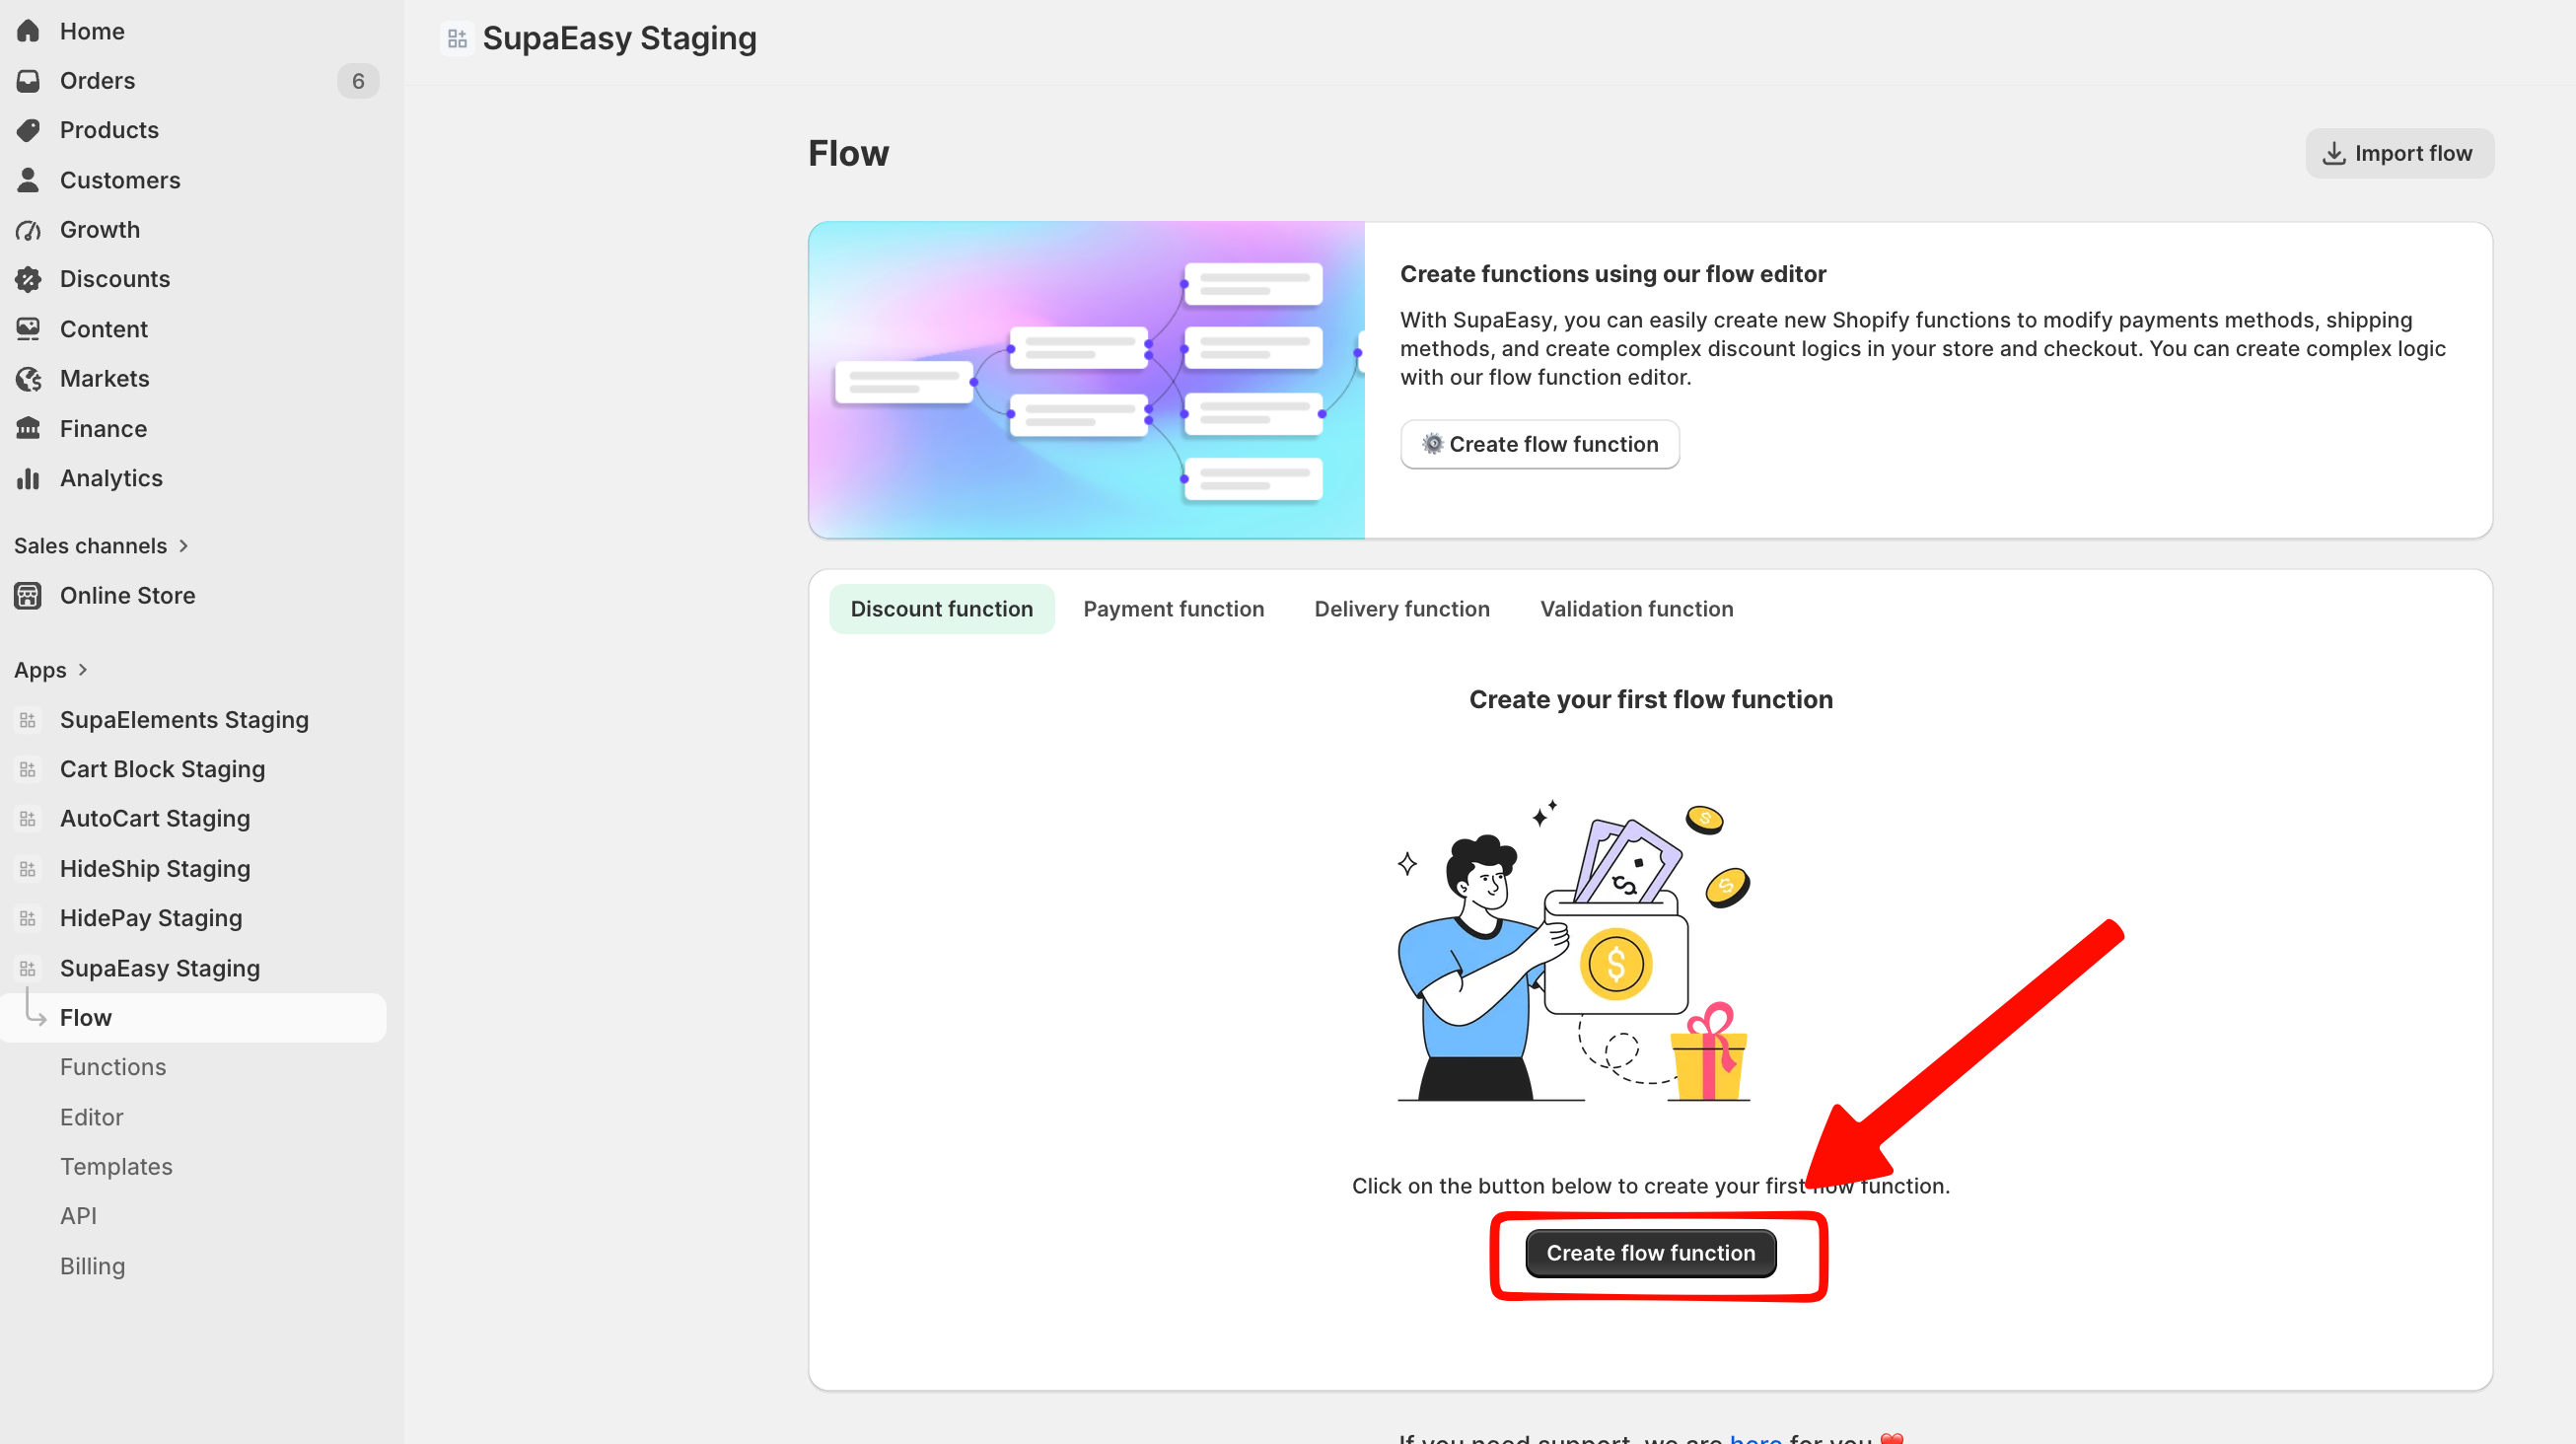
Set a title for your rule, this is mandatory to save the function.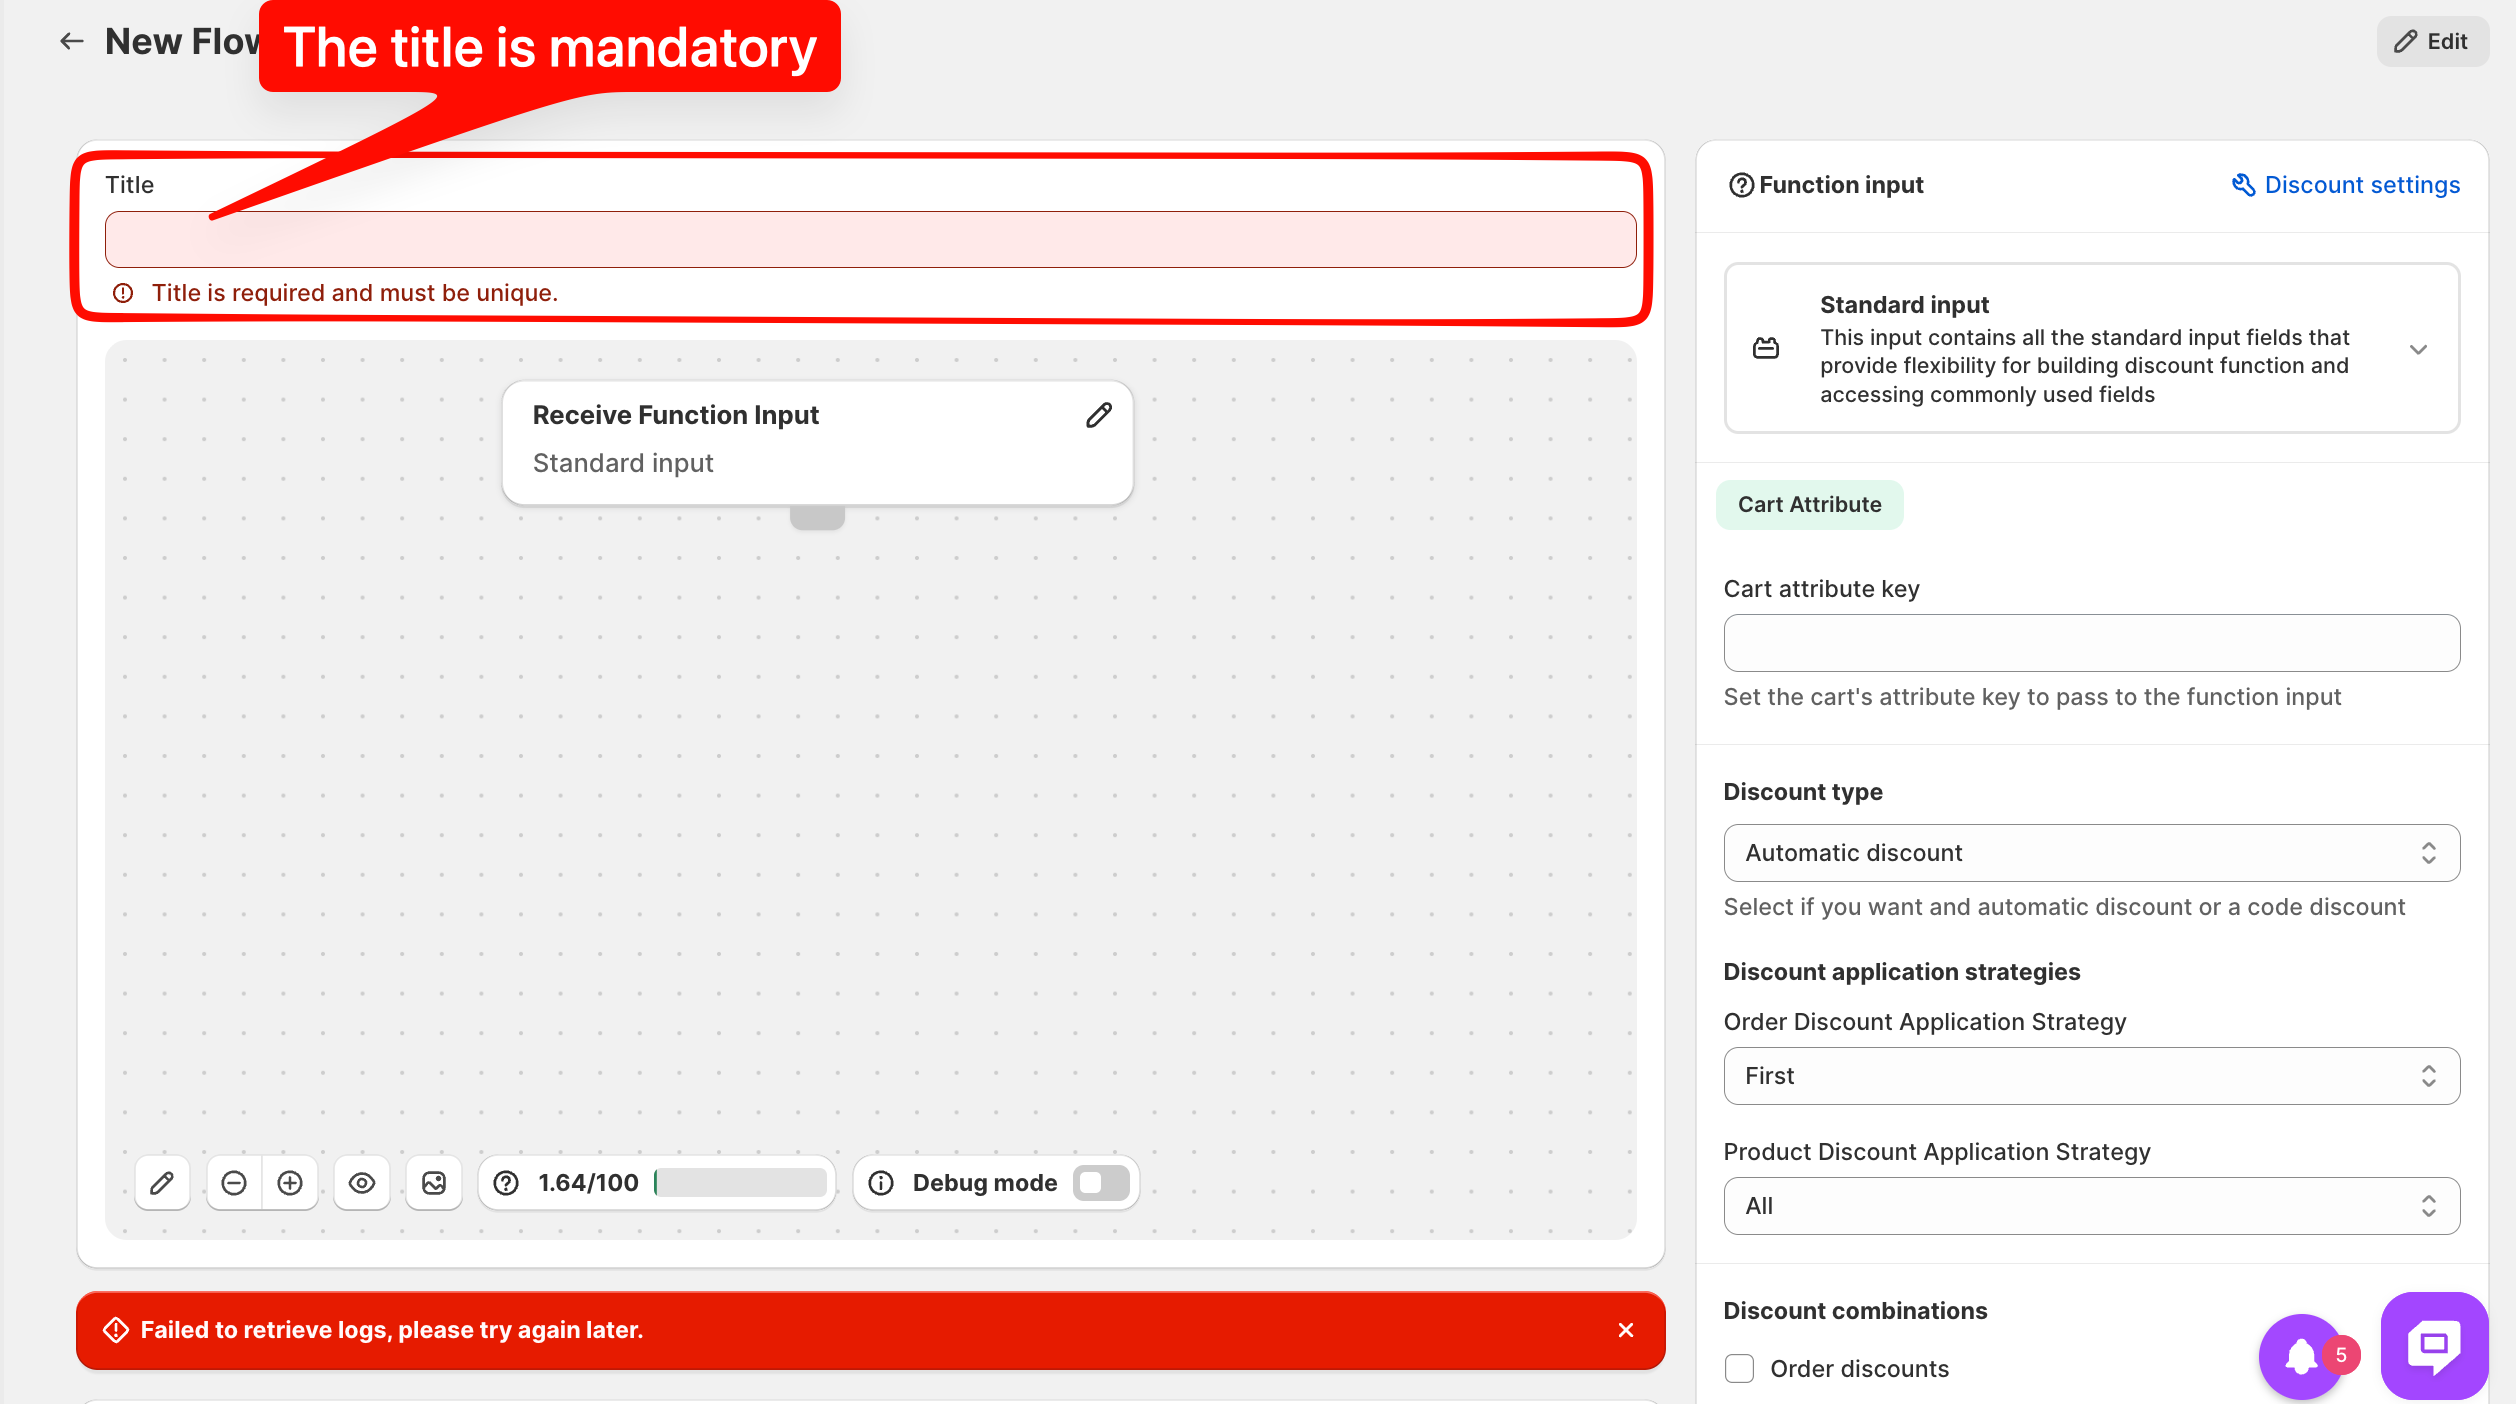
Now click Edit, bottom left or top right, to open the Flow editor.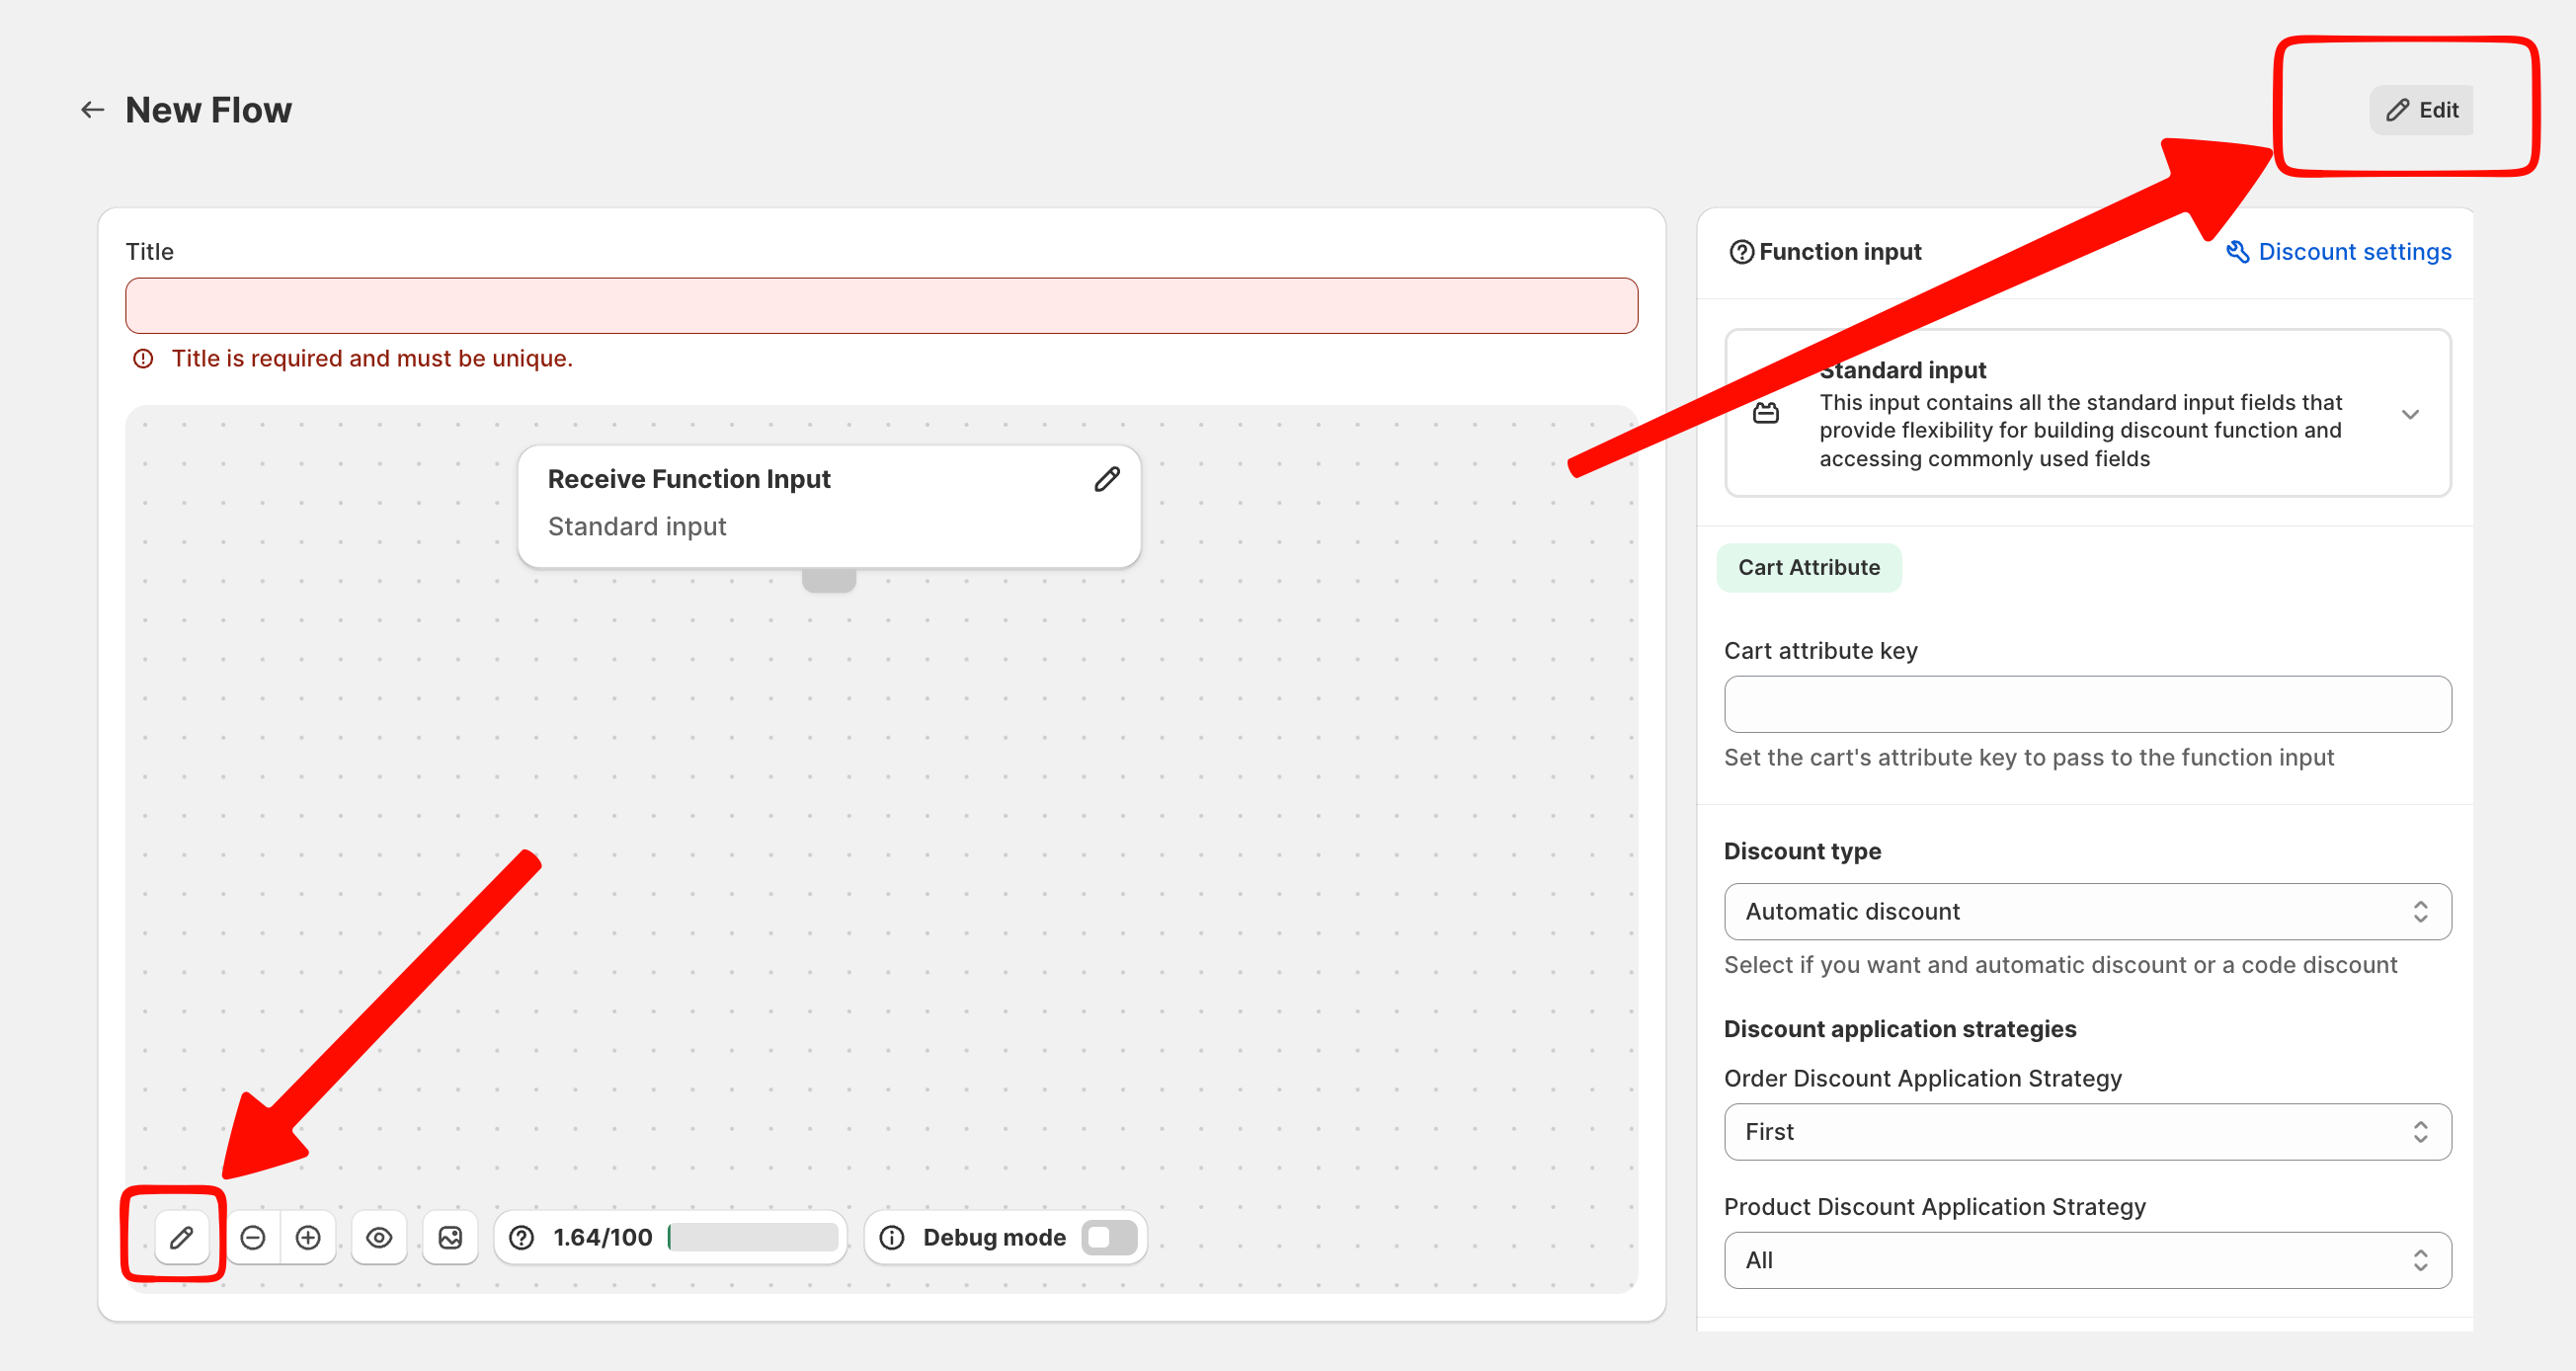
Hover over the first block. A plus (+) icon will appear. Click it and open the Condition menu and select Switch.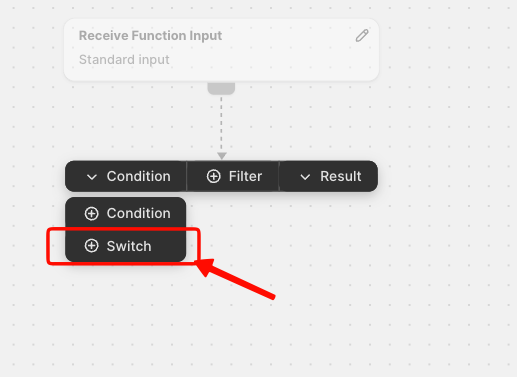
A new linked block will appear. Click on the Add button inside the block
and Case #1 will open. In here you can change the name to give a title to help you what this rule does and then you can set the rule.
Now we can create the rule for product with the tag COOL and click on Rule,
select Product tag, select any and in Set Value we set the specific tag COOL. When we setted correctly we push close to go back.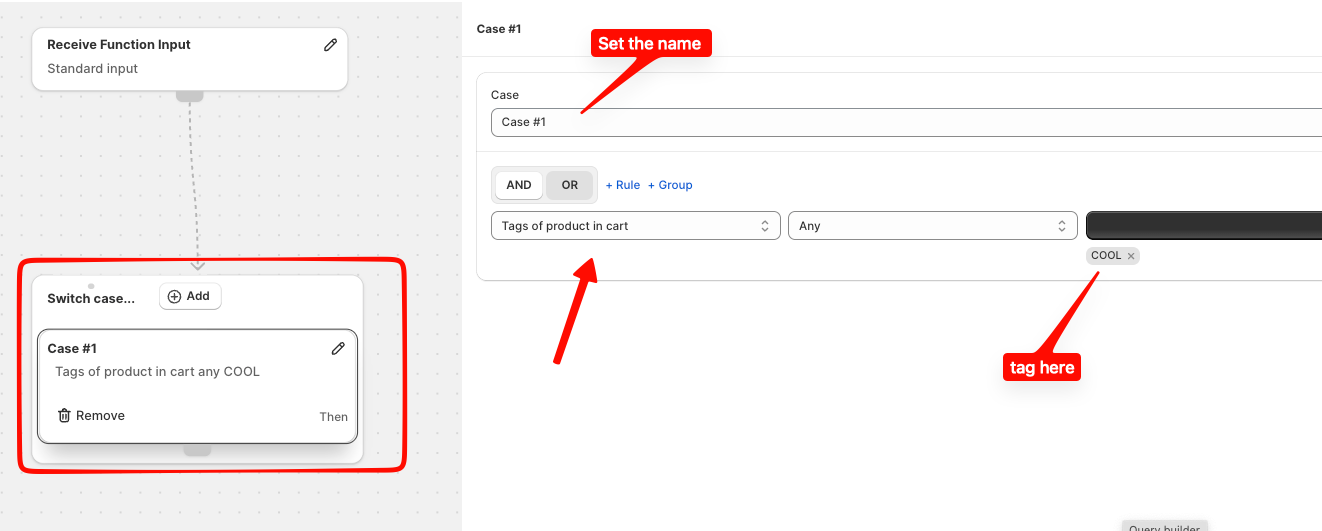
Set the value to Any, and under “Set Values”, enter the specific product tag you want to target (e.g., VIP etc.).
Now define what should happen if the condition is true:
Now we select the filter so the discount will apply only to products with the right tag.
Add a filter node, in the right window select "Current Cart" and target the "Lines".
Now add a Rule and in the rule set the Product tag a per the switch rule (in our example is COOL)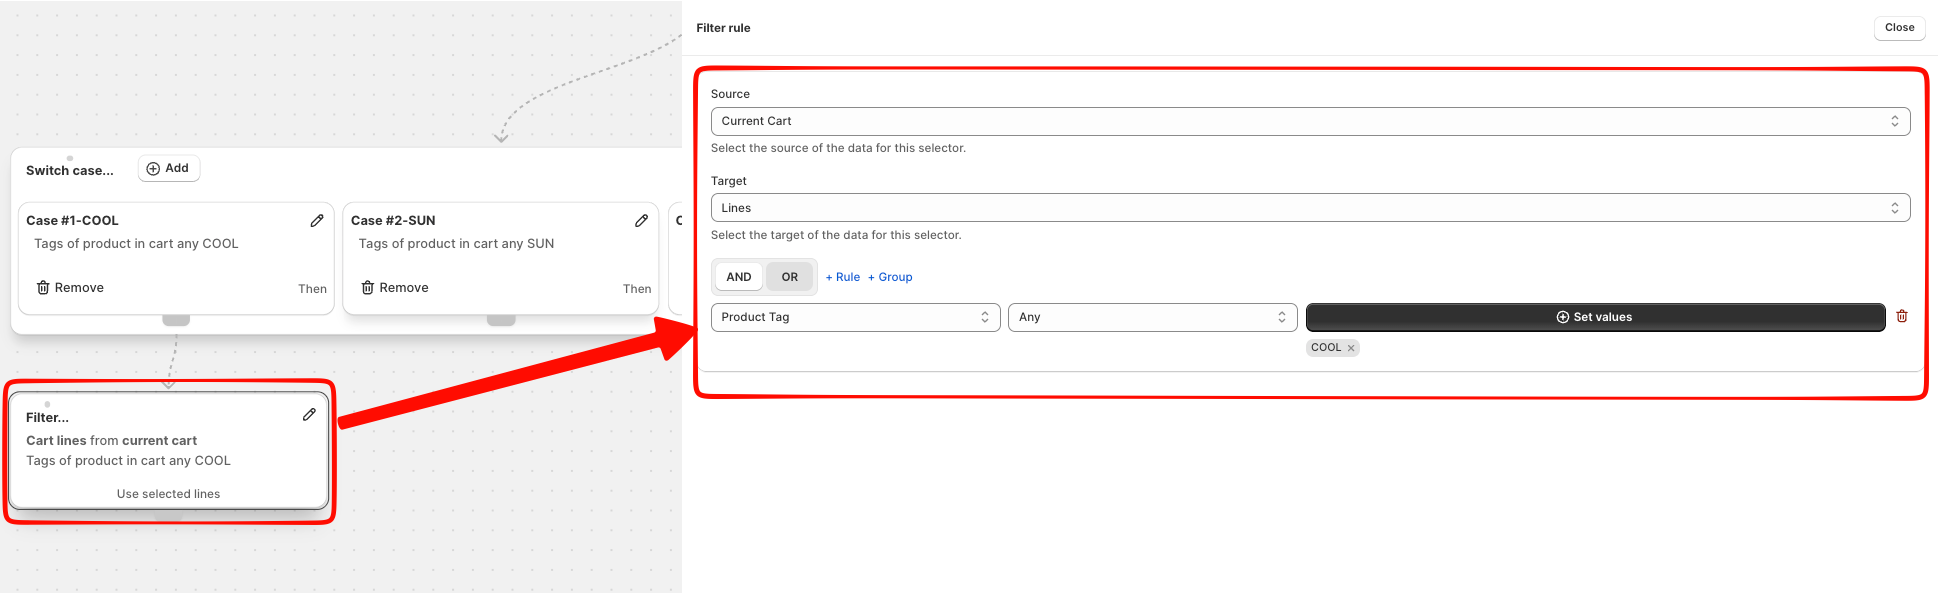
Now let's create the discount on the Result Node
Click the plus (+) icon Select Result, Choose the discount type (in this case, Product) and enter the discount value e.g., 10% off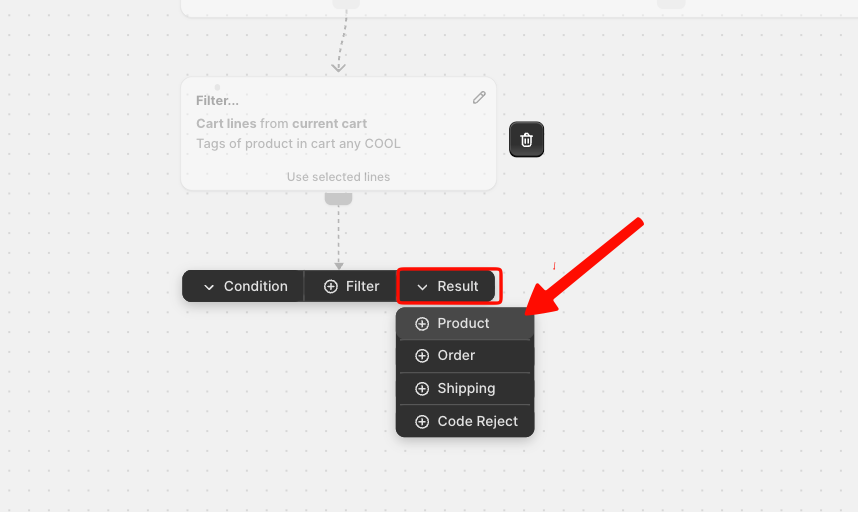
Now in this node we can create the discount and the message to show to the cusstomers, like a 10% only for COOL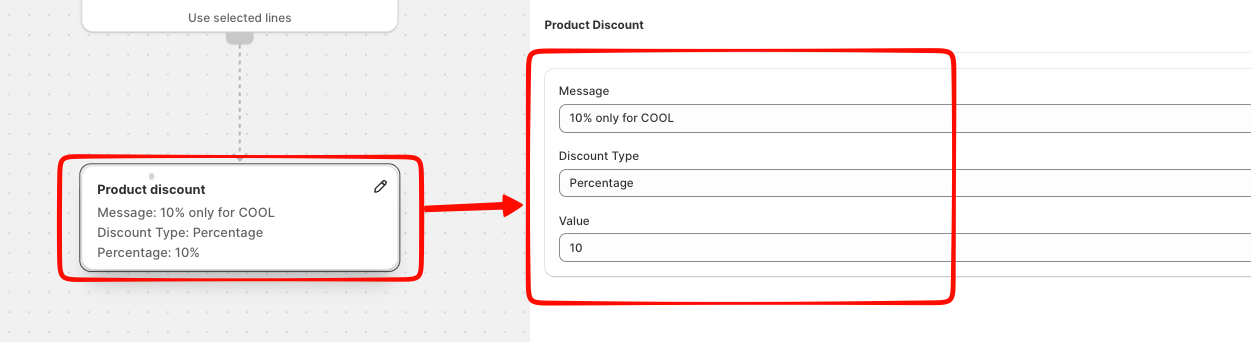
In the new true path, add another Result block this time setting the discount to 15% off.
Then repeat this structure for as many product tags conditions as you need.
Each tag can have its own personalized discount based on your logic.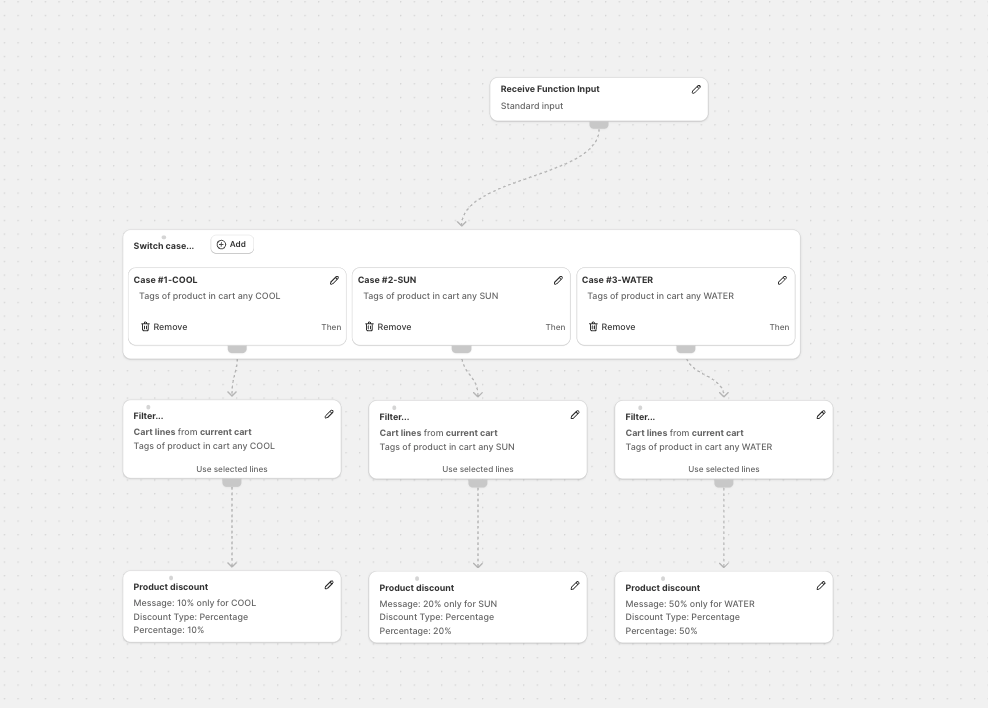
Once your structure is complete, click Save.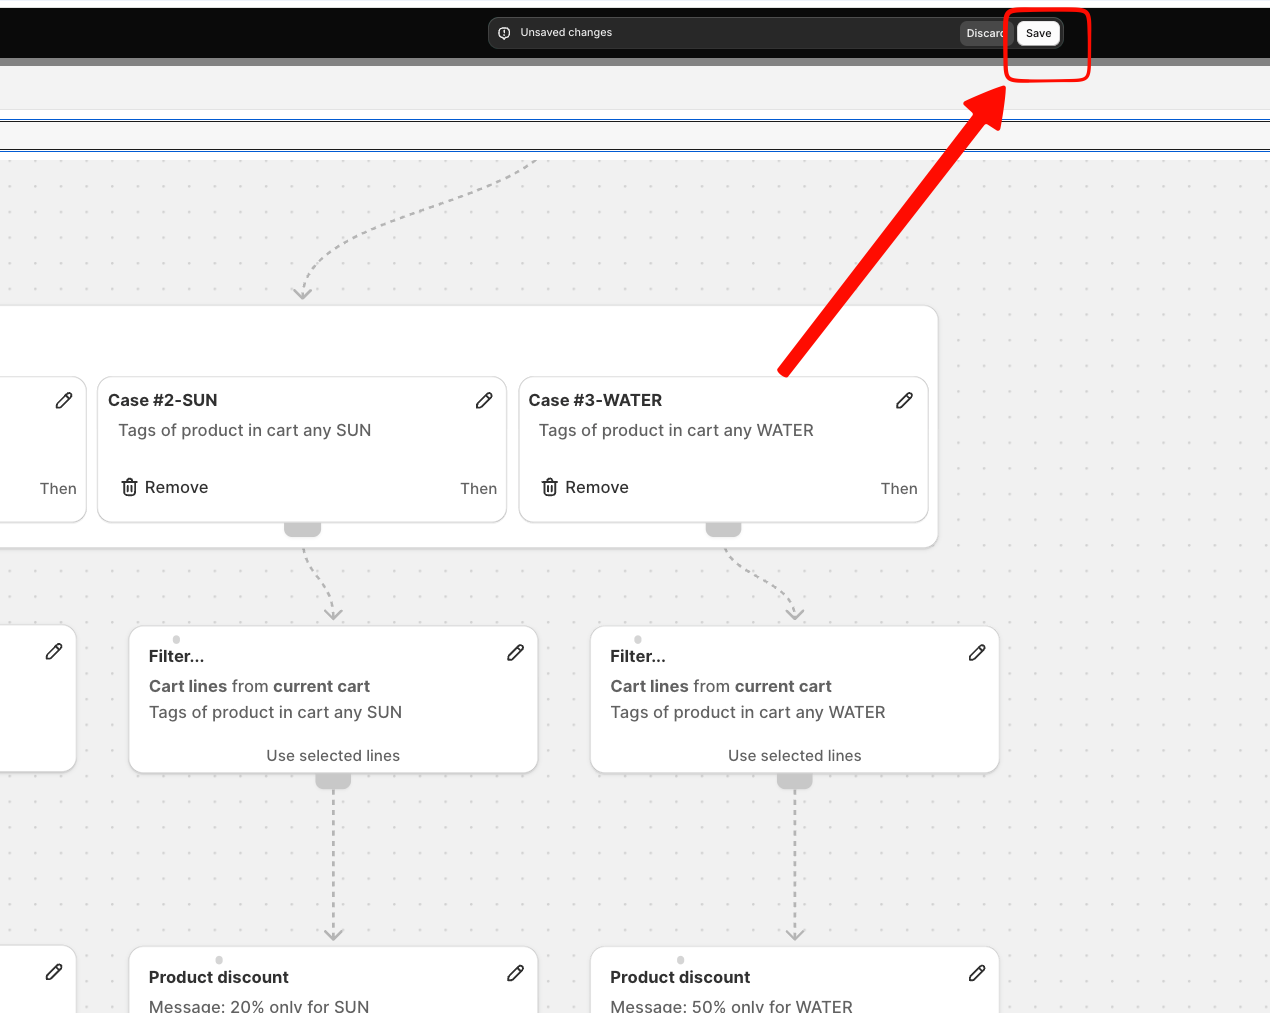
After saving, you’ll return to the main preview of the rule.
On the right-hand settings panel, you can now configure important rule options: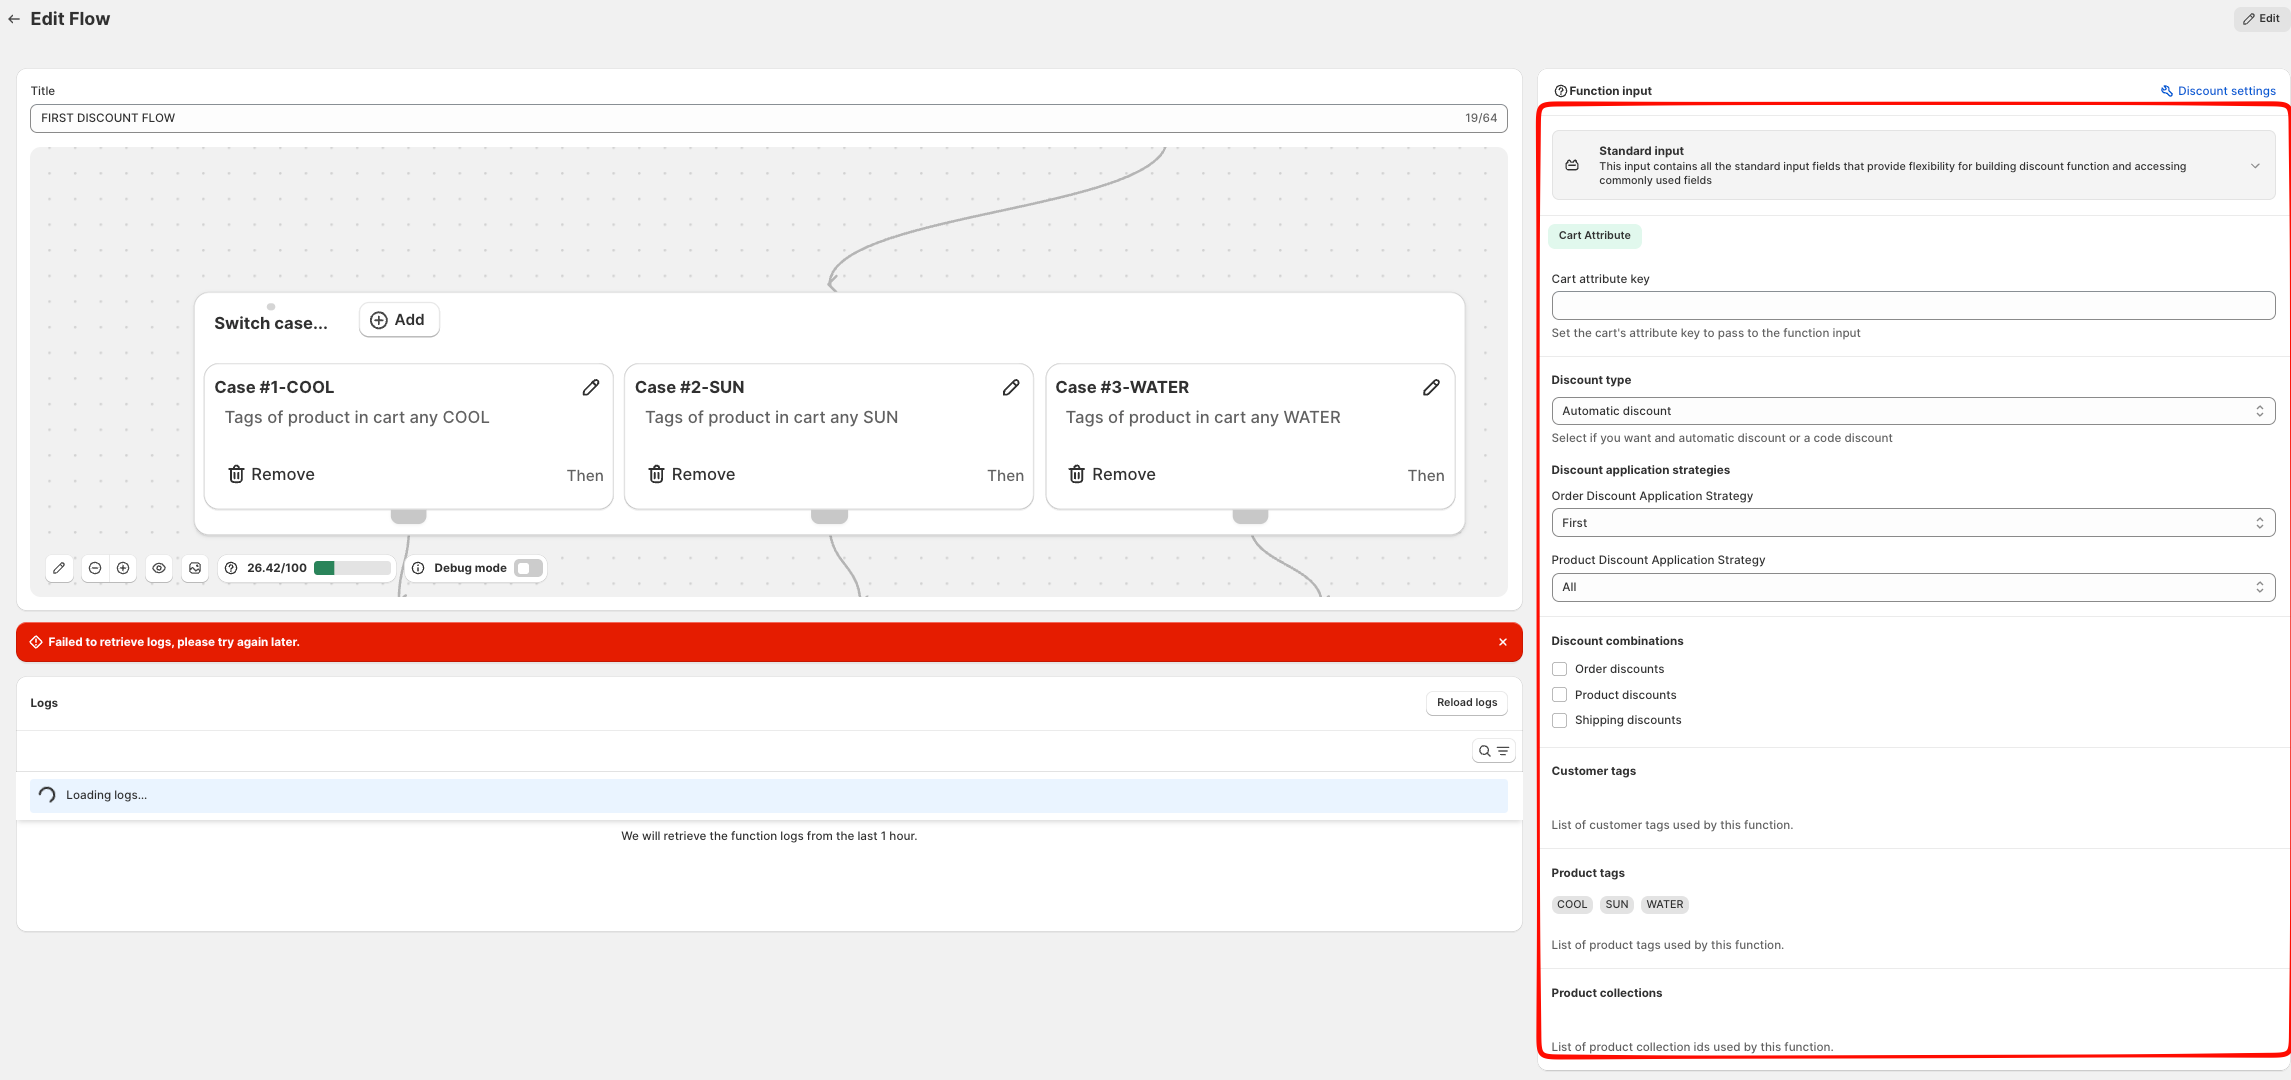
Set the discount type: choose between Automatic or Discount Code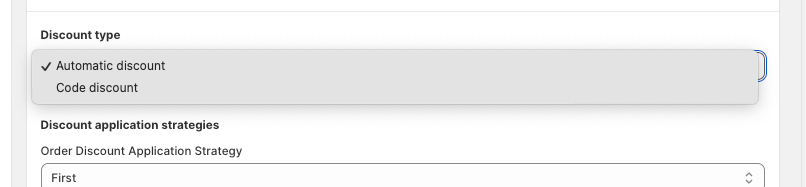
Decide if the discount is combinable with others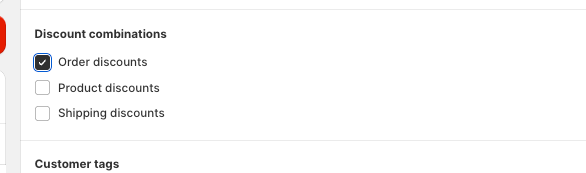
Double-check that the customer tags used in the Flow are correctly listed in the parameters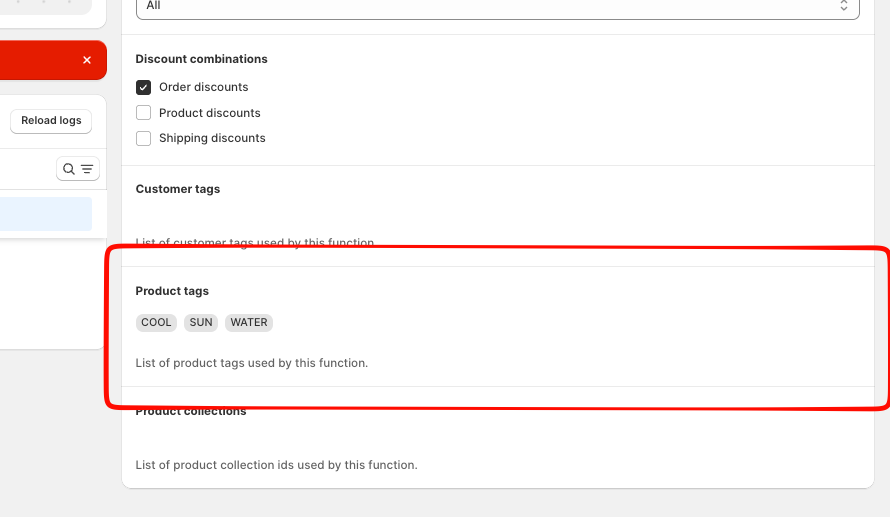
Once everything is reviewed and set, save the rule again from the top-right corner and your rule will now be active immediately.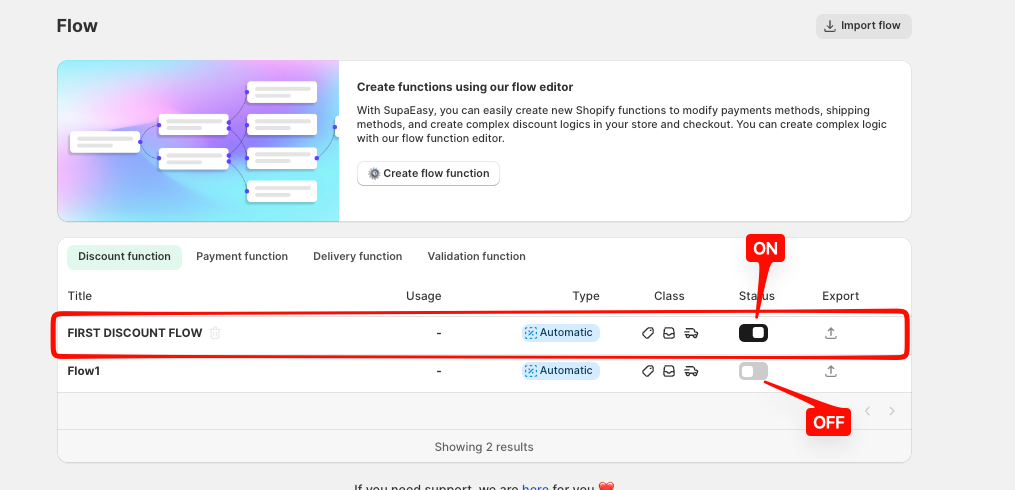 To disable it, just go back to the Flow dashboard and toggle the Status button for that rule.
If you have any questions or need assistance during setup, our team is here to help. You can contact the Nextools Support Team anytime via the in-app live chat or by email. We’ll be happy to assist you.
