Installing ABCheck is quick and takes only a few minutes. Follow the steps below to get it up and running in your Shopify store.
Step 1 – Install the App
Go to the Shopify App Store and search for ABCheck, or install it directly via the app link provided by Nextools. LINK ABCheck
Click Install.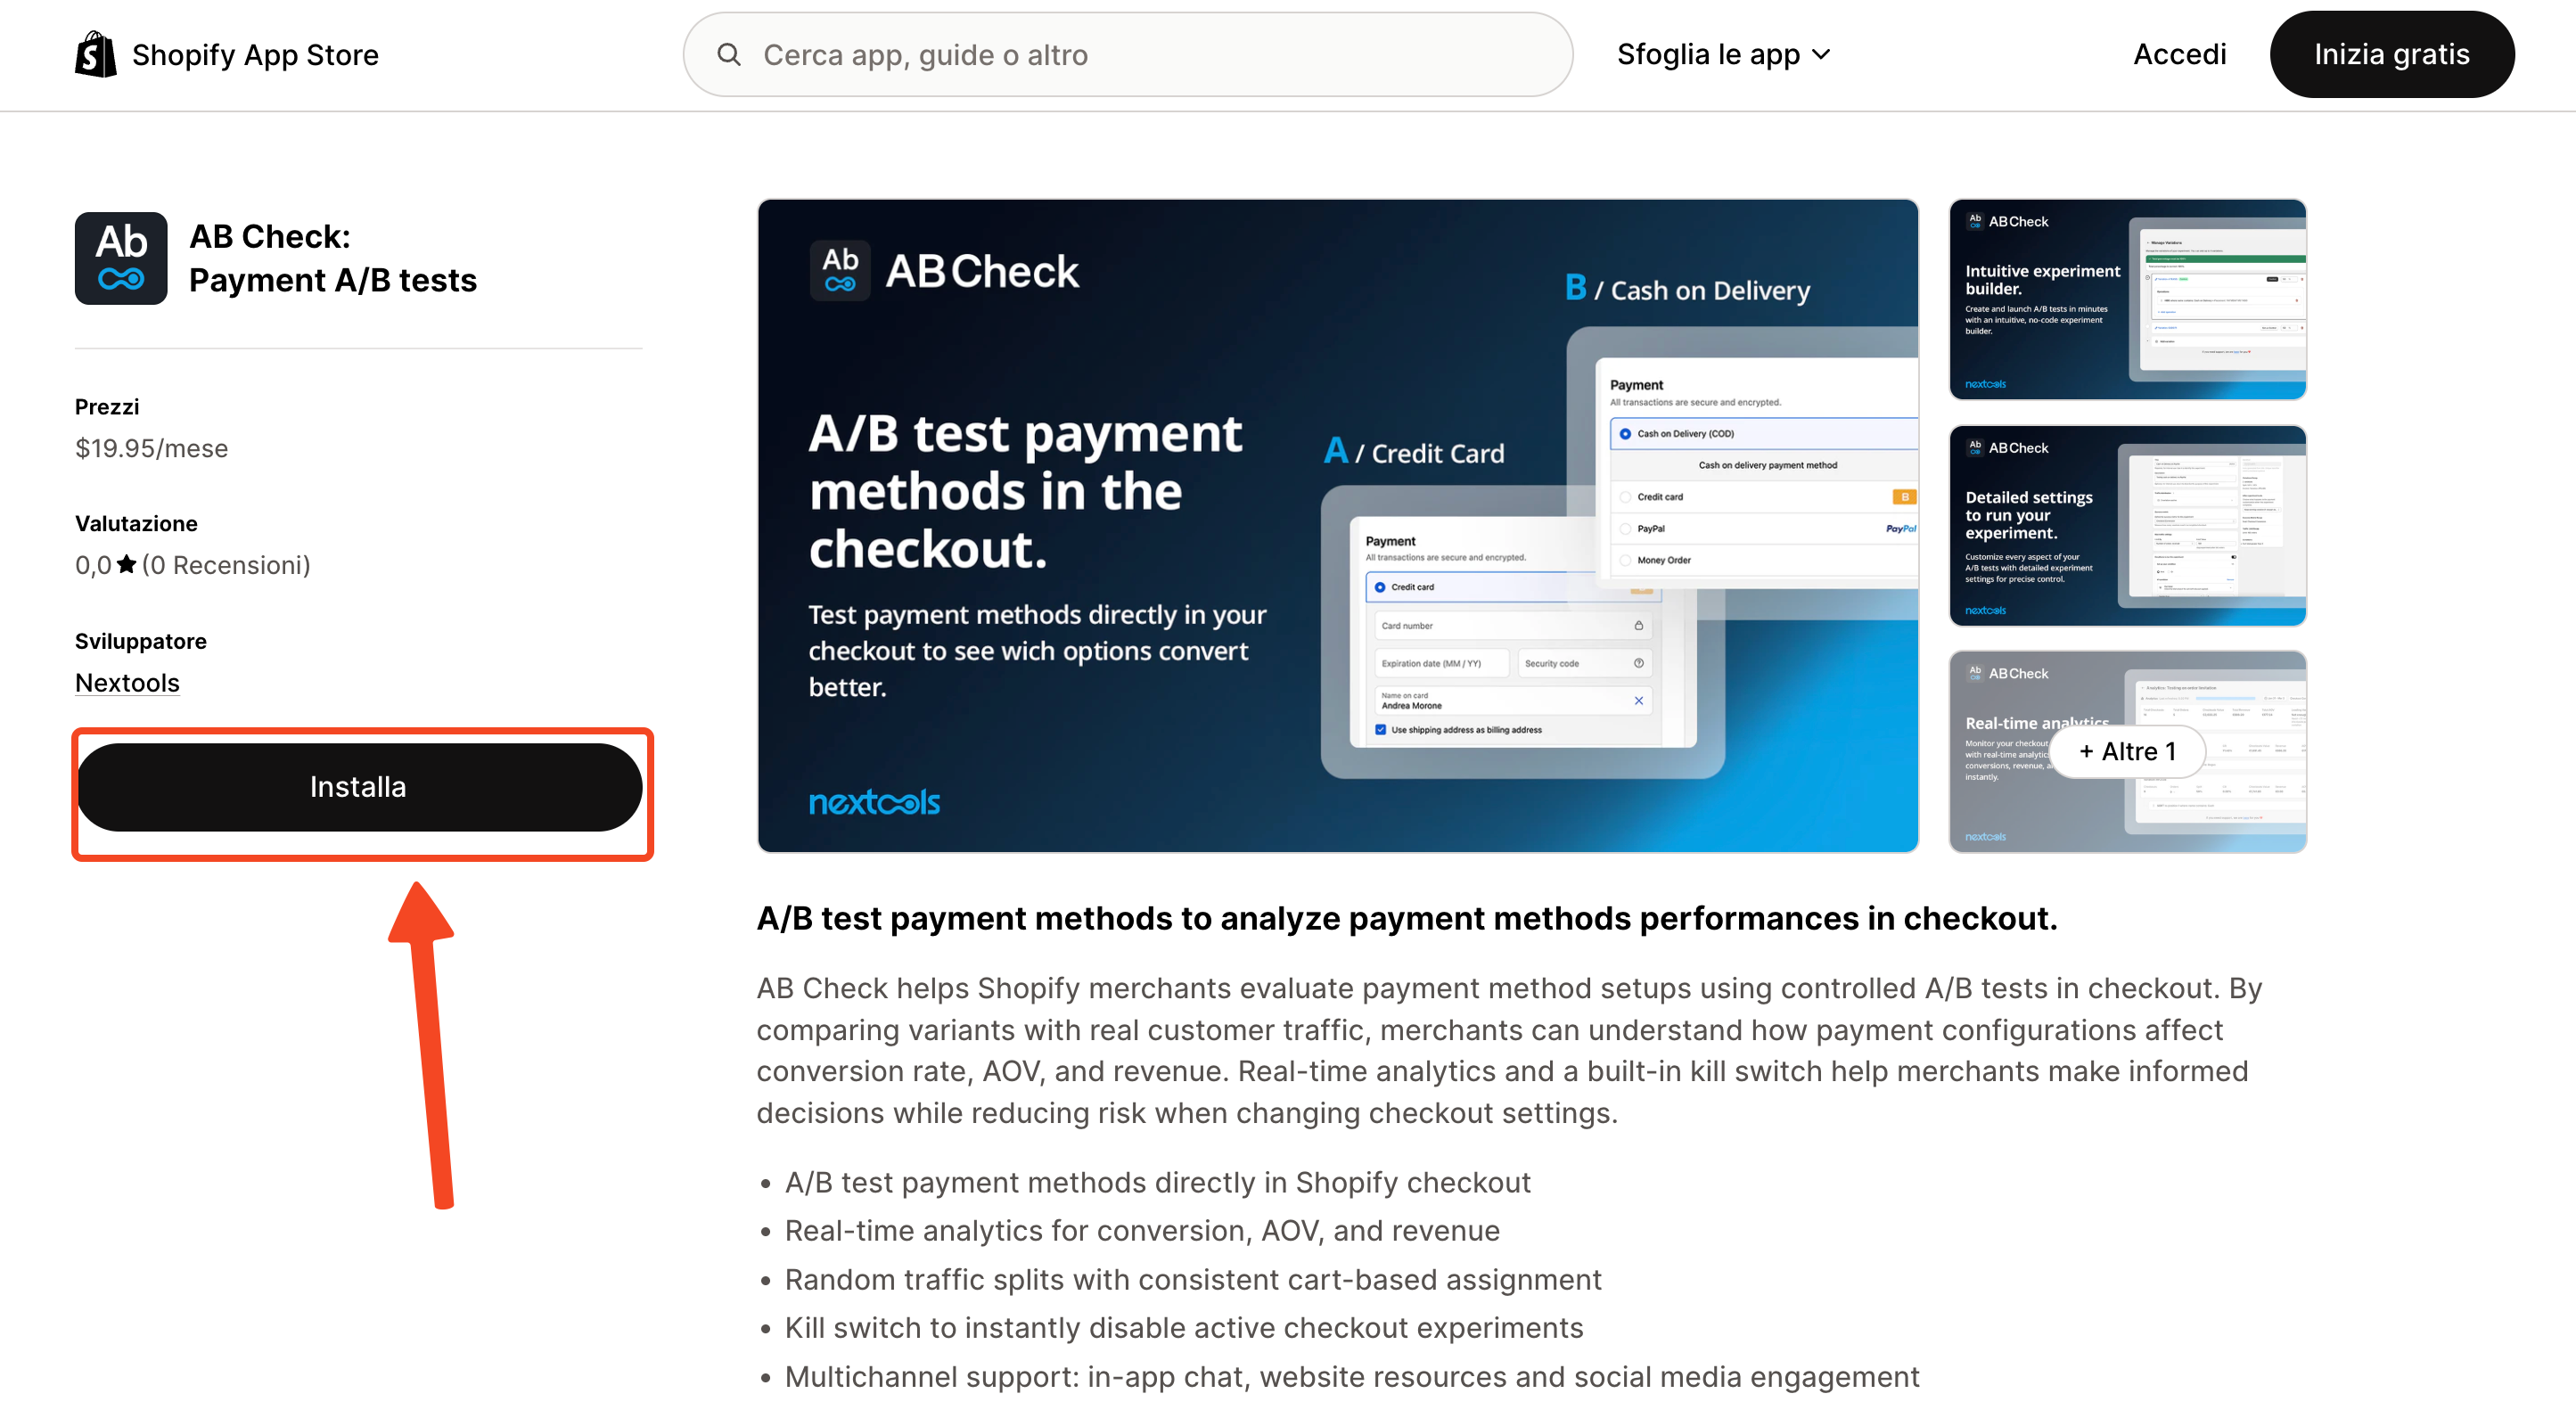
Step 2 – Accept the Required Scopes
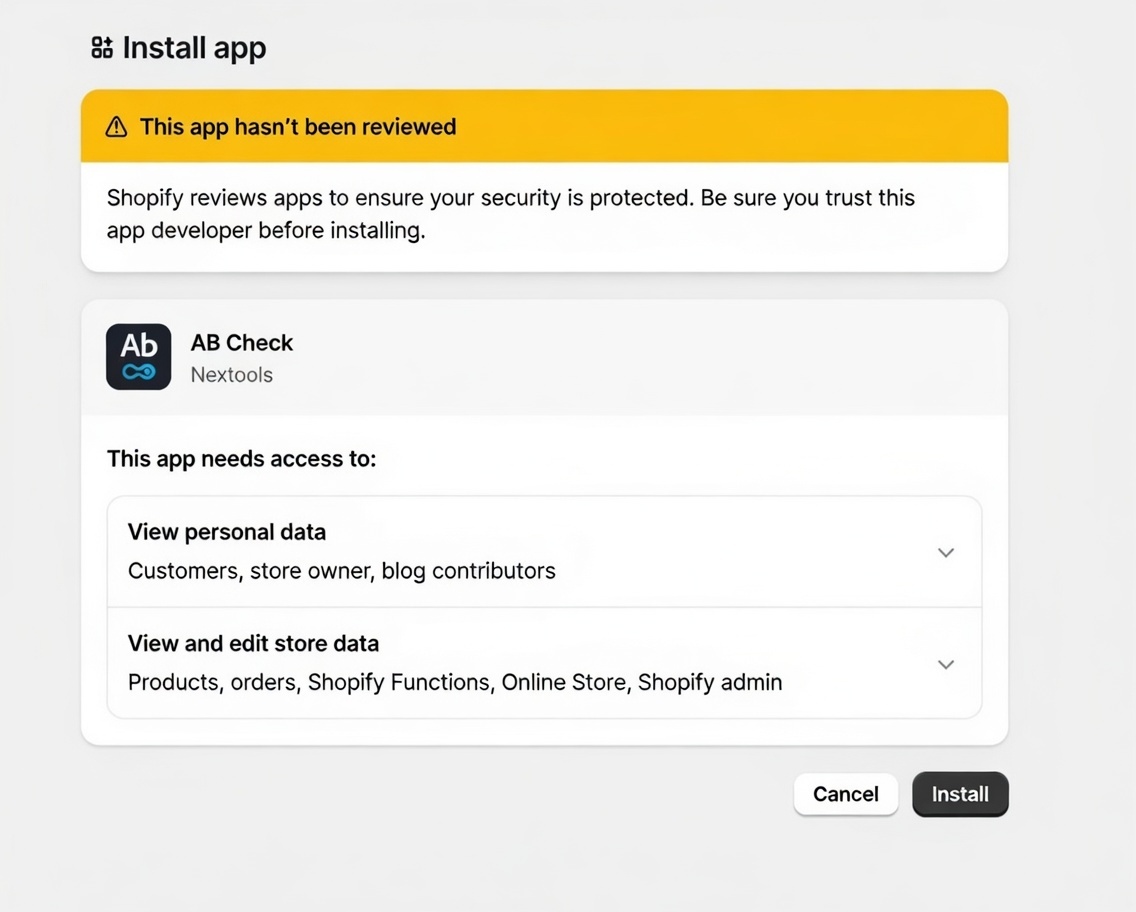
ABCheck needs access to certain store data to function correctly. During installation, you will be asked to approve the following permissions:
-
Read/write access to customers
-
Read access to orders
-
Webhook access for checkout_update, checkout_create, and orders_create events
These scopes are required so that ABCheck can track which payment method was shown and selected during each checkout session, and associate it with the resulting order.
Step 3 – Activate the App Extension
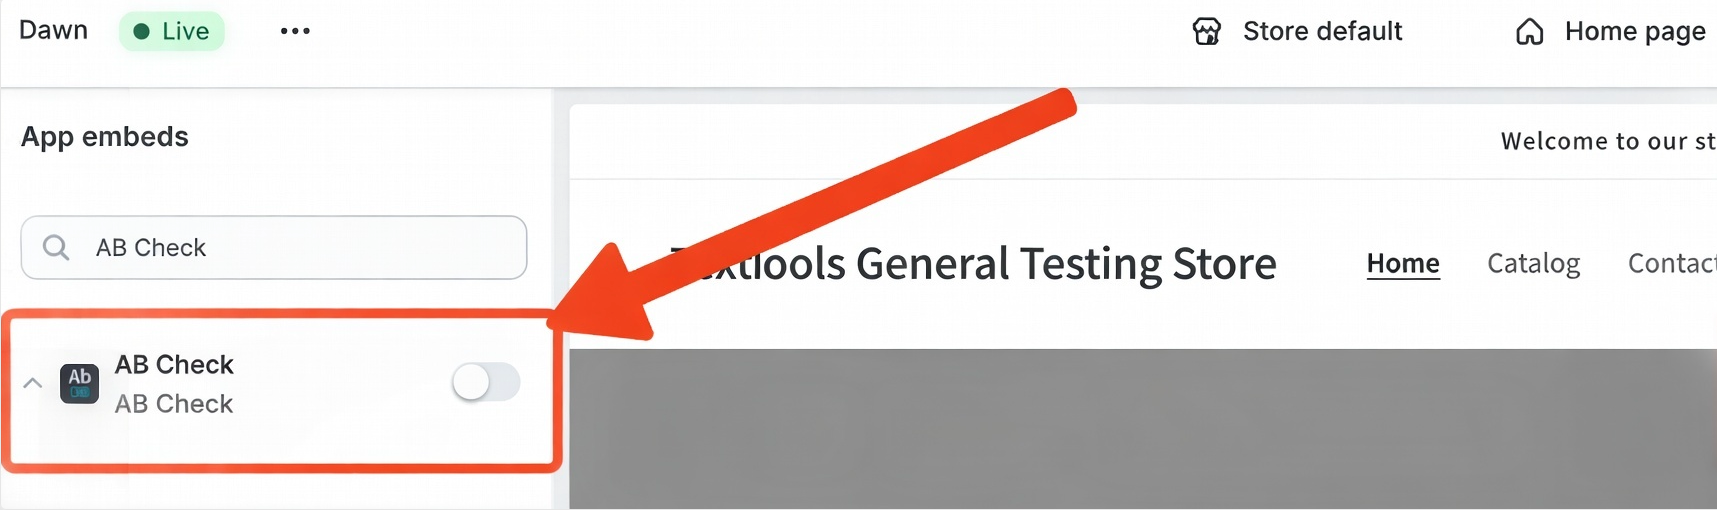
After installing, ABCheck will guide you through an onboarding flow. One of the key steps is activating the Shopify checkout extension required by the app. You will be taken to the Shopify checkout editor simply enable the extension and save. Once enabled, ABCheck will confirm that the extension is active and you can proceed.
Step 4 – Choose Your Plan
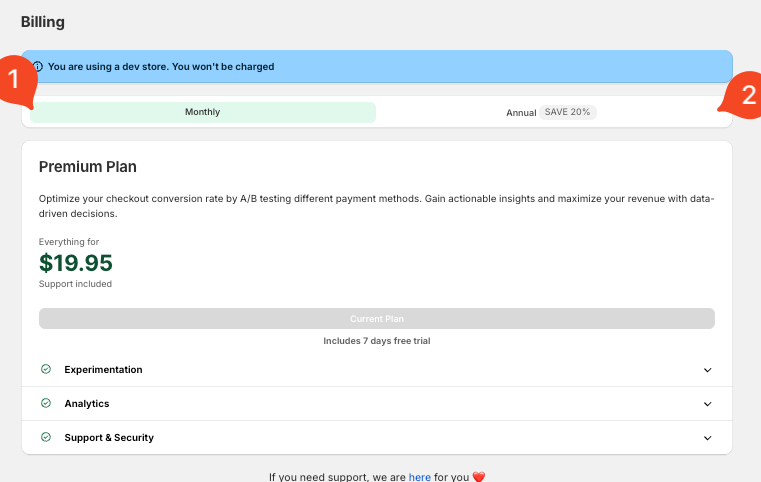 ABCheck offers two paid plan options:
-
Monthly Plan – billed monthly, no long-term commitment
-
Annual Plan – billed yearly, includes a 20% discount
If you are installing on a Shopify development store, no charge will be applied. A test charge will be created and you simply need to approve it to proceed — ABCheck is partner-friendly and free for development environments.