
Set up a cyclic automation to automatically apply progressive gift rewards in your shopping cart based on a single condition. This guide will walk you through configuring the automation, enabling it in your store theme, and ensuring it operates seamlessly.
What You'll Need
-
AutoCart feature in your app
-
Advanced or Ultimate Plan
-
Access to them store
-
Shopify Plus Account for Checkout automation
Step 1: Create a New Rule
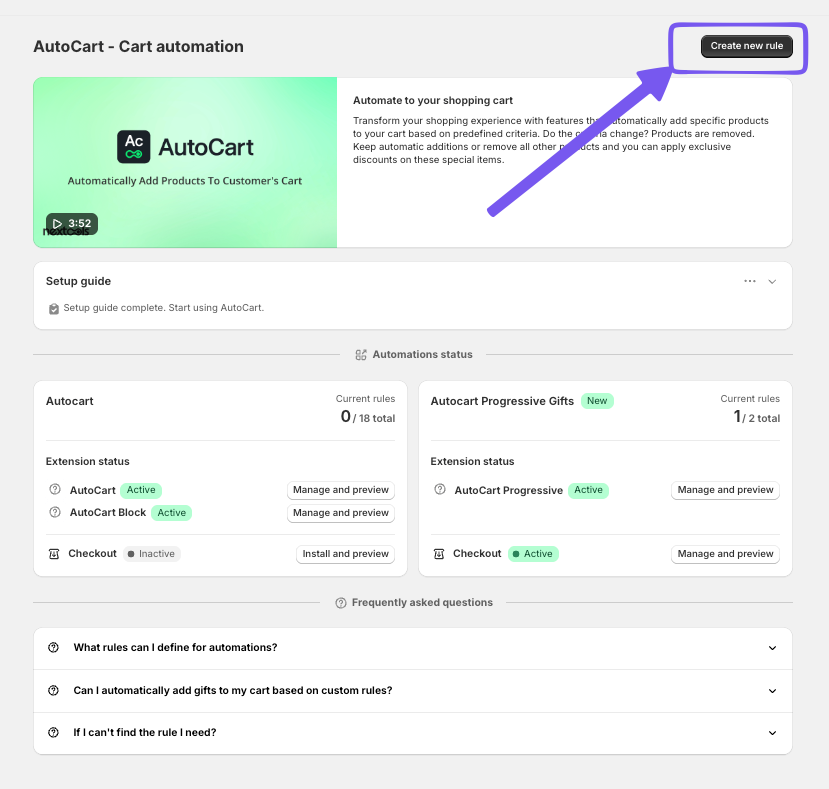
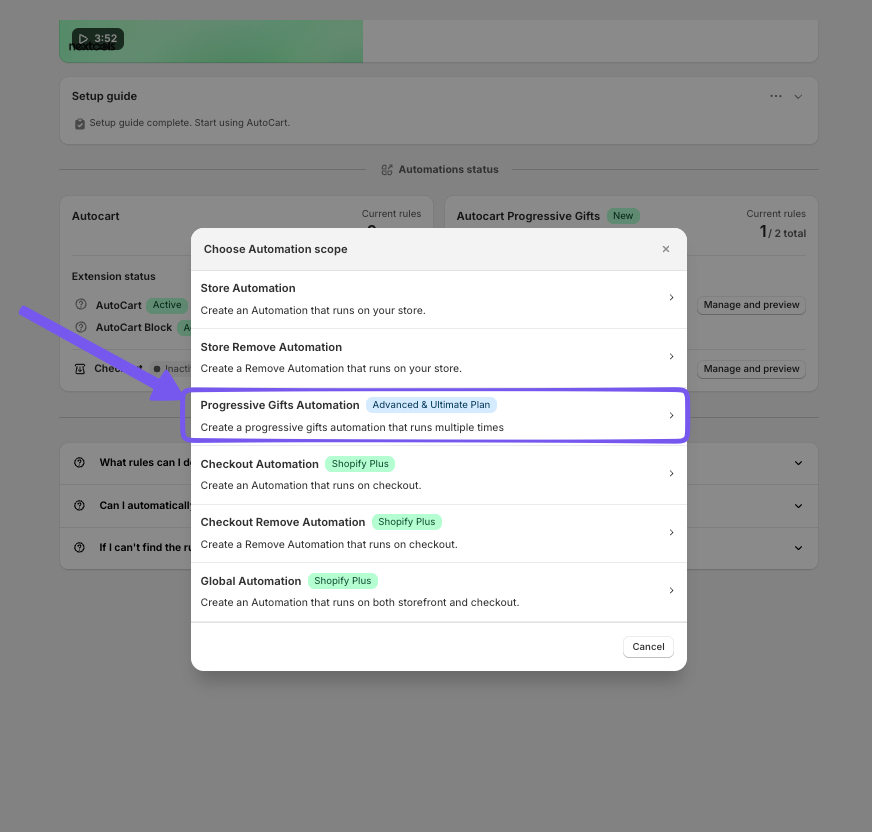
From the AutoCart dashboard Click the Create new rule button and choose Progressive Gifts Automation from the popup. This template provides options for highly customizable cart incentives.
Step 2: Select Cyclic Automation Strategy
Enter a descriptive title in the Title field for easy tracking.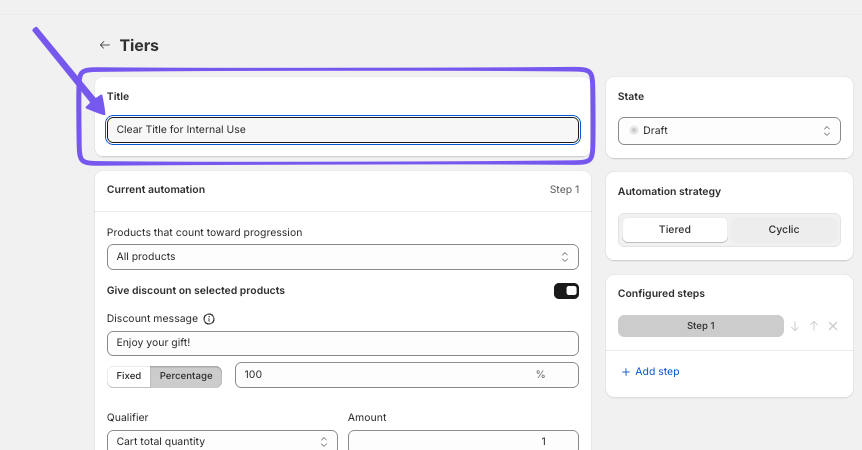
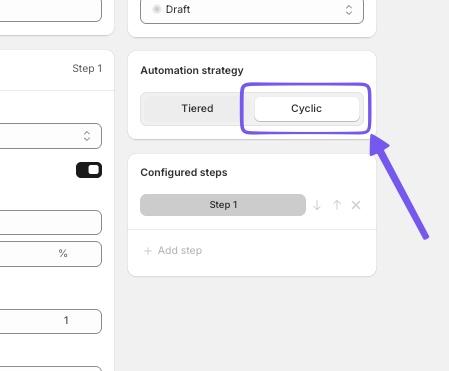
Then, click the Cyclic button under Automation strategy to enable continuous reward cycles,
this will set the automation on adding gift in the cart anytime the condition is met.
Step 3: Set Product Qualifier
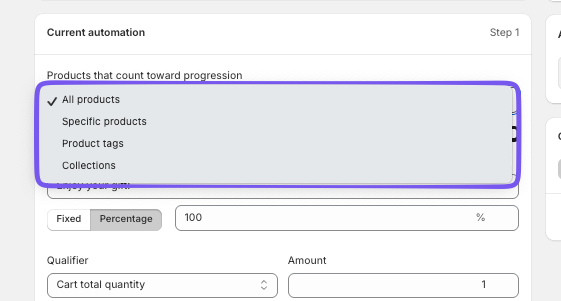
Open the Products that count toward progression dropdown and select the best option for your automation. You can choose between All products, Specific products, Product Tags or Collection. This will give you a wide range of customization.
Step 4: Configure Discount, Message, Type and Qualifier
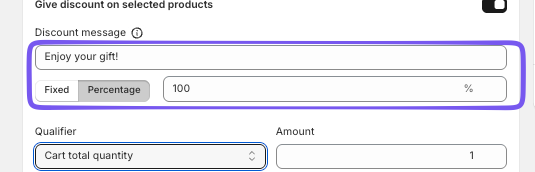
First you can set the message to show to your customer when the Automation will run and add the gift to the cart.
Then you Select between Fixed or Percentage for discount type and in the next window you define the exact amount or percentage to apply as discount at the Gift product.
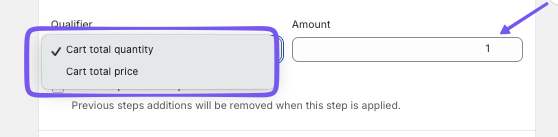
Open the Qualifier dropdown and choose between Cart total quantity or Cart total amount then you Adjust the amount to qualify the automation in the Amount field from
Step 5: Define Cycle
In the Cycles iteration limit field you can define the exact number of cycle you offer to the customer to use.
if you set 3 the customer can receive up to 3 gift if it met the condition 3 times,
if you set 5 the customer can receive up to 5 gift if it met the condition 5 times,
if you set 0 there is no limits for the gift to receive.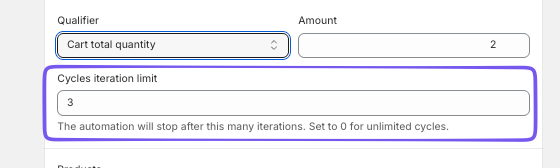
Step 6: Choose the Product
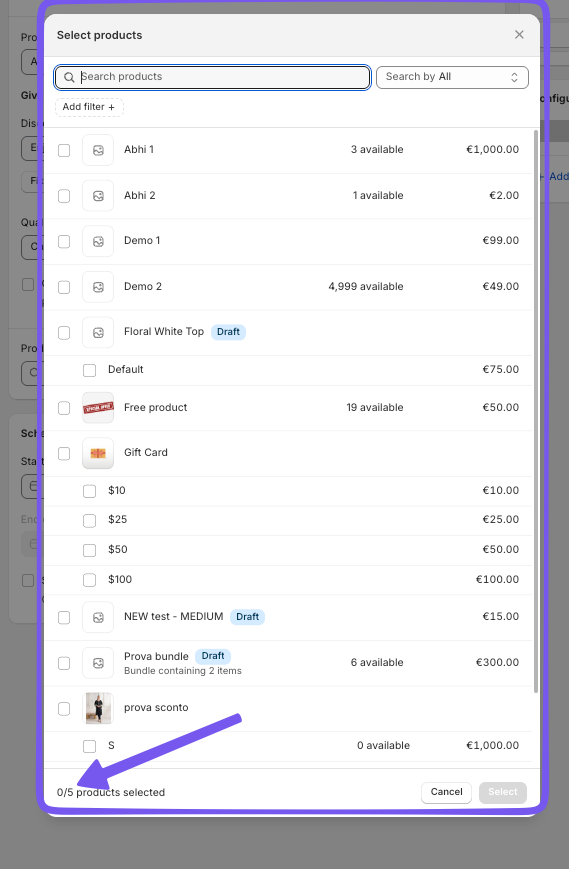
In the products section you define the Gift product to offer to your customers.
Click Browse next to the product search bar, check the product box, and click Select to confirm.
Remember! You have up to 5 products that you can offer and add automatically to the cart.
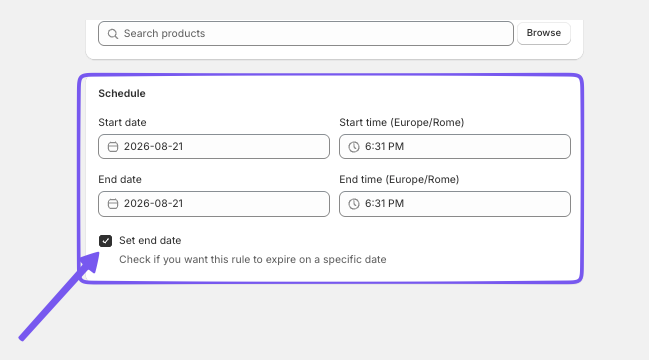
Step 7: Schedule
Optionally check the Set end date box, select an end date and time, or leave it unchecked for continuous operation. This allows you to schedule the starting and end date of a promotion.
If the End date box is not selected and the start date is not configured the discount will activate immediately as you save the automation.
Step 8: Save and activate the rule
Now you can save the rule on the top of the page and the rule will Immediately active. 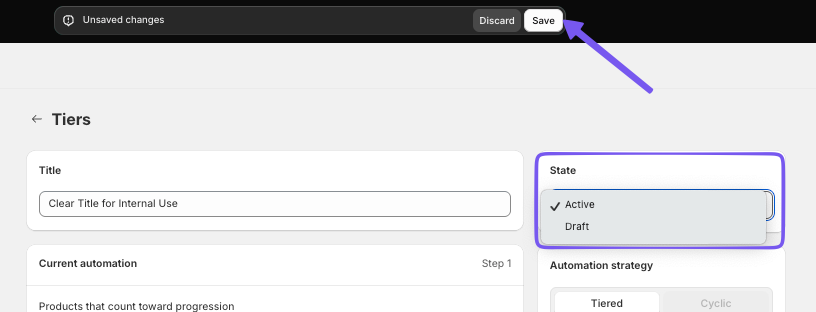
You can also check the status of the automation directly in the dashboard.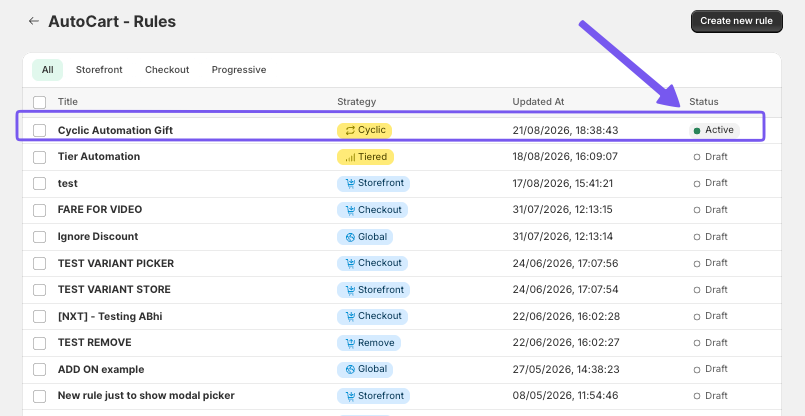
Now you need to Enable it also in the store
Step 9: Activate the Embed within the Store Theme
Open the Online Store from the Shopify sidebar and click Edit theme. In the theme customizer, enable AutoCart Progressive in the App embeds section and save changes.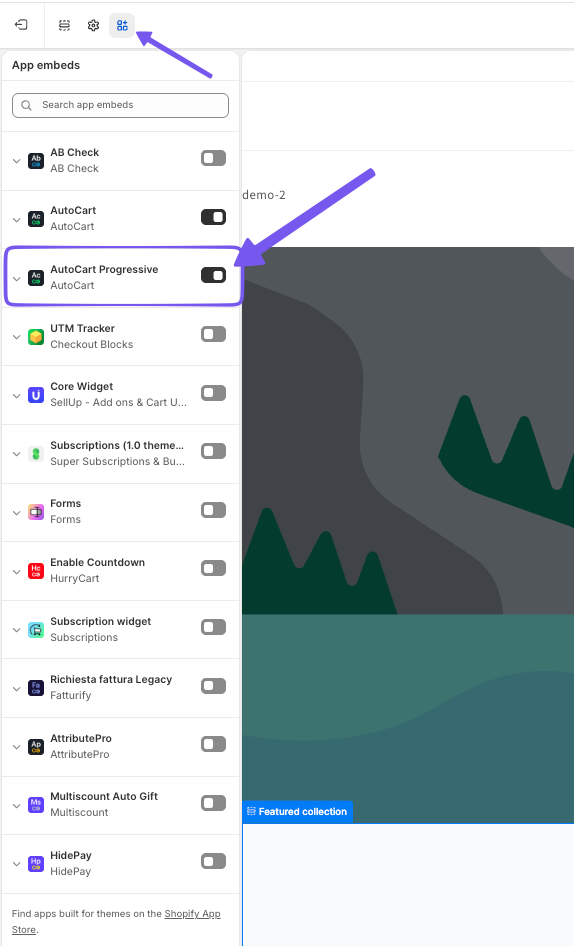
Step 10: Configure Checkout Layout
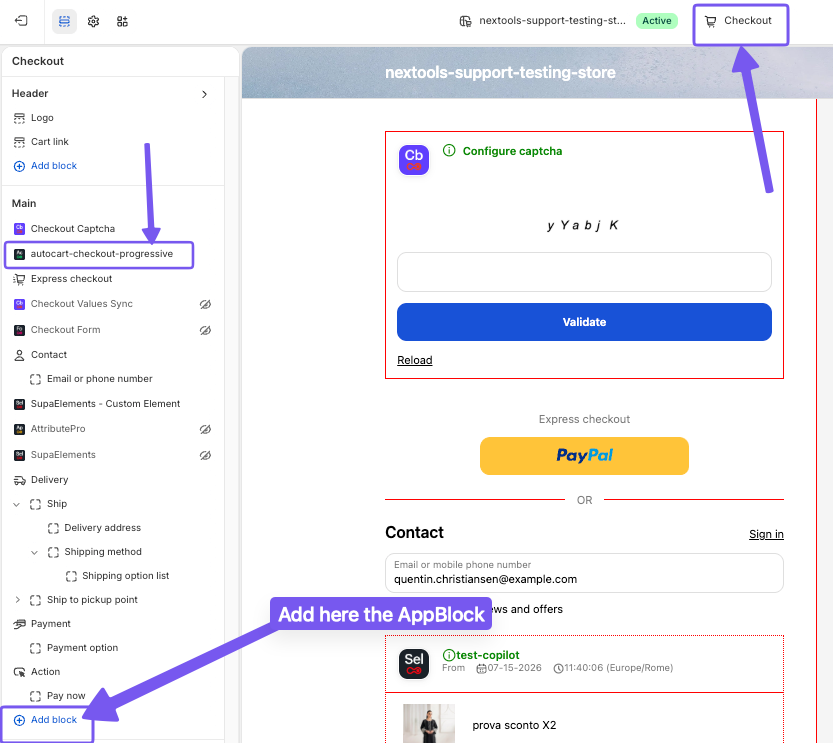
Switch to the Checkout template from the top dropdown. Add a new block for autocart-checkout-progressive and position it below the Express checkout block.
Save your layout and your automation is ready and active in your store.
If you have any questions or need assistance during setup, our team is here to help. You can contact the Nextools Support Team anytime via the in-app live chat or by email. We’ll be happy to assist you.
Tips and Best Practices
-
Use clear naming conventions for easy rule management.
-
Customize discount messages to engage customers effectively.
-
Regularly review active rules to avoid overlaps.
-
Test the automation in a live environment to ensure proper function.

Thank you for choosing and trusting the AutoCart application! 🚀
